Setting up the Grid for your Calendar Pages for the Appointment Style Calendar
Please note: I have created this Tutorial on my Mac so the environment may look slightly different.
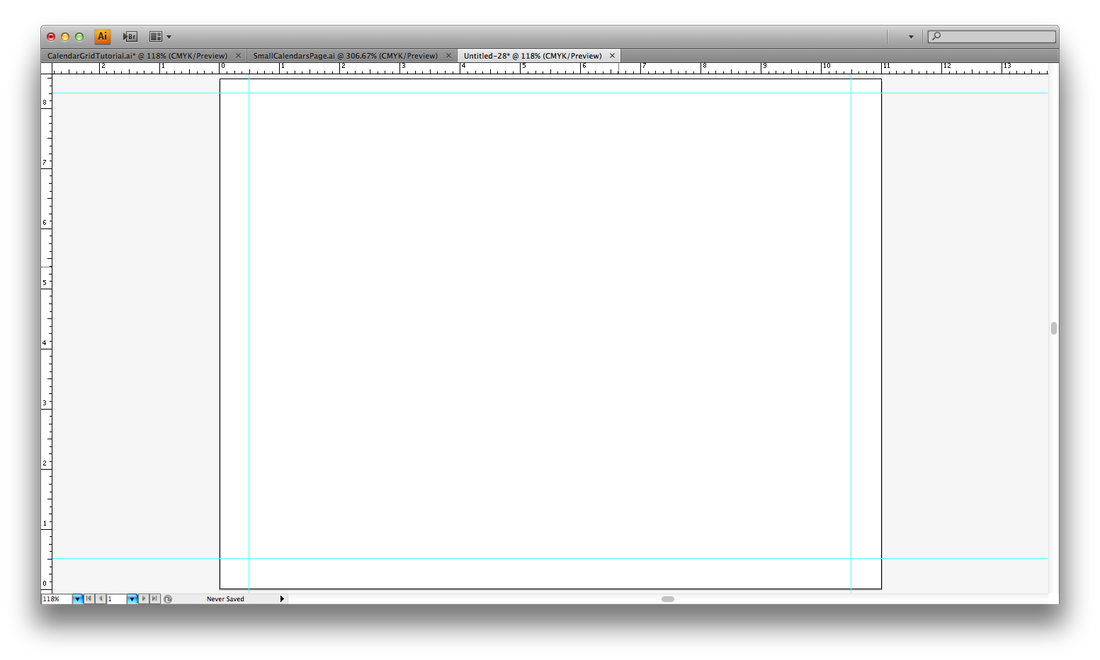
Start by making a New Page = Control "N"
Set it up as a "Letter" = 8.5 x 11"
Make it Horizontal / Landscape
Set up Margins / Guides at 1/2" (.5")
on the Left, Right and Bottom of the New Page
Set the Margin / Guides at .25" (1/4") at the Top
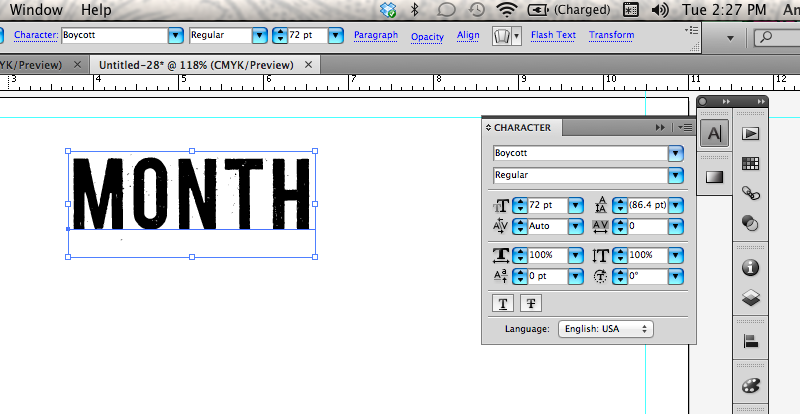
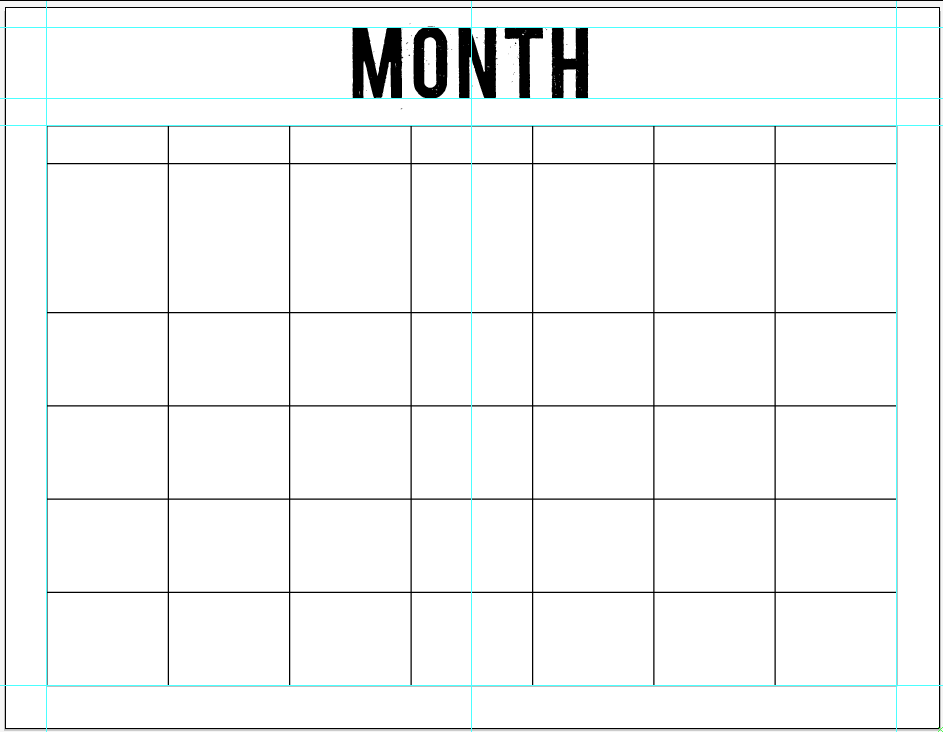
Type the name of one of the months
you'll be using.
Change that font to something more . . . fun,
more . . . decorative and make 72 point.
Position it in the center of the page.
And align the top of the Type to the
Top Guide line (Margin).
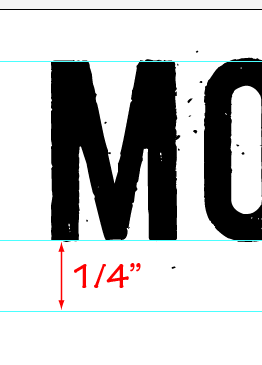
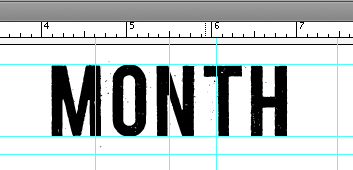
Set a Guide Line / Margin about 1/4" (.25") under the name of the month
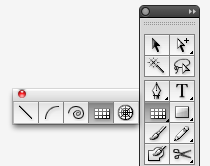
Choose the Rectangular Grid Tool
"Click" the cross-hairs on the top left margins,
under the name of the month.
The Rectangular Grid Tool Menu will pop up
under the name of the month.
The Rectangular Grid Tool Menu will pop up

Type in all the coordinates shown here then click "OK"
It should now look like this . . . pretty much.
Use the Group Selection Tool (Open Arrow with the Plus Sign)
to Select the Top INSIDE Horizontal Line.
Move it up to about 3/8" from the Top OUTSIDE Frame Line
Now you're going to ALIGN all the other lines to fit in the rest of the space
You will be distributing only the Horizontal lines that are
INSIDE the Frame of the Grid
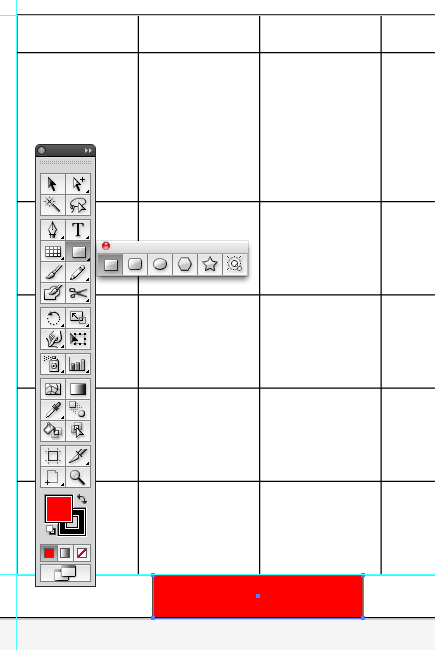
Use the Rectangle Shape Tool and make a Rectangle.
Align it to the Bottom outside Line of the Frame of the Grid.

Again, use the Group Selection Tool and Select the Top Inside Line -
not the Top OUTSIDE (FRAME) - and the other INSIDE Horizontal lines,
and Select the Red Rectangle -
be sure you have not selected any of the outside frame lines.
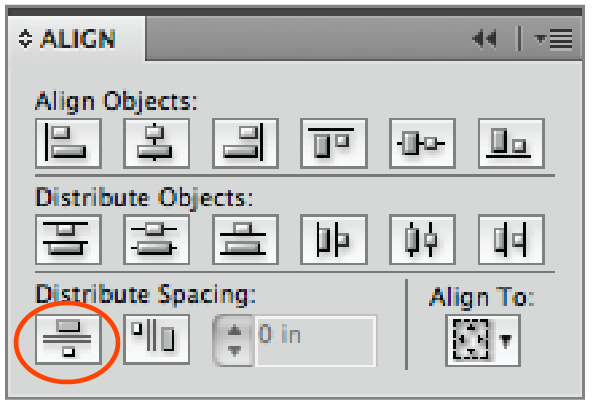
Use the Alignment Pallet and click the Vertical Distribute Spacing Option.
See the Option circled at left.
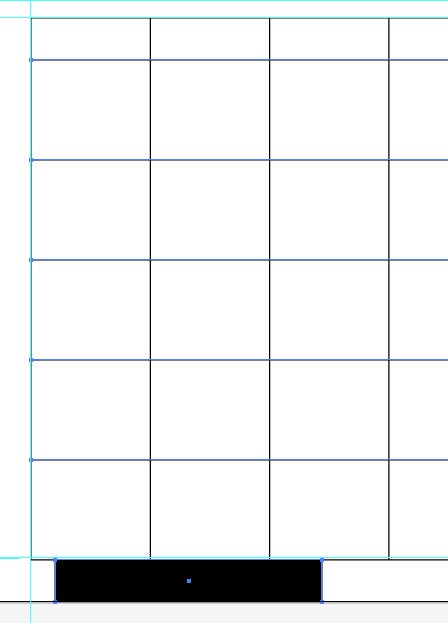
All the Horizontal Lines should look like this.
I am using an older picture here - that's why the block rectangle
at the bottom is now Black . . . sorry.
Delete the Block Rectangle at the bottom.
Let's do the Tabs for the Days of the month
