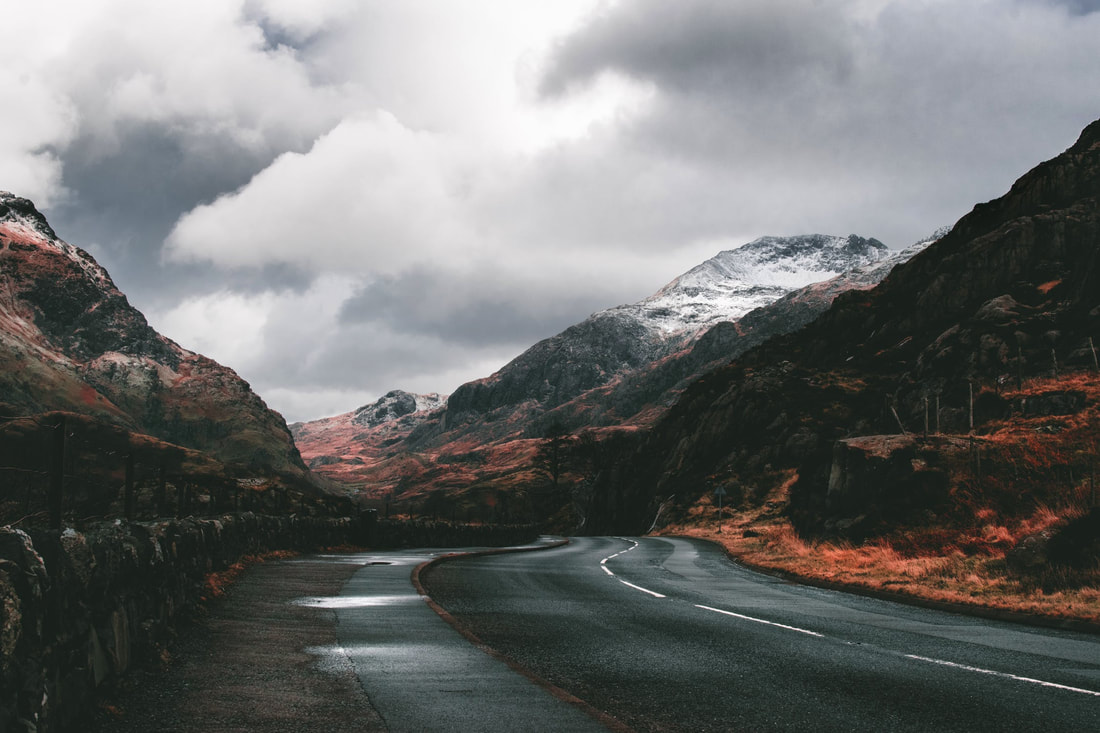
Another SURREALISM Tutorial
This Video Tutorial moves along pretty quickly, so ask me a lot of questions . . . Have Fun!
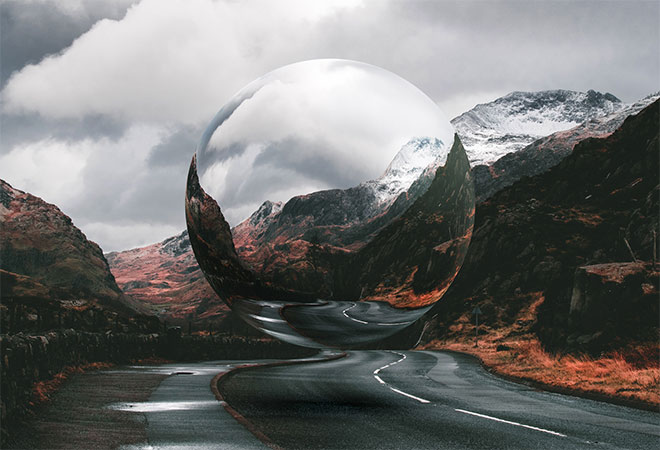
This is another Photoshop Tutorial for anyone who's interested.
You will need this Photo:
You will need this Photo:
Please CLICK HERE to go directly to the Photoshop Tutorial.
This will give you a bit of an intro into this interesting Tutorial.
The link just below here will take you to the Video Tute on YouTube
This will give you a bit of an intro into this interesting Tutorial.
The link just below here will take you to the Video Tute on YouTube
PHOTOSHOP TUTORIALS
Part 1: Combining Text & Shapes: Follow the directions for this Tutorial as written.
Make a New Folder in your Photoshop Folder. Call this new Folder Combining Text & Shapes.
I don't think you will need a Pictures Folder for this one.
This Tutorial is due today by the end of class (Plus, see Part 2 below).
You will Save this File as a JPEG using the directions I gave you at the beginning of Class.
For this Tutorial you'll download the PDF here:
| combining-text-with-shapes.pdf |
PART 2: Now design your own layout Combining Text with Shapes.
Follow the same format as this tutorial. Save the File as a JPEG as above.
Follow the same format as this tutorial. Save the File as a JPEG as above.
If you have time, you will also do this Tutorial:
Tutorial #2 • Part 1: Creating Custom Shapes in Photoshop Follow the directions for this Tutorial as written.
Make a New Folder in your Photoshop Folder. Call this new Folder Creating Custom Shapes in Photoshop.
You will have a Picture to save for this Tutorial: The Gingerbread Man.
You will Save this File as a JPEG using the directions I gave you for the previous File.
For this Tutorial you'll download the PDF here:
| creating-custom-shapes-in-photoshop.pdf |
PART 2: Now Create your own Custom Shape in Photoshop. You can use an Image from the web as a base to Trace from.
Follow the same format as this tutorial. Save the File as a JPEG as above.
Follow the same format as this tutorial. Save the File as a JPEG as above.
PHOTOSHOP TUTORIAL • WEEK OF 1/6/2014 :
TEXT EFFECTS IN PHOTOSHOP: Photoshop Text Effects
This Tutorial is Due today 2/21/2013 by End of Class - You will e mail it to me. See Instructions below the Pictures
Make a New Folder in your Photoshop Folder. Call this new Folder Photoshop Text Effects.
Make a Pictures Folder to Save the following Picture in.
Remember, Right Click on the Image and "Save Picture As" to this new
Pictures Folder inside the New Photoshop Text Effects Folder.
Please Save the File as follows: PsTextEffectsNamePdX.psd and e mail it to me at: [email protected]
PHOTOSHOP TUTORIAL #2 WEEK OF 2/18/2013:
Click on this Link: WATERCOLOR EFFECTS IN PHOTOSHOP to go directly to the Tutorial
This Tutorial is Due Thursday 2/22/2013 by End of Class - You will e mail it to me. See Instructions below the Pictures
Make a New Folder in your Photoshop Folder. Call this new Folder Watercolor Effects in Ps.
Make a Pictures Folder to Save the following Picture in. Right Click on the Image and "Save Picture As" to this new
Pictures Folder inside the New Watercolor Effects Folder.
Make a Pictures Folder to Save the following Picture in. Right Click on the Image and "Save Picture As" to this new
Pictures Folder inside the New Watercolor Effects Folder.
Please Save the File as follows: WatercolorEffectsNamePdX.psd and e mail it to me at: [email protected]
