Photoshop Surrealism Tutorial - Week of 1/8 - 1/12

Note: This tutorial is written on a Mac - Command = Control
STEP 1
Create a New Folder in your FLASH DRIVE or ONE DRIVE > 562 . . . > make the new Term Folder . . .
GDI - 3rd QTR Folder
Make a Folder for the Project: SURREALISM TUTORIAL
Make another Folder in the Surrealism Folder labeled "Reference"
Make another Folder in the Surrealism Folder labeled PSD and another named
Make another Folder in the Surrealism Folder labeled JPG
Right Click on the image above (Apple Face Guy) and choose "Save Picture As"
Save this image in the "Reference" Folder, name it "Original"
The Animation below shows you a rough progression of what you will be creating
STEP 2: Make a New Page in Photoshop (Ps)
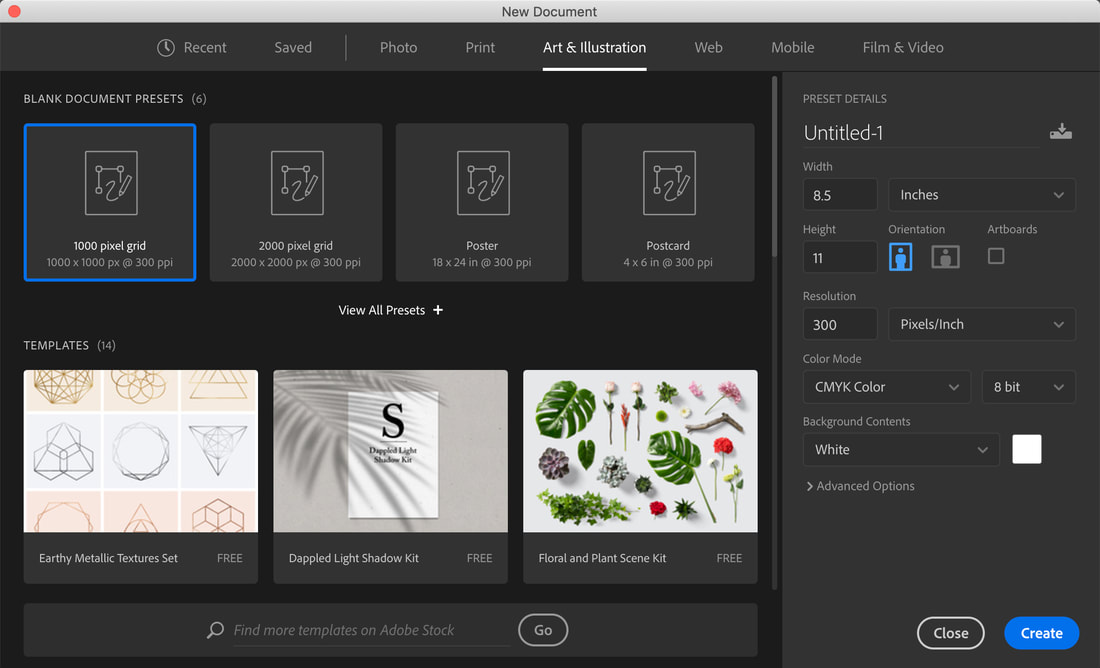
< Click on the image at left to see it at full size
Start by making a New Page: Control "N" in Photoshop
Name the File: Name_PsIntro_Pd(X)
Choose Print > Choose Letter > Inches > Portrait
Resolution: 72 (Leave pixels / inch as is)
(I forgot to change to 72 on the sample picture - my bad)
Click "OK"
Start by making a New Page: Control "N" in Photoshop
Name the File: Name_PsIntro_Pd(X)
Choose Print > Choose Letter > Inches > Portrait
Resolution: 72 (Leave pixels / inch as is)
(I forgot to change to 72 on the sample picture - my bad)
Click "OK"
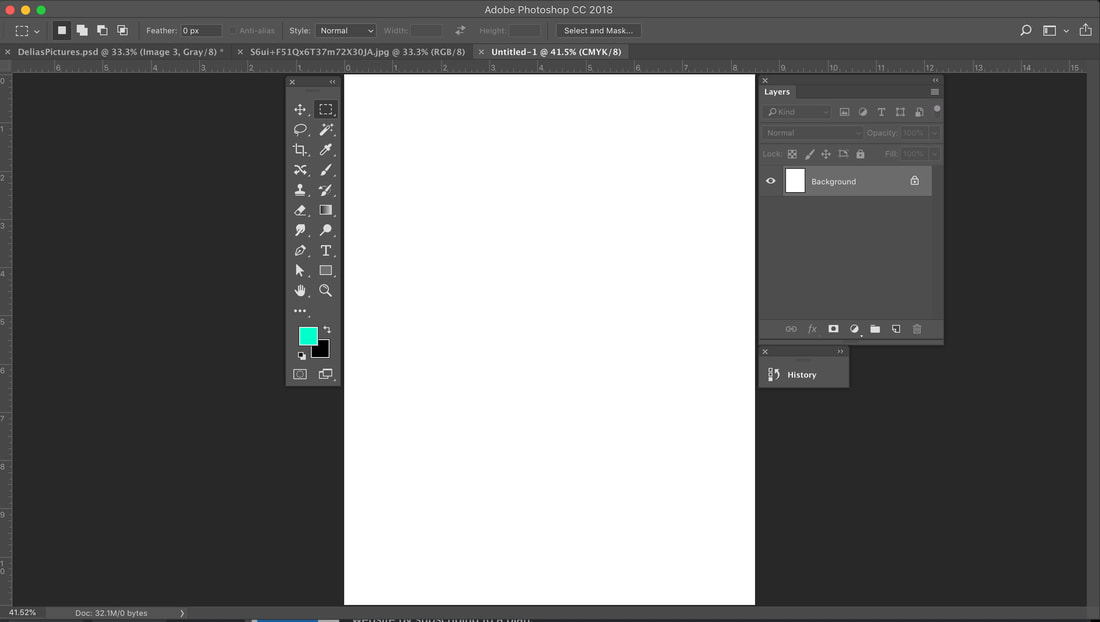
< Click on the image at left to see it at full size
Your File should look something like this.
Close or collapse all windows on the page EXCEPT:
Tool Box
Layers Panel
History Panel
STEP 3: Copy & Paste each of the Images in Order:
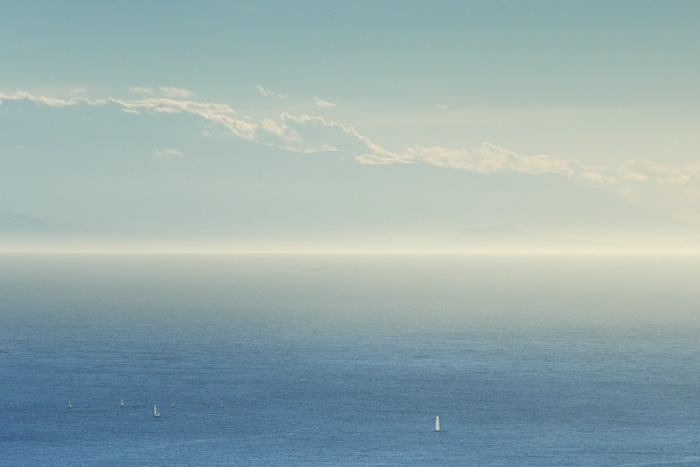
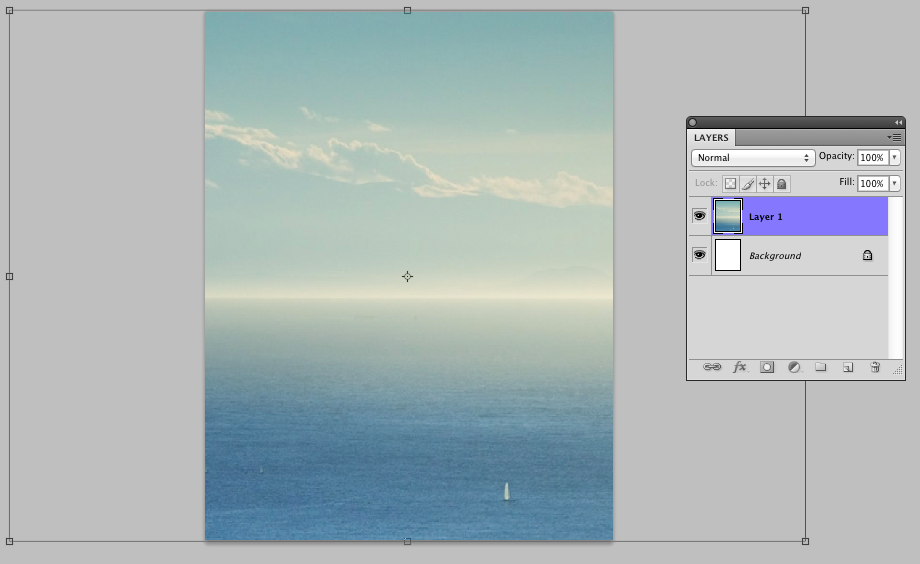
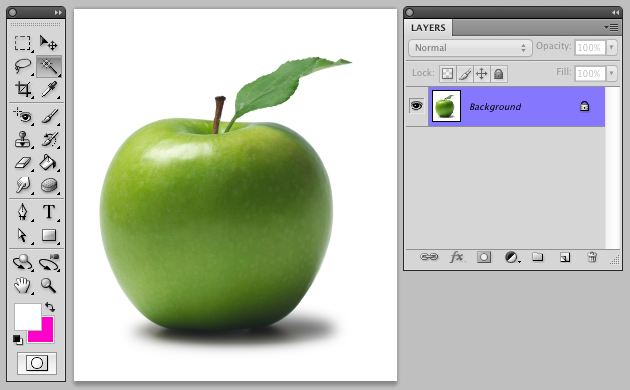
1st Picture is the Sea & Sky:
Click on the Image below > Right Click > Copy Image > Paste it into the Page and Size it to Fit
Click on the Image below > Right Click > Copy Image > Paste it into the Page and Size it to Fit


STEP 4: Building your Composition
Go to your New Page in Ps that you made earlier.
Type / Click "Control (letter) O" = File > Open
Open the File labeled "Sea+Sky.jpg" . . . that will look something like this:
Type / Click "Control (letter) O" = File > Open
Open the File labeled "Sea+Sky.jpg" . . . that will look something like this:
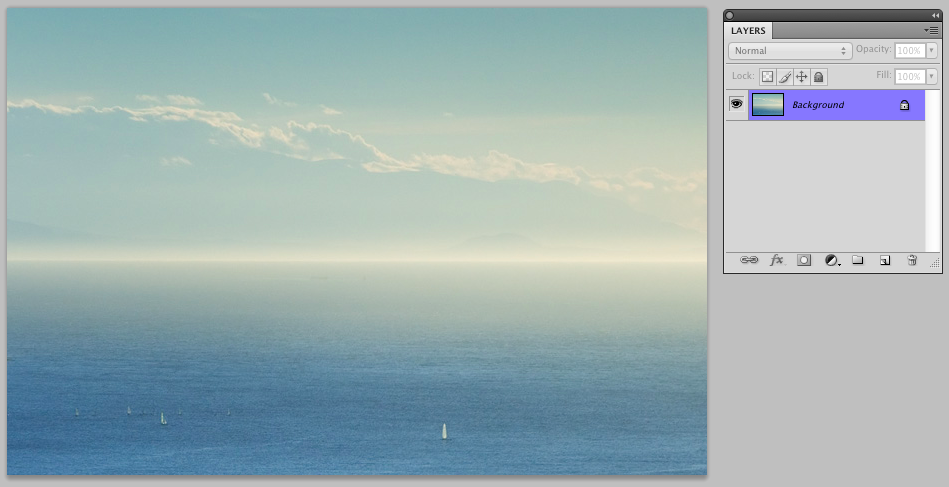
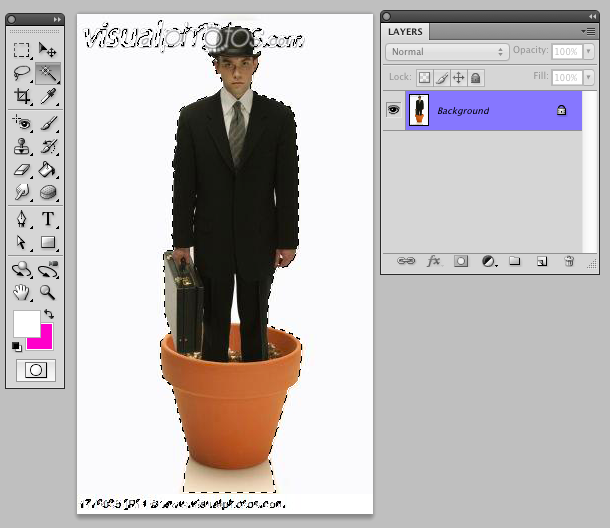
You will see that the first and only layer that appears is labeled
"Background".
Type: Control "A" = Select All
Type: Control "C" = Copy
Type Control "D" = Deselect
Type Control "W" = Closes the Window
"Background".
Type: Control "A" = Select All
Type: Control "C" = Copy
Type Control "D" = Deselect
Type Control "W" = Closes the Window
Now go back to your Ps Page and . . .
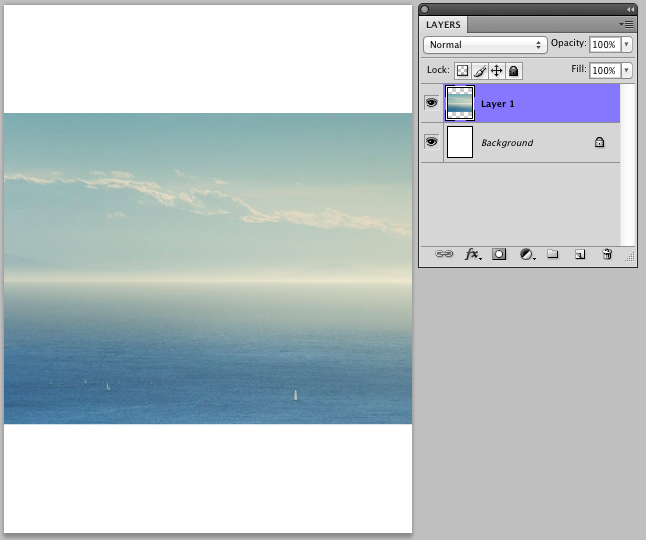
Type: Control "V" = Paste
That image into the page you made.
Notice it doesn't fit perfectly, so we will resize it.
Follow the next Step . . .
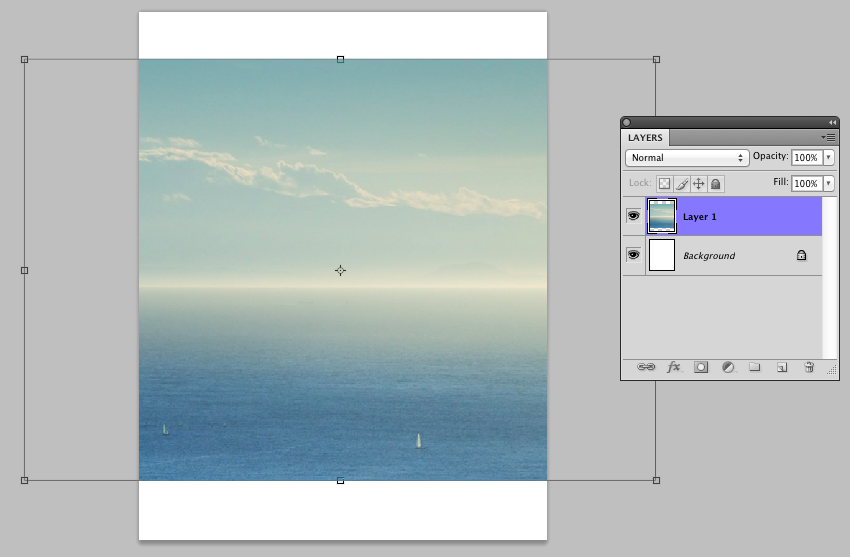
Type: Control "T" = Transform
You see there are now all the handles at the sides and corners.
Use the 5-Part Sequence to Re-size the Image:
1: Mouse: Click and Hold (the Top Left Corner)
2: Shift: Click and Hold Shift
3: Pull the Top Left Corner up to the Top Left Corner of the Page
3: Mouse: Let Go
4: Shift: Let go
Notice the Corners of the Image are outside your view. Click or Type Control "-" (Dash or Minus Sign) to Zoom Out
Now follow the above sequence
to size the bottom of the Image down to the Bottom of the Page.
The Image will be off both sides and that is fine.
DO NOT SQUEEZE ANY PICTURES TO FIT THE PAGE SIZE.
Always Follow the 5-Part Sequence to resize Images!
It may not fit the way you want it to, but it is correctly proportioned and
that's the way it should be.
____________________________________
Click "Enter" after you have finished Re-sizing the Image.
You can't do ANYTHING until you Click "Enter"
____________________________________

Go back up to the top of this Tutorial
We will copy the Original Picture for Size & Position
Right Click > Copy Imge
Go to the Ps Page > Paste (Control V)
Size the Image to Fit > See the next step . . .
Paste (Control "V")
the Image into the New Page you are Building.
If it's too Small . . . Resize it . . .
If it's too Big . . . Resize it . . .
Type Control "T" = Transform
Make the Image as Tall as the Page
Don't worry about the Width -
It will increase Proportionately
Click "Enter" to be able to move to the next Step or Part
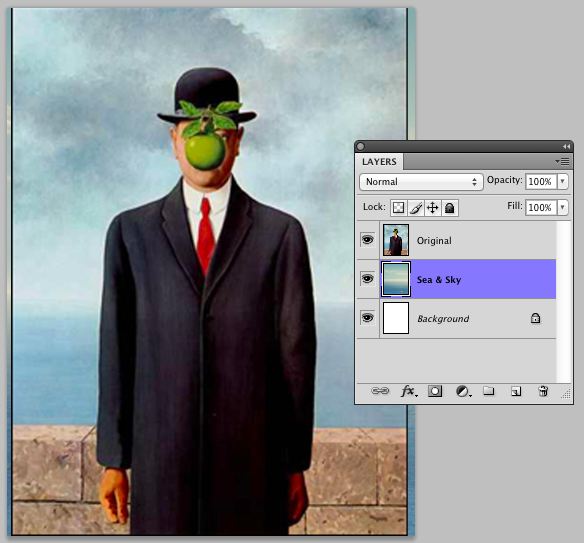
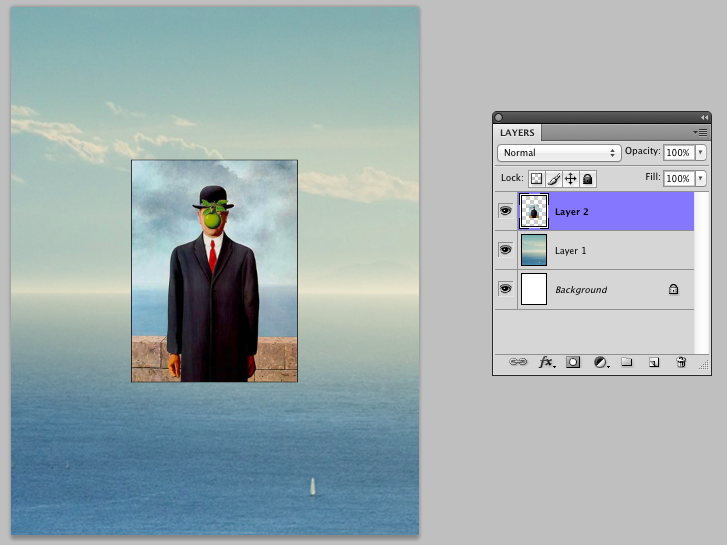
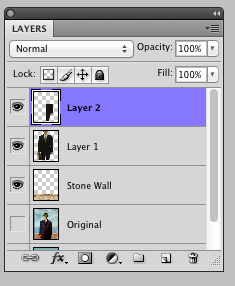
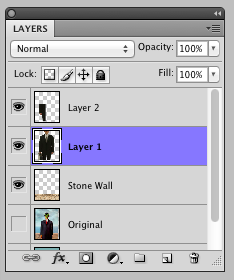
LABEL THE LAYERS
Double Click the Words Layer 1 and Name it Sea & Sky
Double Click Layer 2 and Name it Original
You can Delete or Trash the Background or you can leave it.
I usually Delete / Trash it.
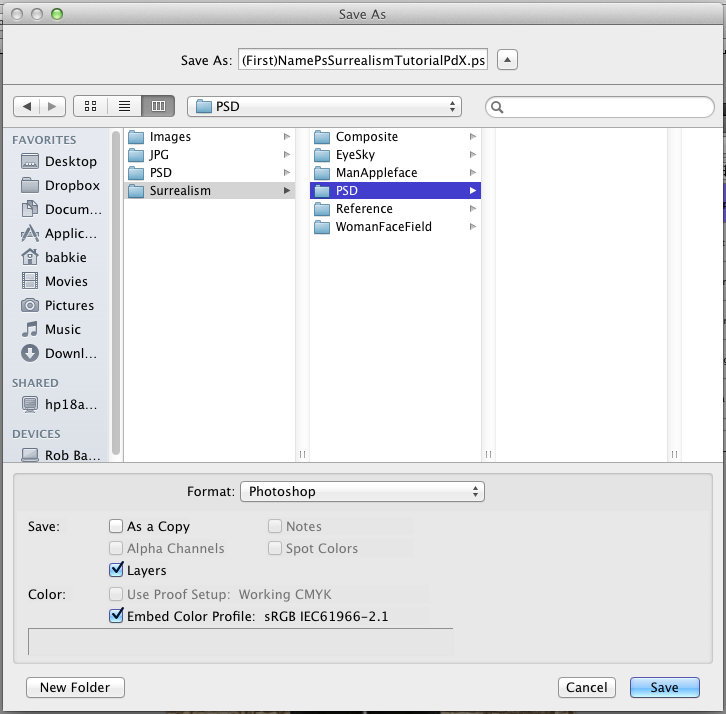
SAVE YOUR WORK: Control "S" and Save it in the New Folder PHOTOSHOP INTRO
This file should be saved as (Your First) Name_PsIntro_PdX . . .
Direct this File to be saved in the PSD Folder

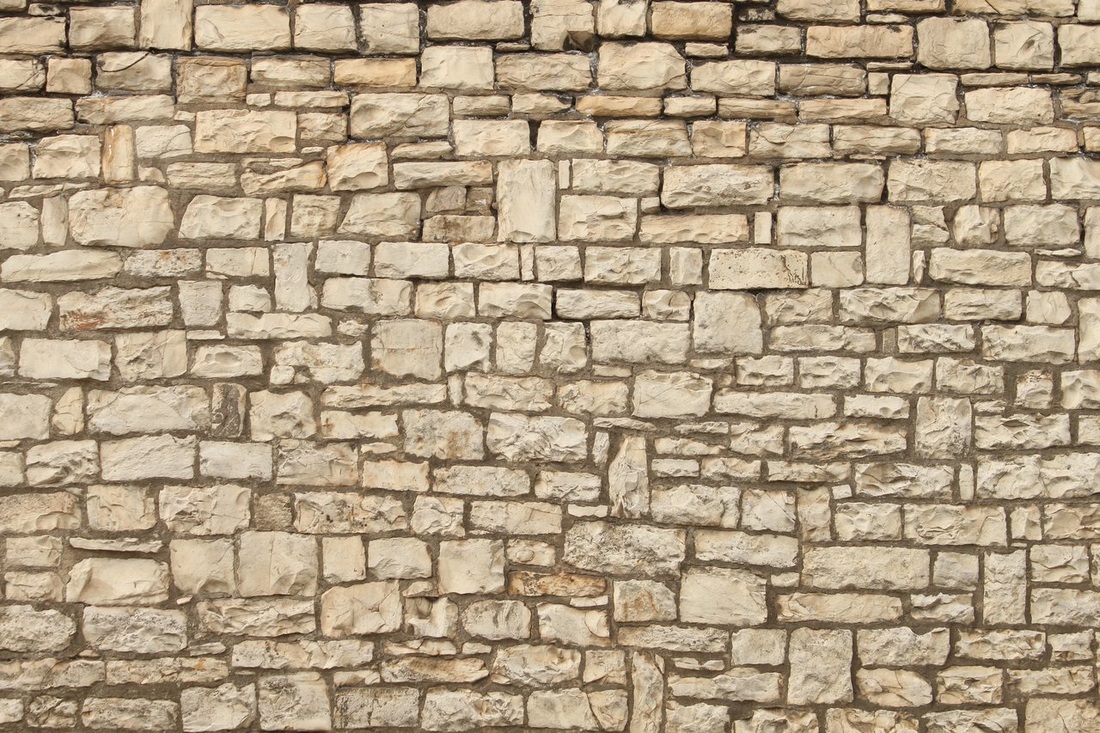
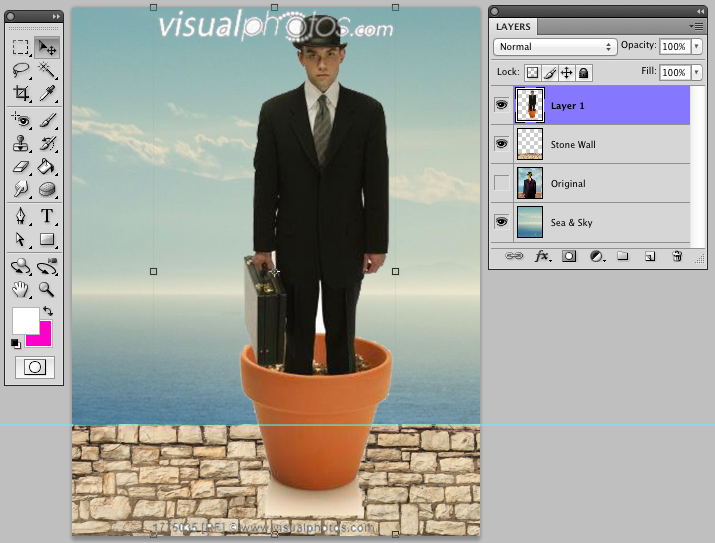
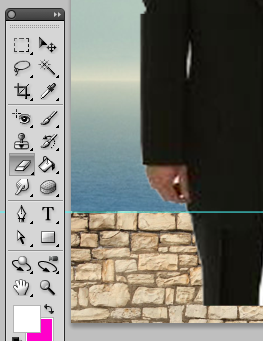
Now Click on the Picture of the WALL
RC > Copy Image >

Paste (Control "V") the Stone Wall Image into the Page.
Resize the Stone Wall using the following Sequence:
Control "T" = Handles for "Transformation"
Click / Type "Enter" to accept the Transformation
Now use the Move Tool (V)
(Top Right Tool in the Tool Box)
to Position the Wall as I have here.
Rename the Layer: Stone Wall
SAVE! Control "S"
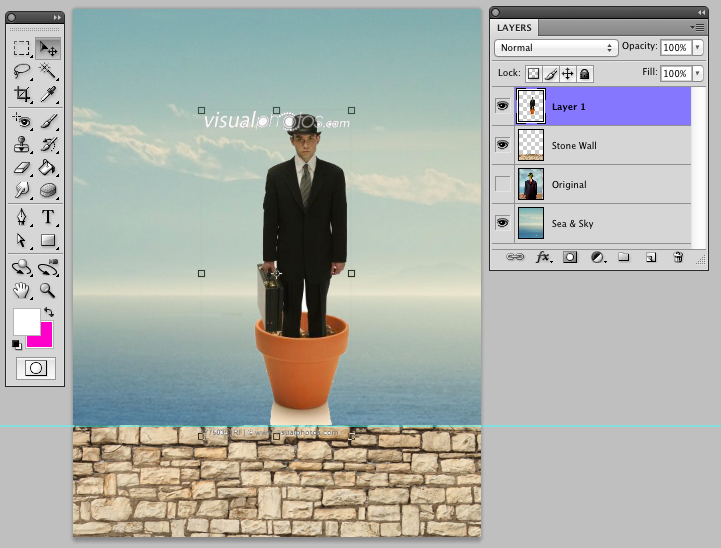
NOTES:
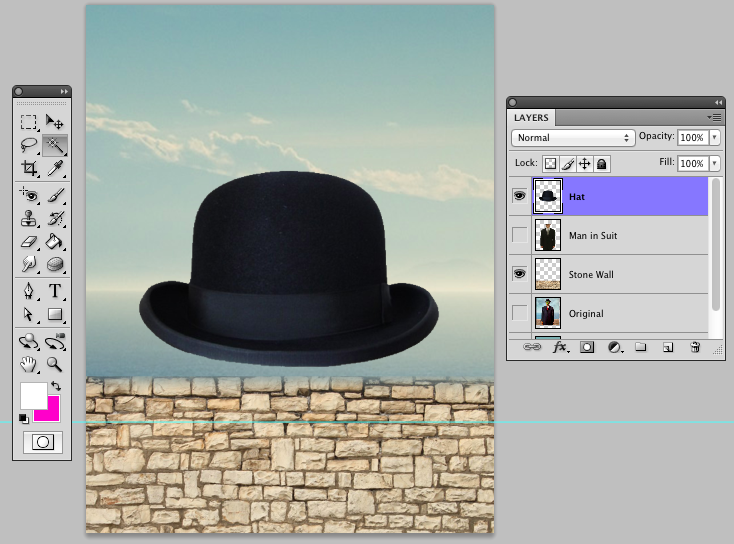
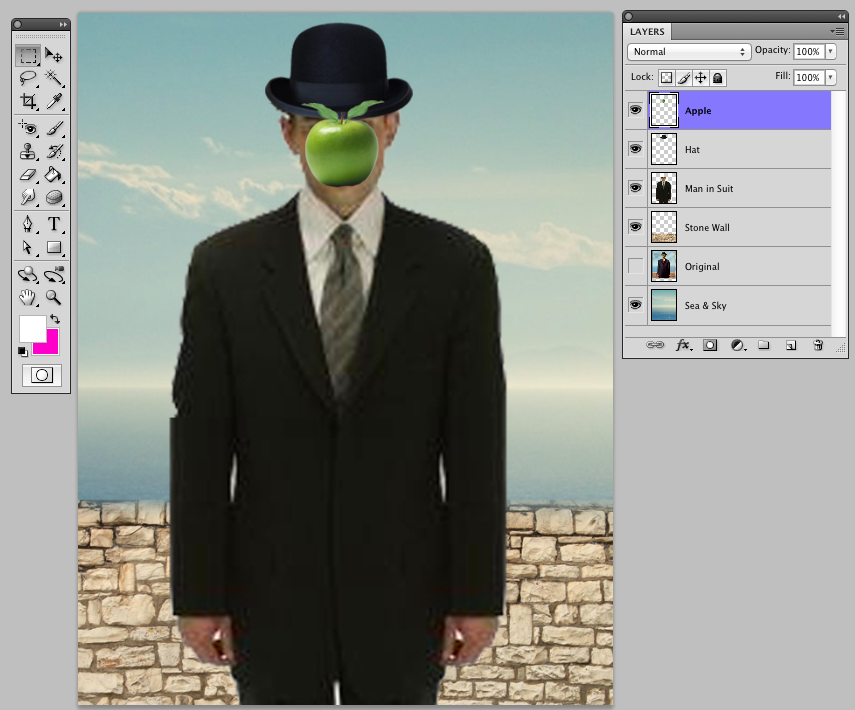
We are Building the Composition from the Back to the Front.
Notice the Picture shows us that the Sea & Sky are furthest back.
Then the Stone Wall is in Front of that. The Man in the Suit is in Front of that.
And we will be replacing the Hat with the one we chose. And the last thing, closest to the viewer, is the Apple.
In the next few steps, we will use various Tools and Functions to work on each Part of the picture.
You will Select, Copy, Deselect and Paste images into the page as we have already done a couple of times.
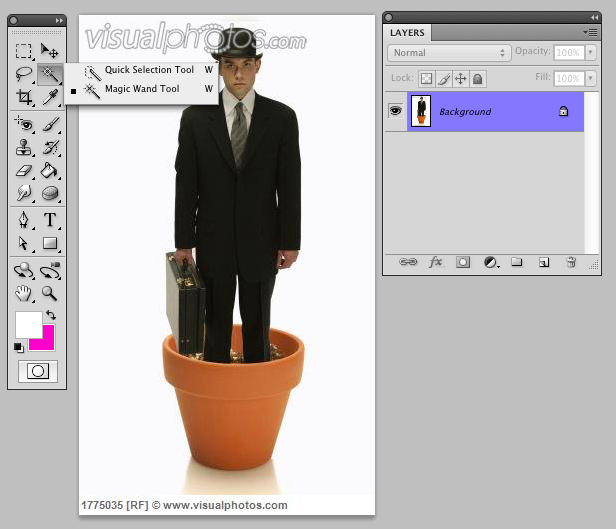
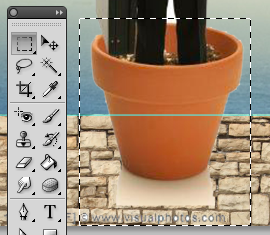
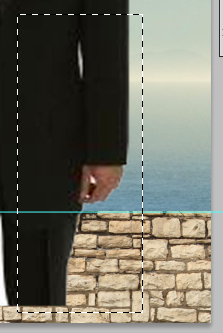
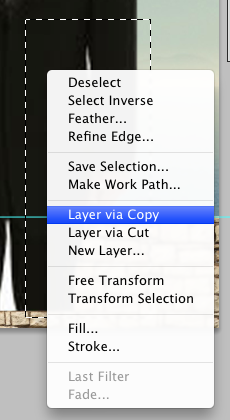
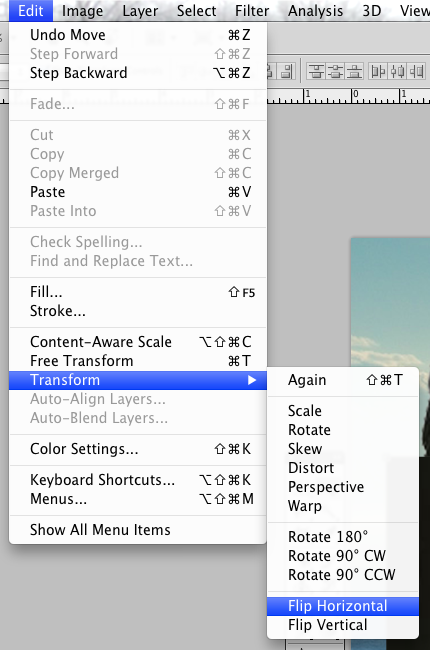
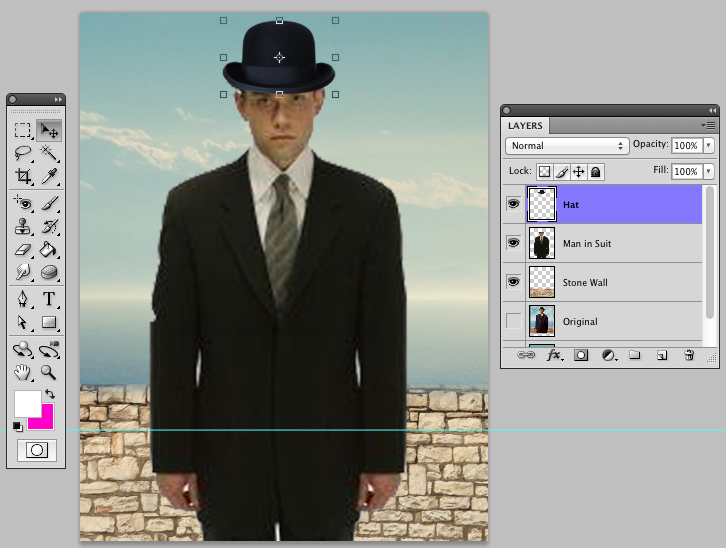
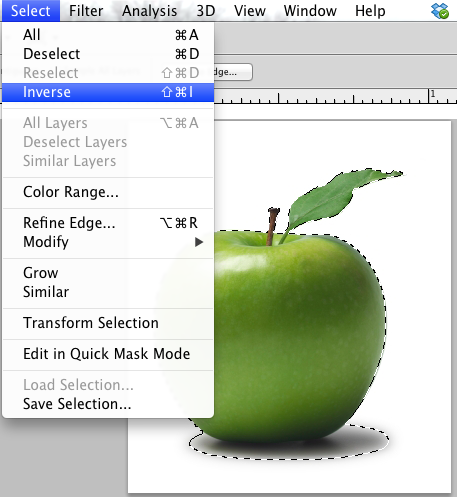
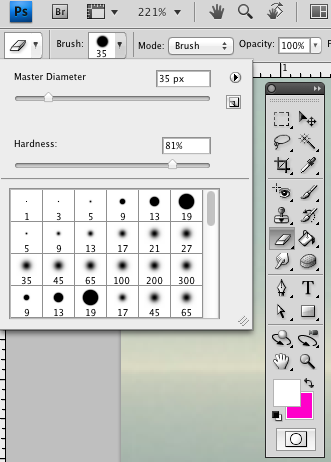
STEP 5: Man in the Suit Image:
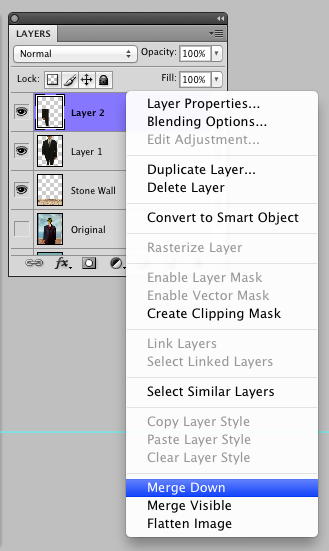
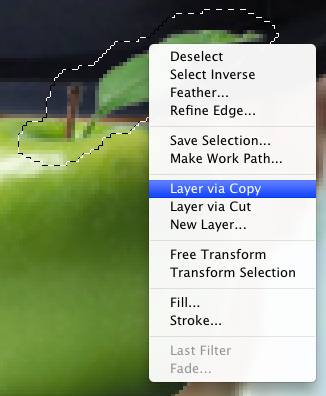
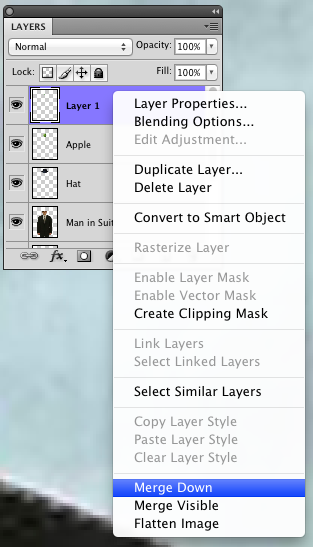
Terminology / Tools / Functions: Magic Wand, Select Inverse, Marquee Tool, Layer via Copy, Eraser Tool, Right Click, Transform, Flip Horizontal, Merge Down
Click on the first picture below to see the Steps Full Size, as you finish the Step,
click on the "Next Arrow >" to go forward.
The Steps are the Captions that go with each Picture
click on the "Next Arrow >" to go forward.
The Steps are the Captions that go with each Picture


SAVE! Control "S"
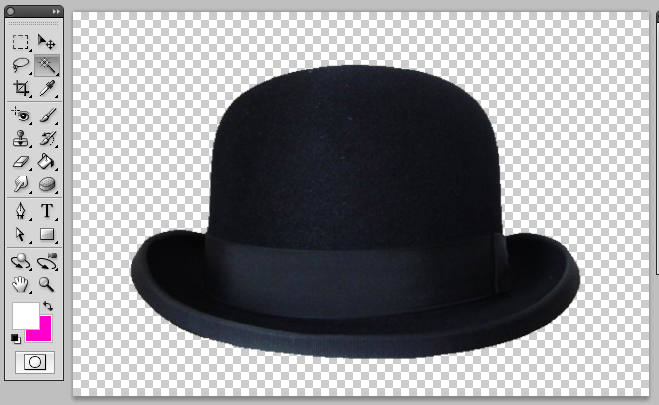
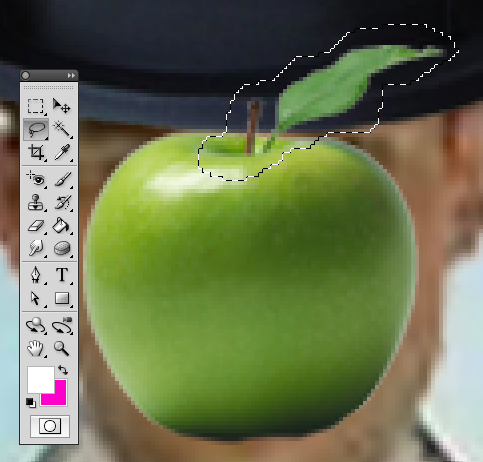
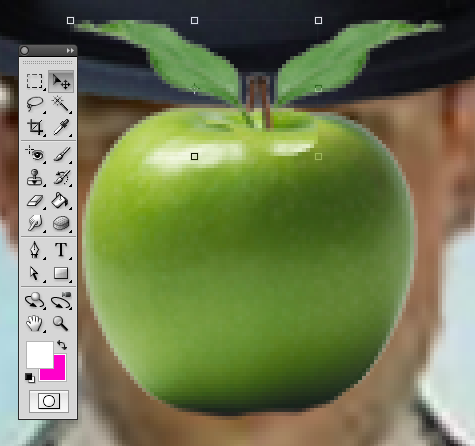
STEP 6: The Hat and The Apple:


SAVE! Control "S"


SAVE = Control "S"
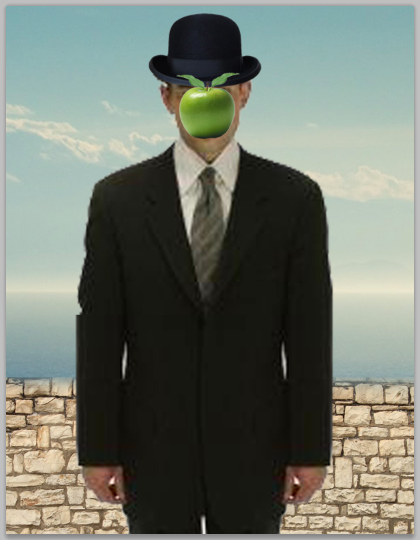
You are so Awesome - Look what you have Created!
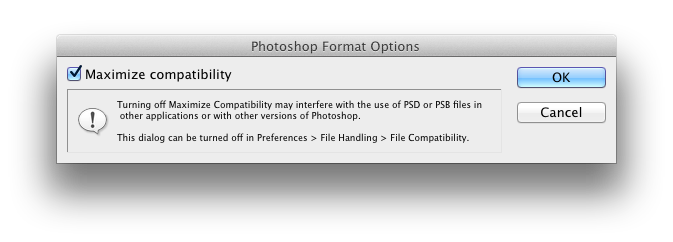
STEP 7: Saving your File as a PSD (Photoshop Document).
You've been saving it as a PSD all along so far
You must save your files as a Photoshop Document in the PSD Folder.
Follow the Step-by-Step below - which has pictures to back up each Step.
the File STEP 8: EXPORT the File (Export As) choose JPEG
I always send my Clients a JPEG (or JPG) Proof because they are easy to find and see right there in the e mail.
You will send me a JPEG of your work in Photoshop most often.
You cannot make any changes to the JPEG File. It is a Flattened, Low Resolution File with no Layers.
That's why you have to save the PSD first.
Please follow the Sequence / Procedure below to Save your File as a JPG.
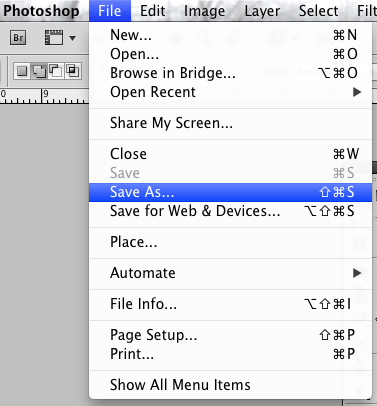
With PSD (Layered File) open > Go to "File" at the Top of the Page
Choose "Save As"
In the PS INTRO FOLDER choose the JPG Folder (Click that open)
Under the File Name you'll see the File Type is currently "Photoshop" - Click the word Photoshop and you'll see a list
Look in the list for JPEG (JPG, JPEG etc) - Choose the first one in the group of types of JPEGs
Then Click "Save" - a Quality Window will pop up, Slide the Slider all the way to the right "Max"
| babkiesurrealismtutepd7.psd |
After all of the above Saving is done - Send me the JPG in an e mail.
Please, Please, Please ask me if you are unsure of any part of this process.
You are doing an awesome job! Keep up the Amazing work you do!
PHOTOSHOP INTRO PART 2:
2 Worksheets
Please download the following Files . . .
| photoshopintroworksheet.pdf |
Fill in the Worksheet
| surrealismworksheet.docx |
Fill in the Worksheet
Replicate a Surrealist Work - WEEK OF 1 / 11 - 1 / 18
Go to the Place you are Saving your Files: Flash Drive? OneDrive?
Go to the 3rd Quarter Folder
Make a New Folder: Surrealism Replica
Inside that Folder, make 3 more (separate) Folders:
Reference
PSD
JPG
Go onto the FireFox (Internet) and find a Surrealist work of Art
maybe another piece by René Magritte.
You will be replicating this piece as we did the "Son of Man".
Research the Internet and find all the Parts that would work as items in your work.
For each Picture:
Right Click and "Save Image As" into the Reference Folder
Make a New Page in Photoshop:
Control "N" (File > New)
Choose "Print" from the Menu above
Letter = 8.5 x 11
OR if your Picture is Landscape, then make your Page Landscape (11 x 8.5)
Build the Photo Composition
Step "A" Open (Control "O") the Surrealism Picture (Reference) that you are Replicating
Copy (Control "C") > Deselect (Control "D") > Close the Window (Control "W") > Paste (Control "V")
Now Resize the Picture to fit into 8.5 x 11 (or 11 x 8.5): Control "T"
Click and Hold the Corner of the Frame > Click and Hold Shift
Pull the Image to resize it > FREEZE! > Let go of the Mouse > Let go of Shift
Now you're ready to Build on this Image . . . Follow Step "A" above for each of the "Parts"
to Build the Image
Make it Your own!
As you build the image, be creative, make it something YOU like . . .
If there are round objects in the picture you are replicating,
and you like a sport which uses a ball of some sort,
think about putting that ball into the image somewhere.
It might seem out of place, but then, remember, this is Surrealism!
Use the Steps I gave you in the original Surrealism Tutorial . . .
________________________________________________________________________________________________
Now you will CREATE AN ORIGINAL SURREALIST DESIGN - WEEK OF 1 / 18 - 1/25
Go to your 562
Make a New Folder: Original Surrealism
Inside that Folder, make 3 more (separate) Folders:
Reference
PSD
JPG
1) Decide what your design will look like.
It's a good idea to create your design around a hobby, a sport or something that interests you.
Then go onto the Internet (FireFox) and gather 5 - 7 images that you think you might use.
You will use at least 5 images because you need to have a MINIMUM of 5 Layers in the PSD.
2) Gather the Images and Save them in the Reference Folder
For each Picture: Right Click and "Save Image As" into the Reference Folder.
It helps to rename the images you are saving in the reference folder
so that you know what that image is when you begin to build your design.
3) Make a New Page in Photoshop:
Control "N" (File > New)
Size: Letter = 8.5 x 11 (Portrait) or 11 x 8.5 (Landscape)
4) Build the Photo Composition > DO NOT PLACE PHOTOS . . .
Open (Control "O") the image you want to use first (background)
Copy (Control "C") > Deselect (Control "D") > Close the Window (Control "W") > Paste (Control "V")
To Resize a Picture Click Control "T" (Transform)
Click and Hold the Corner of the Frame > Click and Hold Shift
Pull the Image to resize it > FREEZE! > Let go of the Mouse > Let go of Shift
Follow the above steps starting at number 4 for each of the Images you use in your design.
You are creating an Original Surreal image.
Make sure the image is presentable in a school Art Show.
Now you will CREATE AN ORIGINAL SURREALIST DESIGN -
Go to your 562
Make a New Folder: Original Surrealism
Inside that Folder, make 3 more (separate) Folders:
Reference
PSD
JPG
1) Decide what your design will look like.
It's a good idea to create your design around a hobby, a sport or something that interests you.
Then go onto the Internet (FireFox) and gather images that you think you might use.
2) Gather the Images and Save them in the Reference Folder
For each Picture: Right Click and "Save Image As" into the Reference Folder.
It helps to rename the images you are saving in the reference folder
so that you know what that image is when you begin to build your design.
3) Make a New Page in Photoshop:
Control "N" (File > New)
Size: Letter = 8.5 x 11 (Portrait) or 11 x 8.5 (Landscape)
4) Build the Photo Composition > DO NOT PLACE PHOTOS . . .
Open (Control "O") the image you want to use first (background)
Copy (Control "C") > Deselect (Control "D") > Close the Window (Control "W") > Paste (Control "V")
To Resize a Picture Click Control "T" (Transform)
5-Part Sequence: Each Part is done 1 Step at a Time. . . .
1: Mouse. Click. Hold any CORNER (no sides or top or bottom).
2: Shift. Click. Hold.
3: Resize the Image = Larger or Smaller
4: Mouse. Let Go.
5: Shift. Let Go.
You are creating an Original Surrealism Photo Composition.
Make sure the image is presentable in a school Art Show.
