This Section will show you how to set up the Final Art for the Cause Poster:
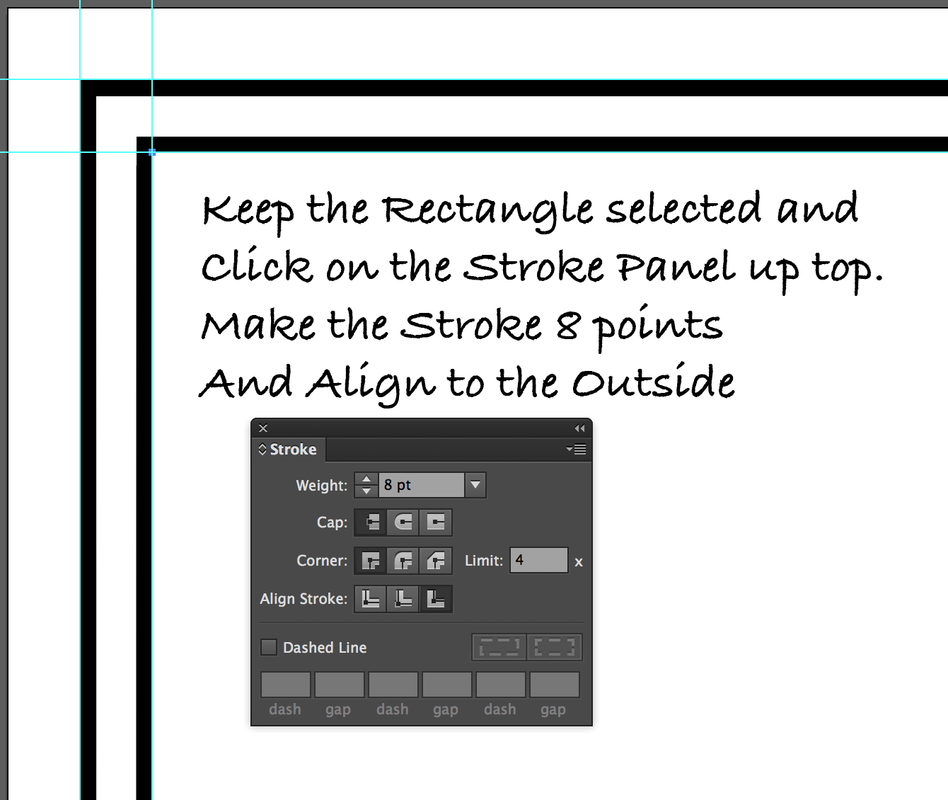
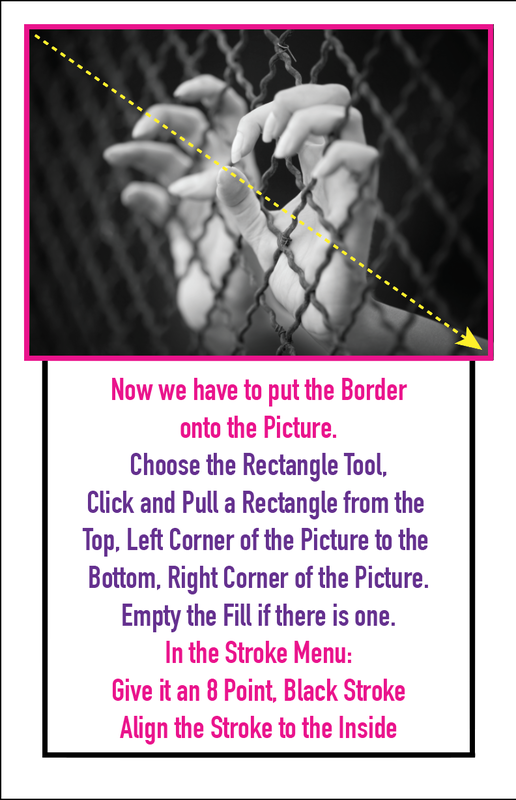
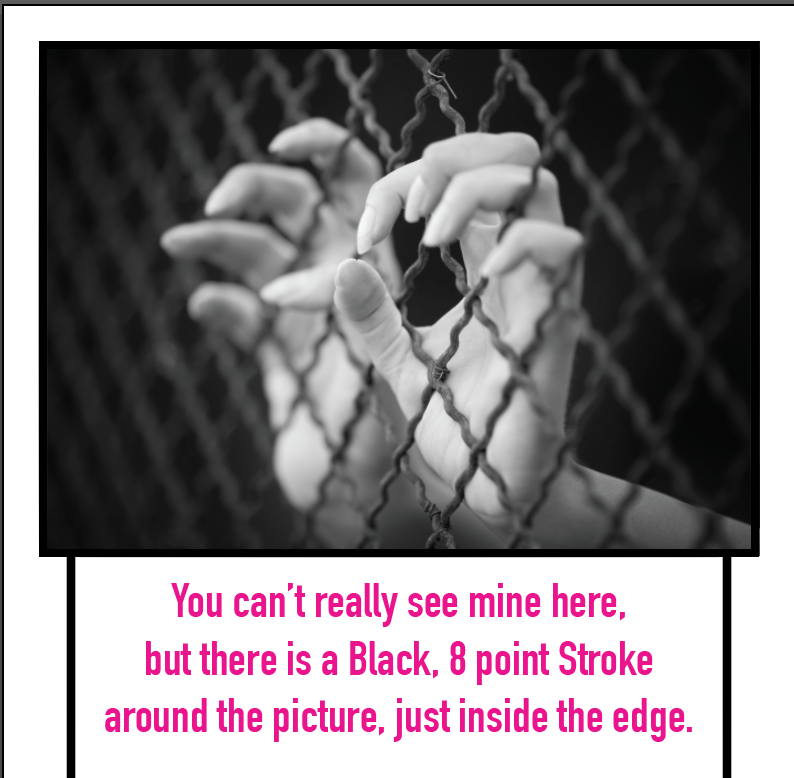
1 The Borders
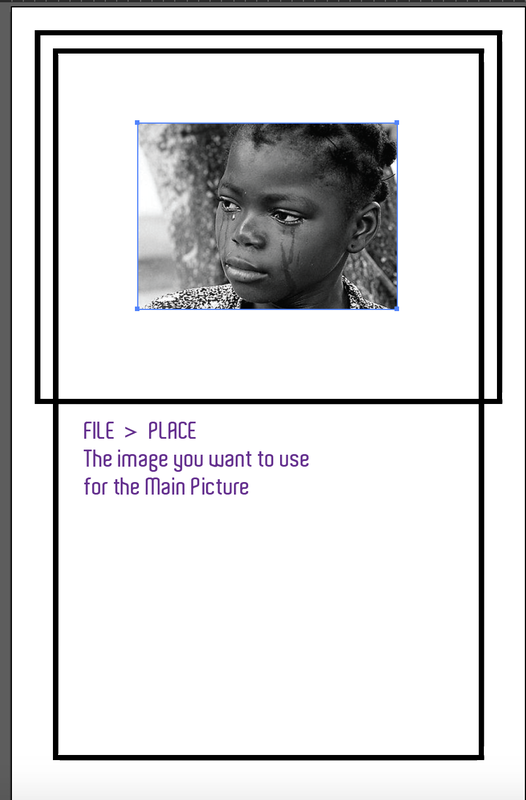
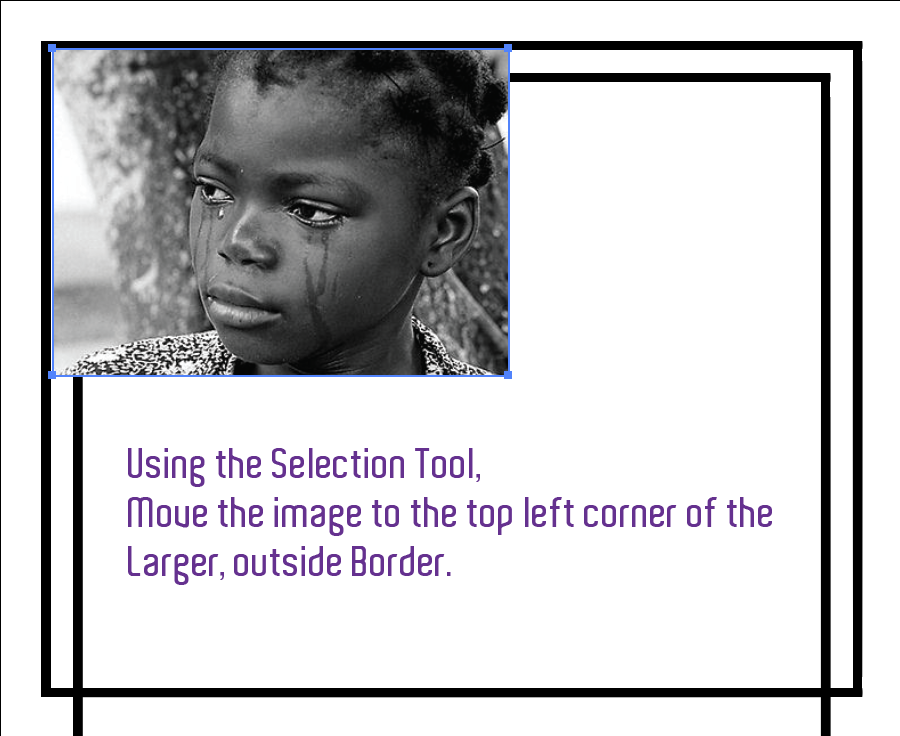
2 The Main Picture Set Up
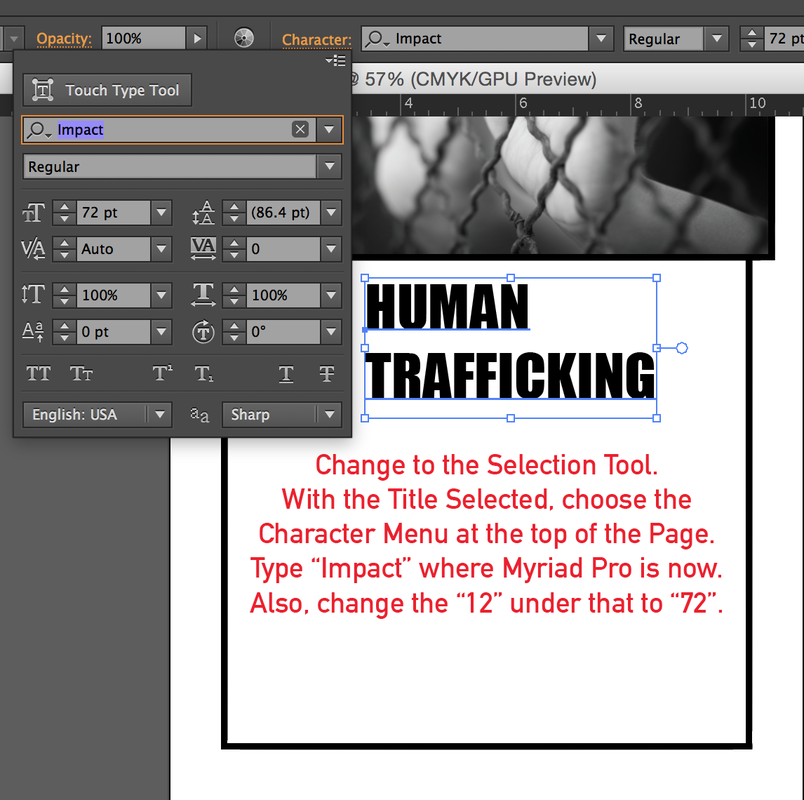
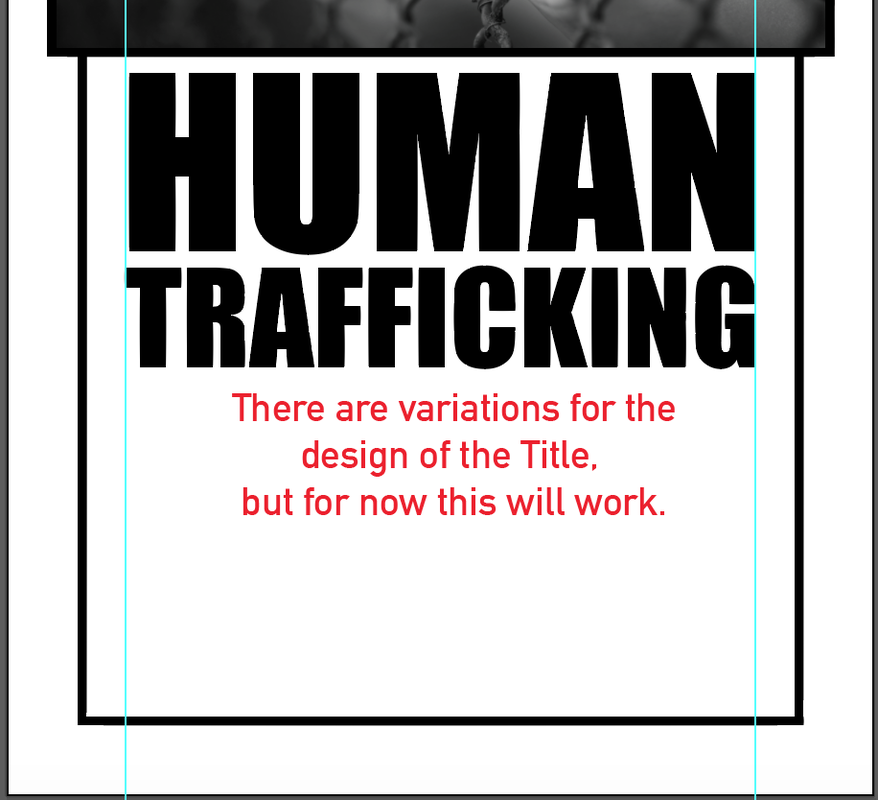
3 The Title
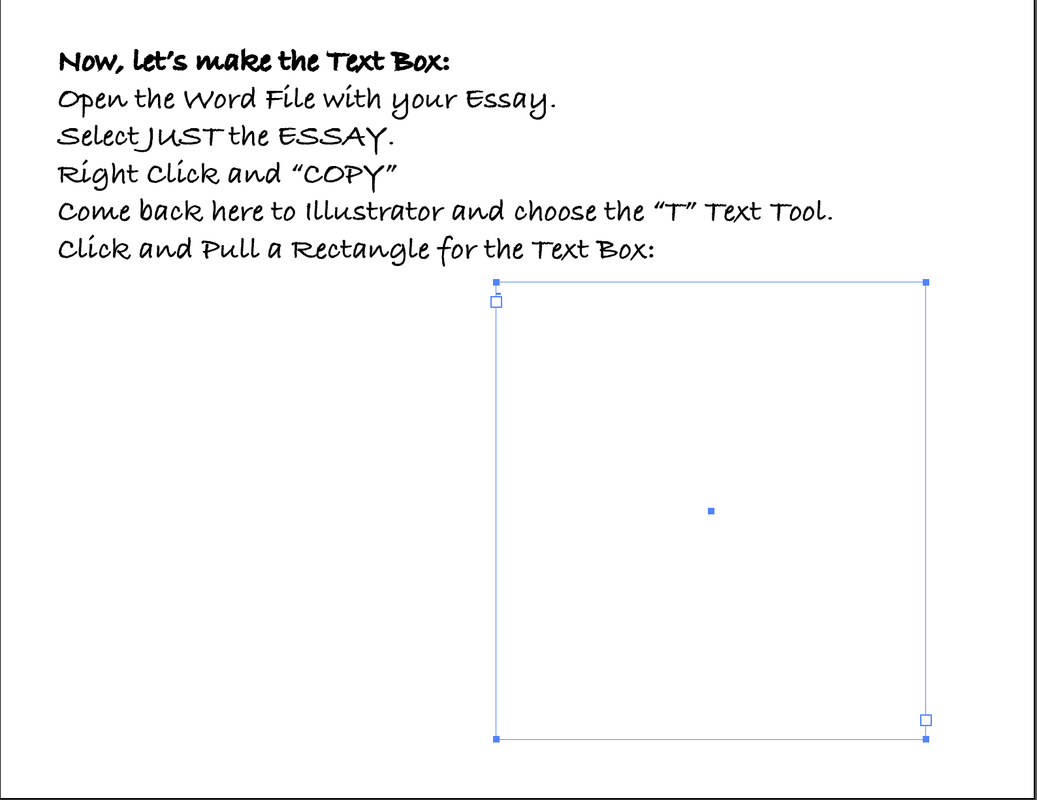
4 The Text Boxes
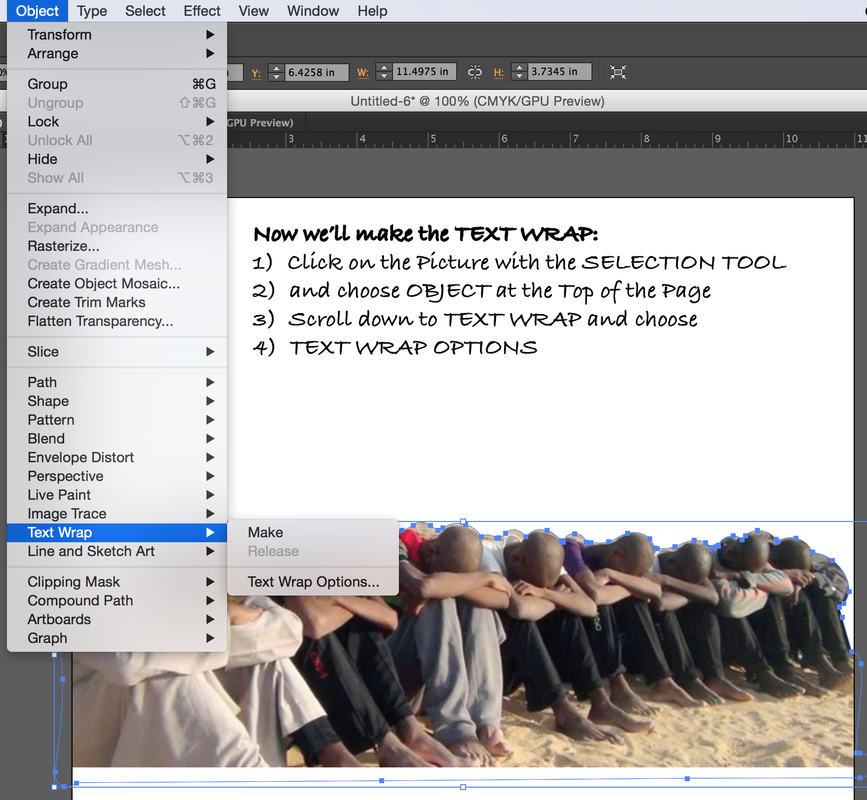
5 The Text Wrap
6 The Final Art
1 The Borders
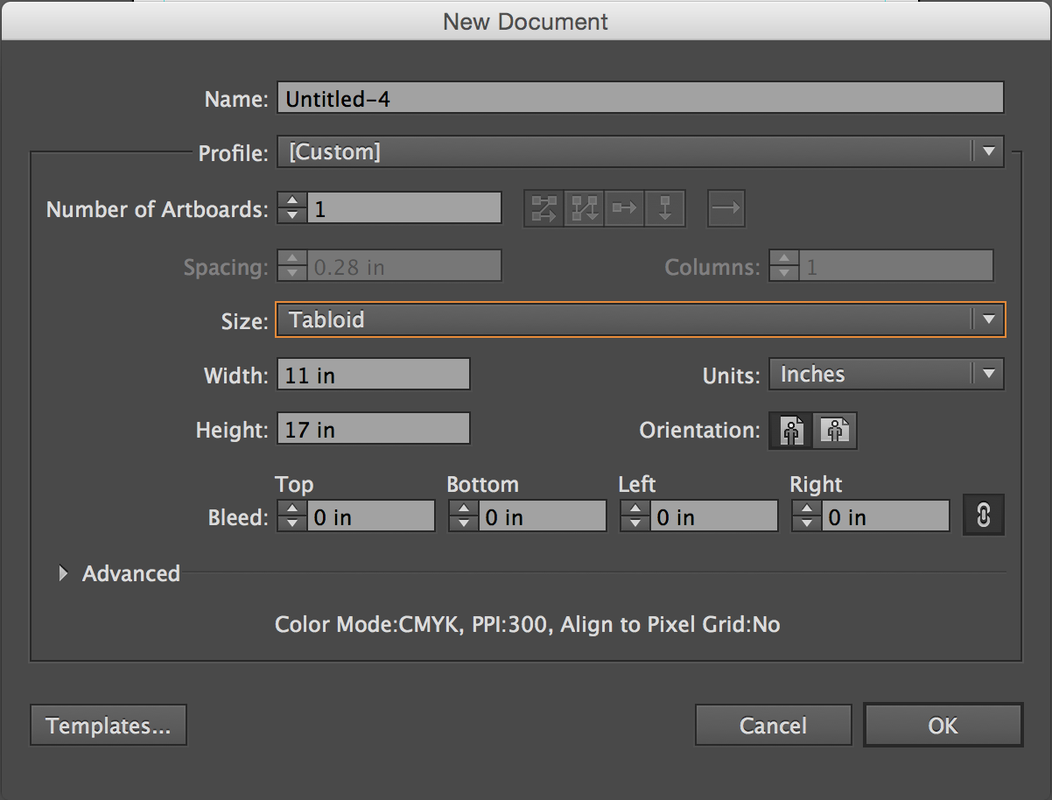
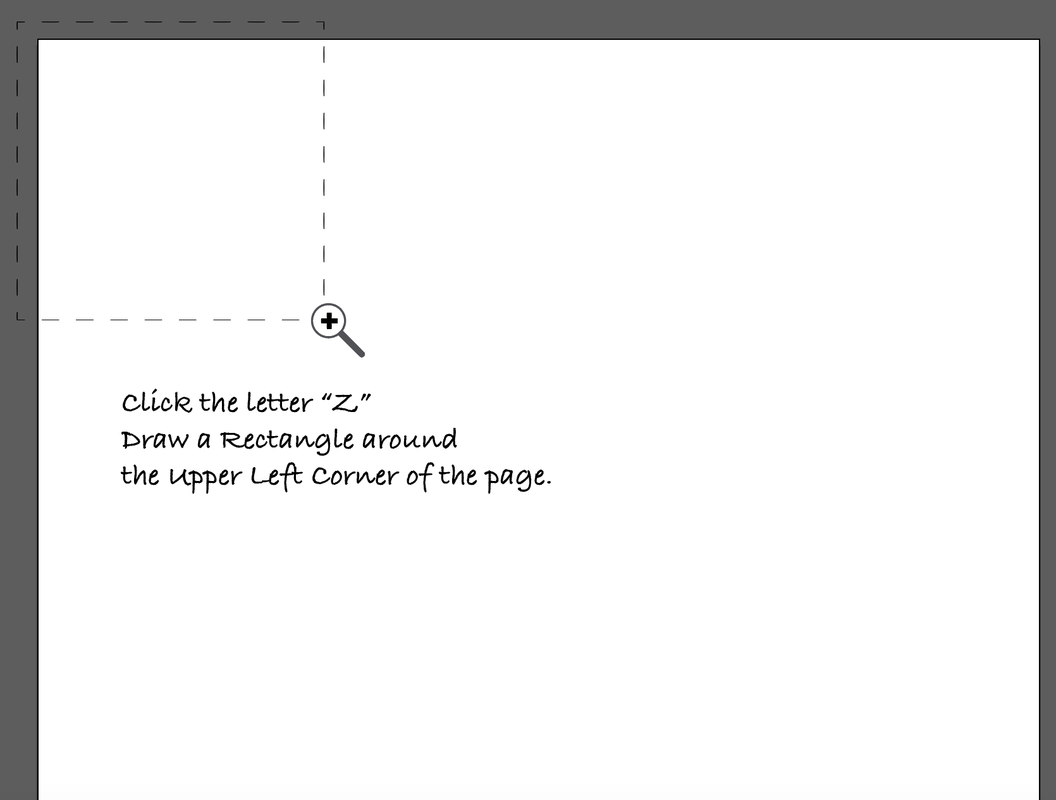
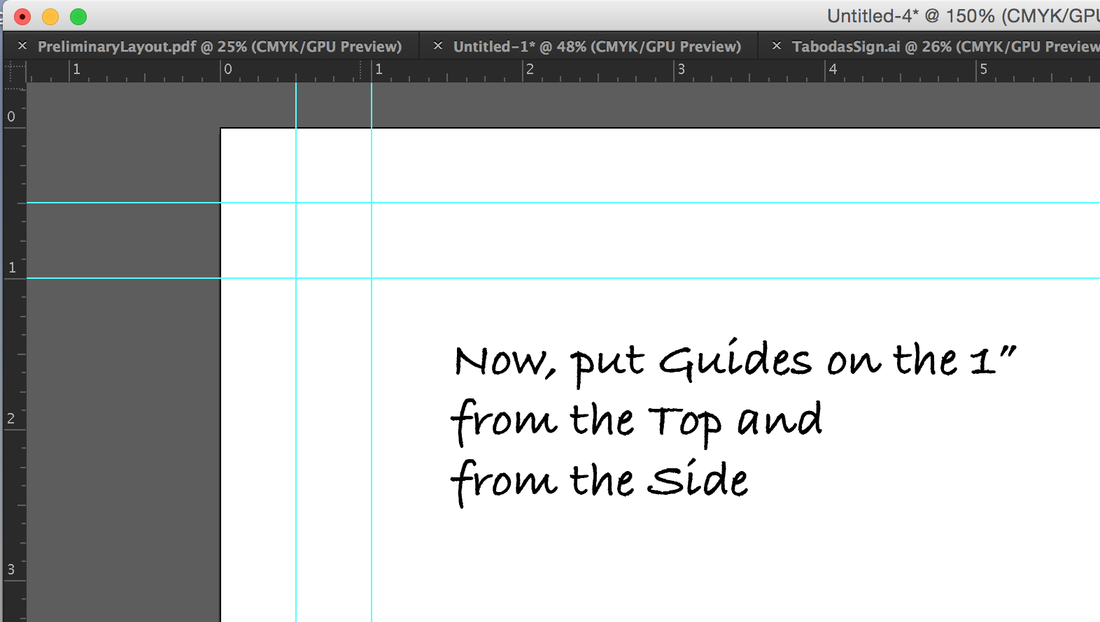
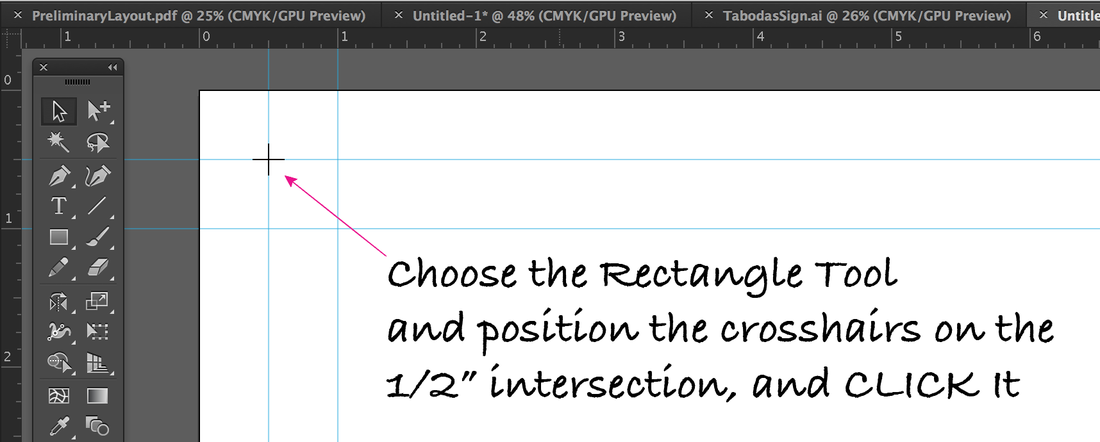
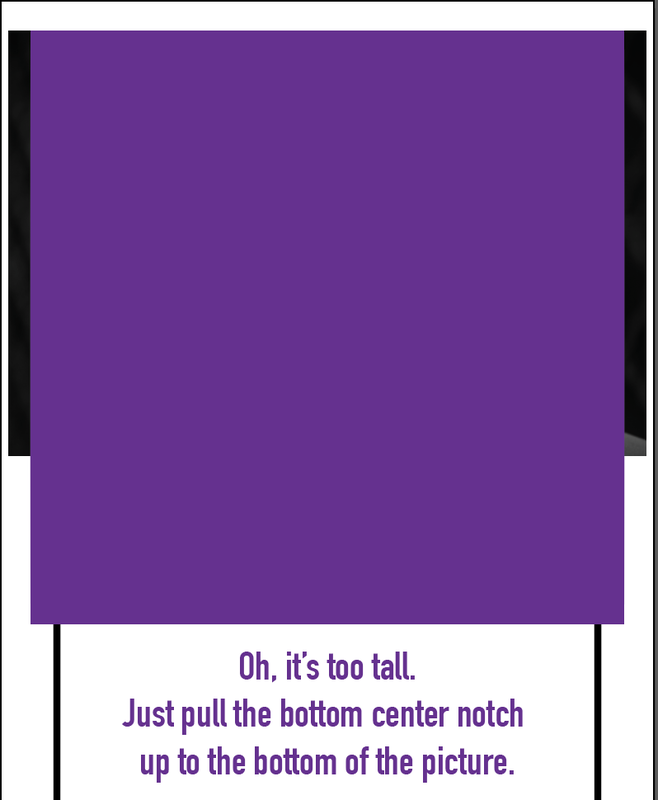
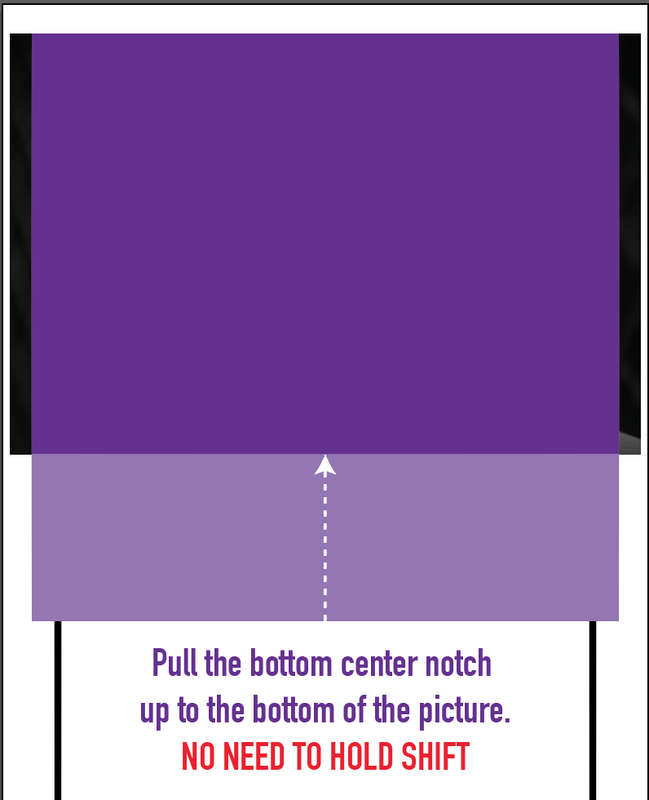
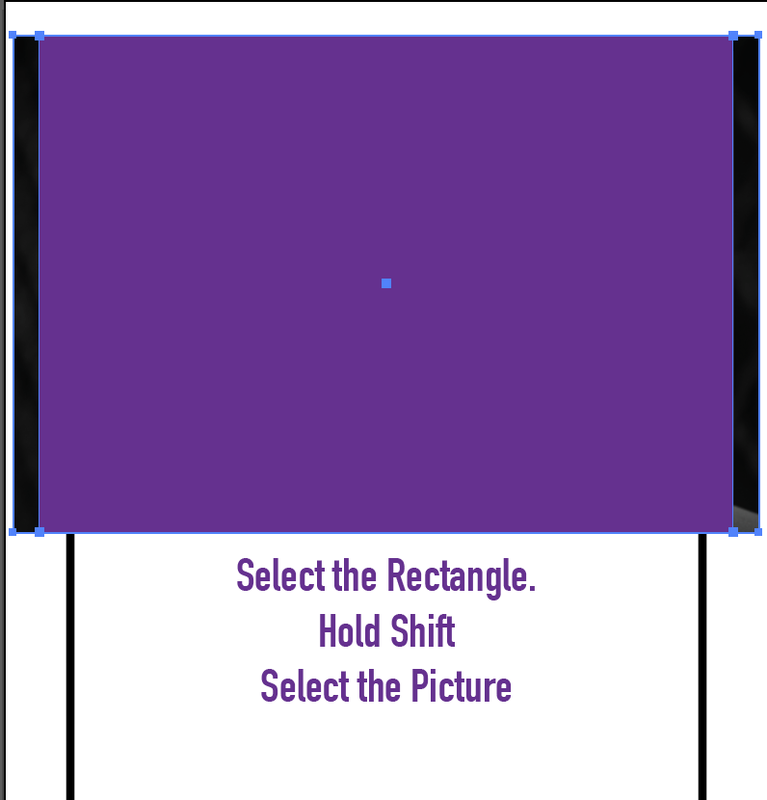
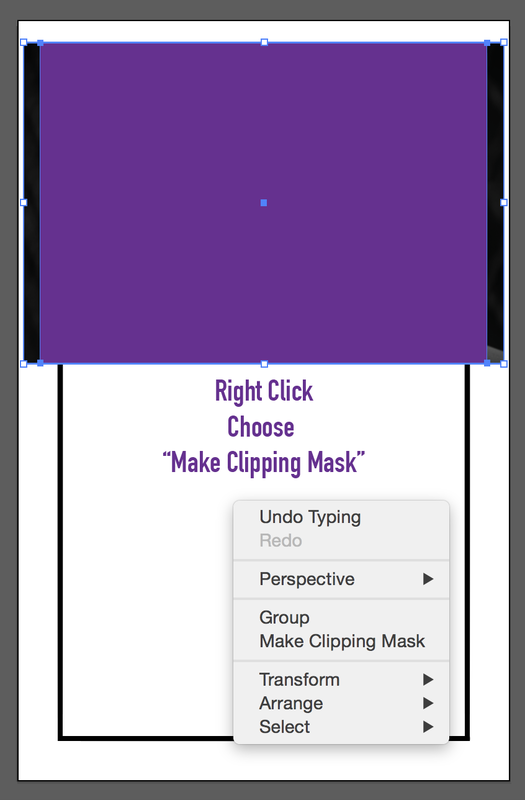
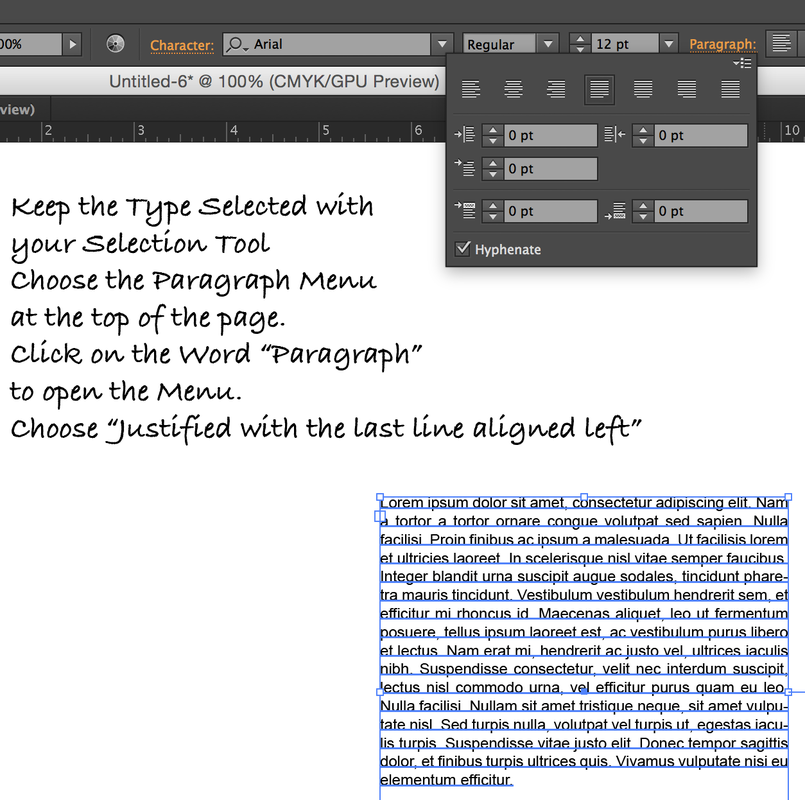
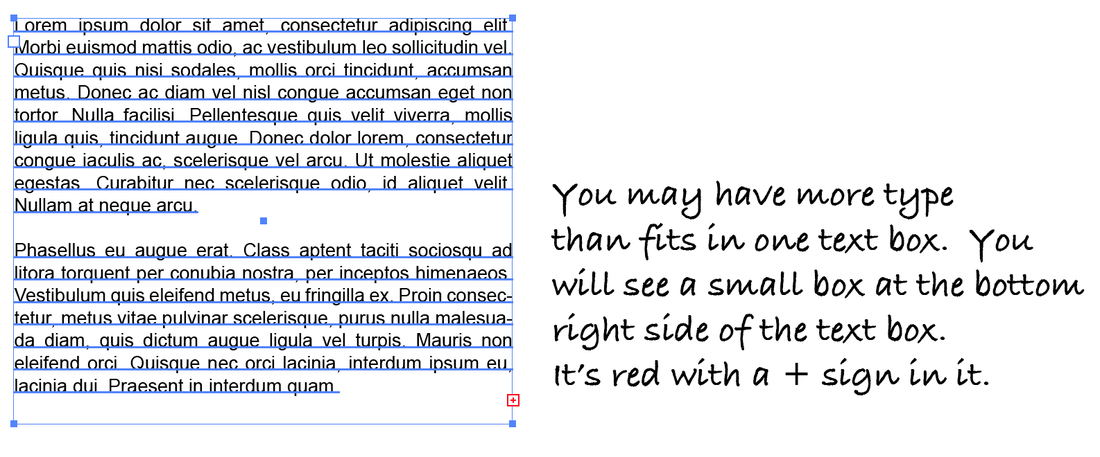
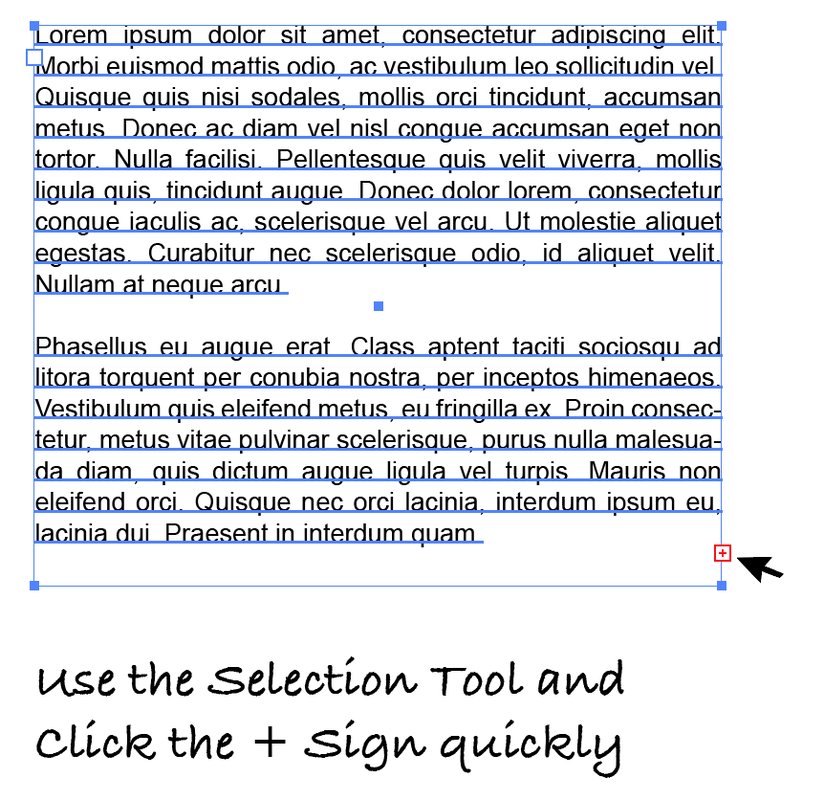
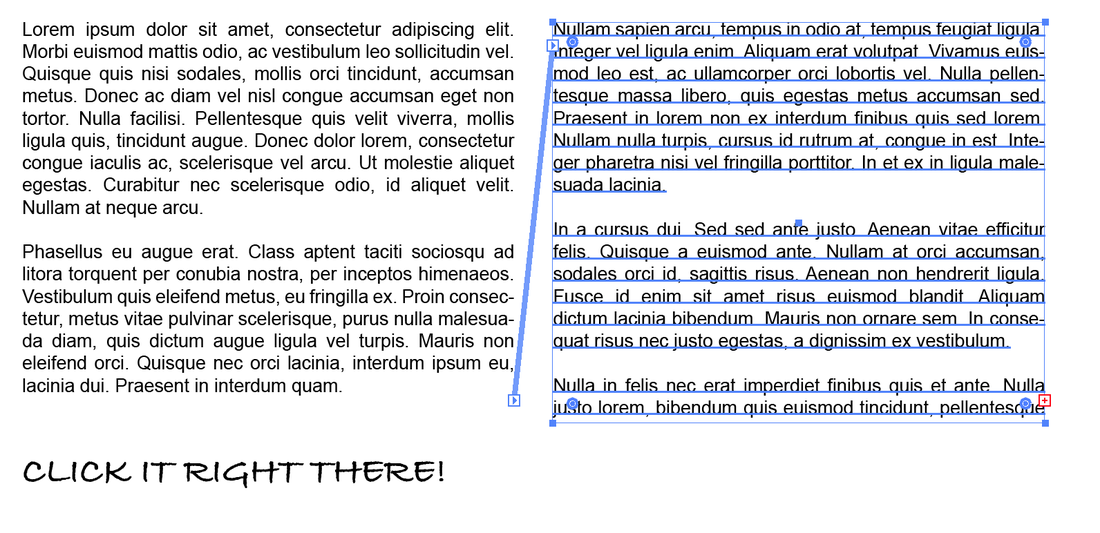
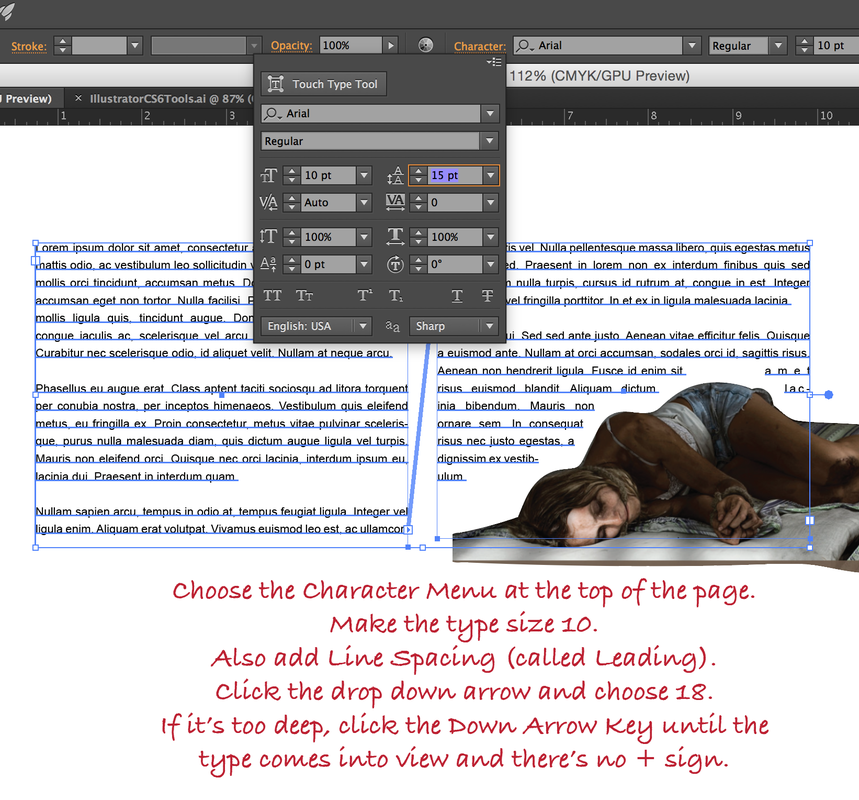
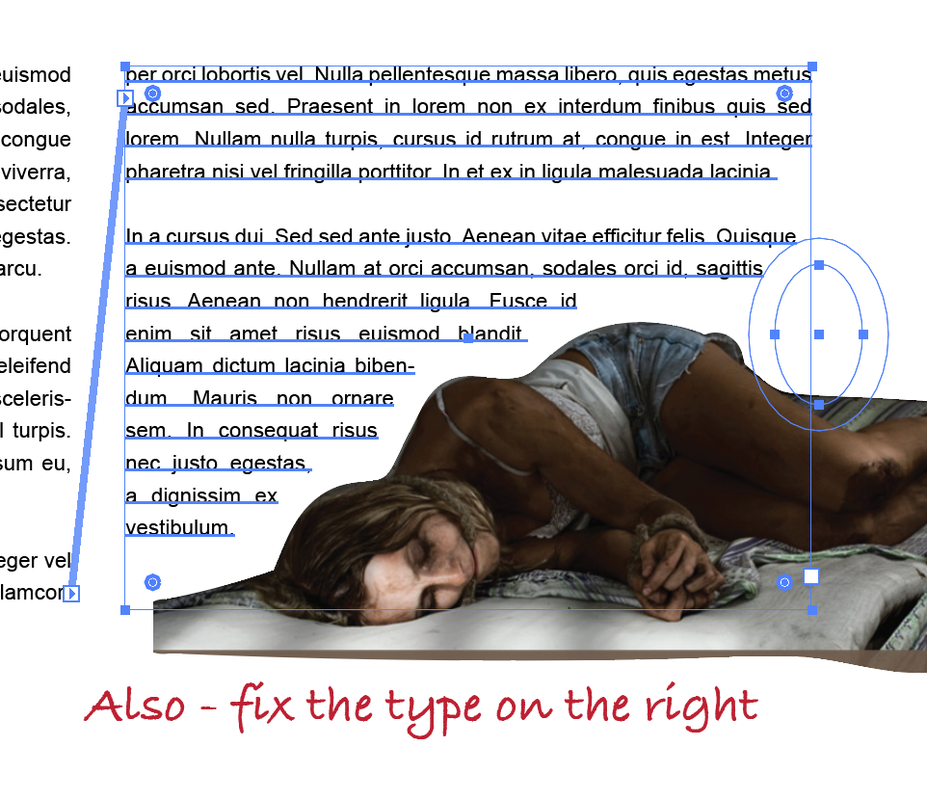
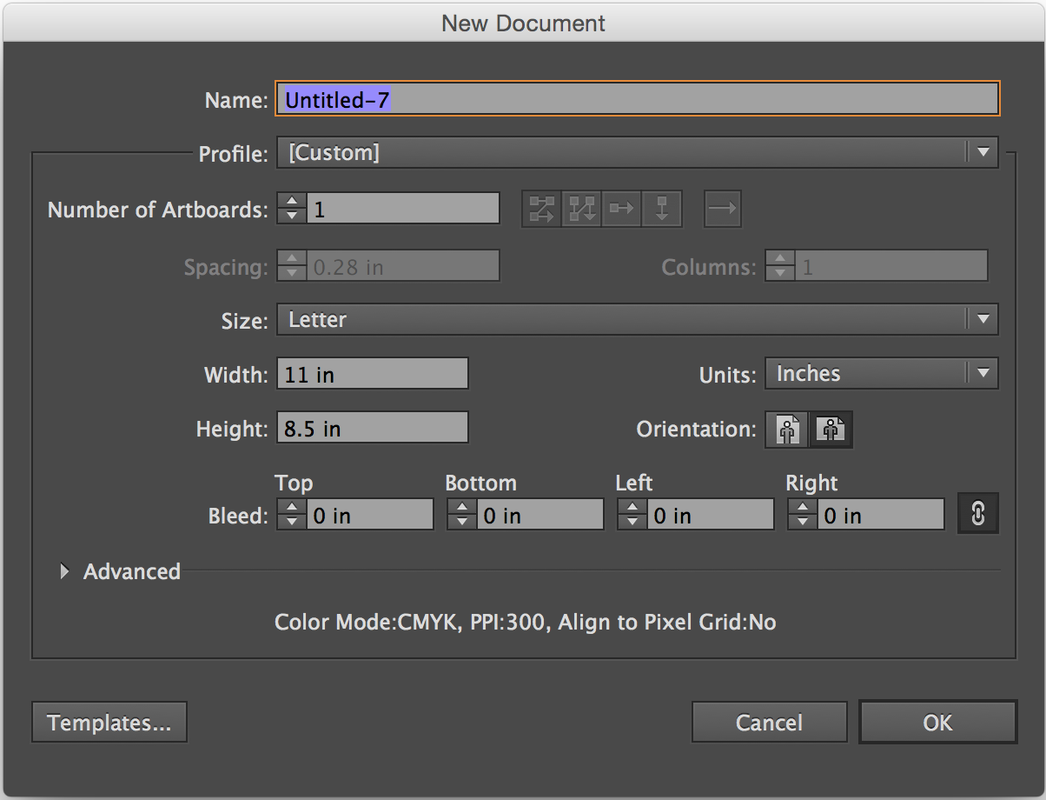
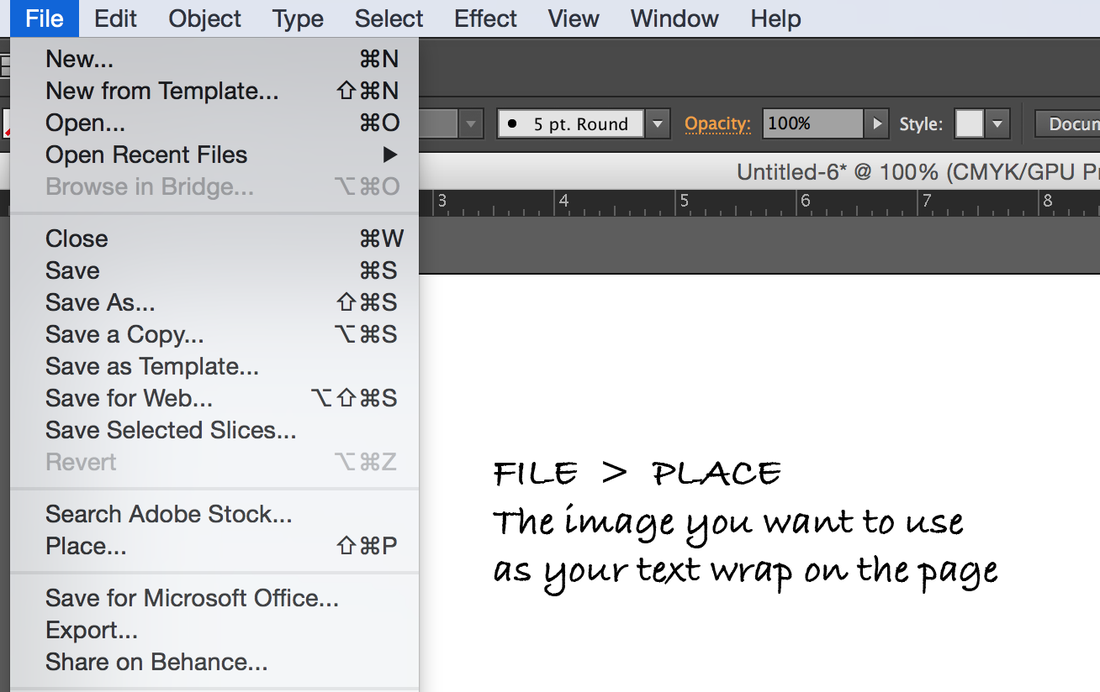
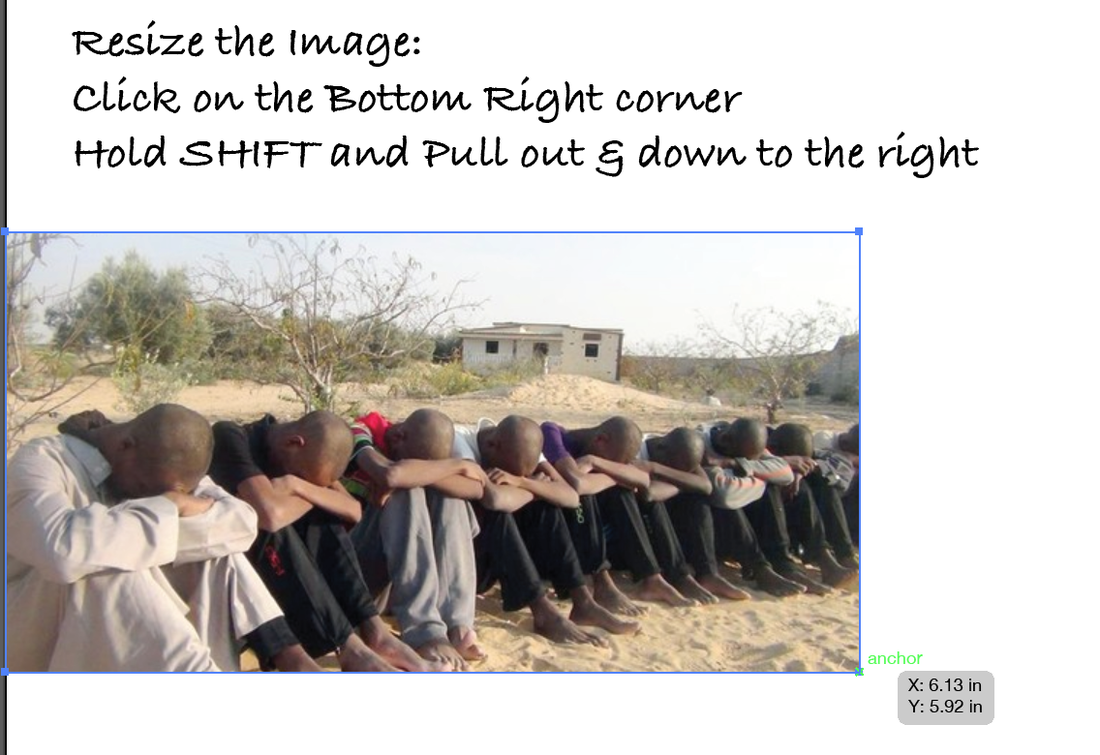
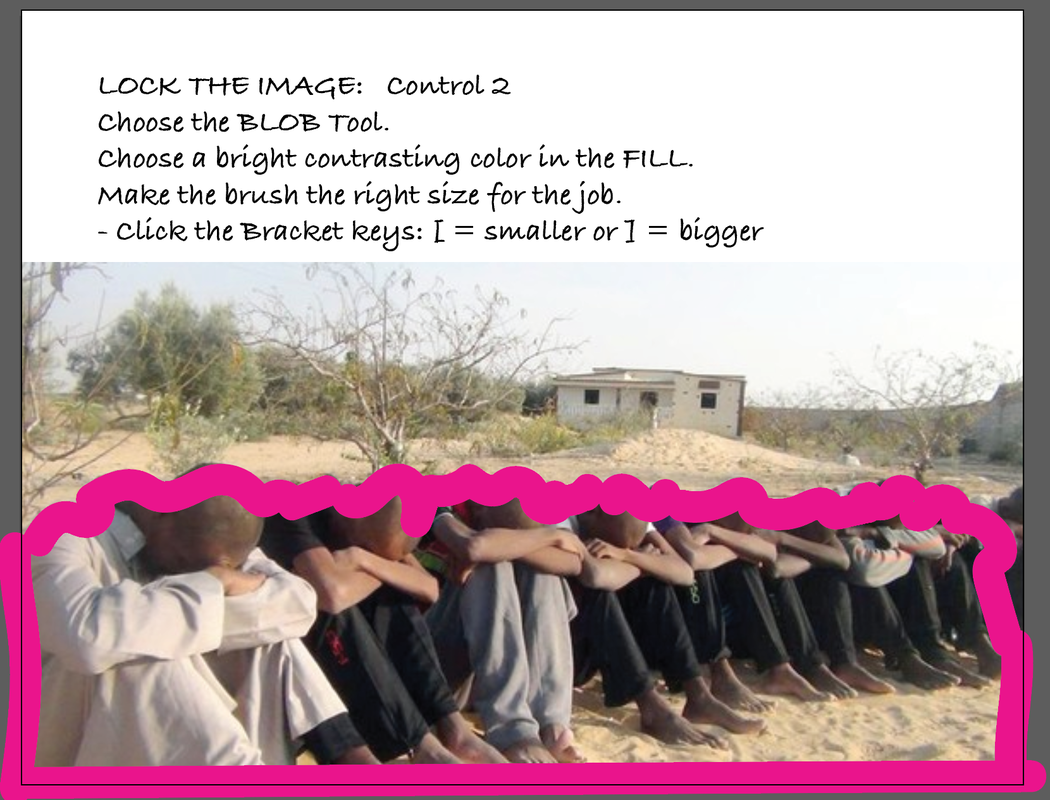
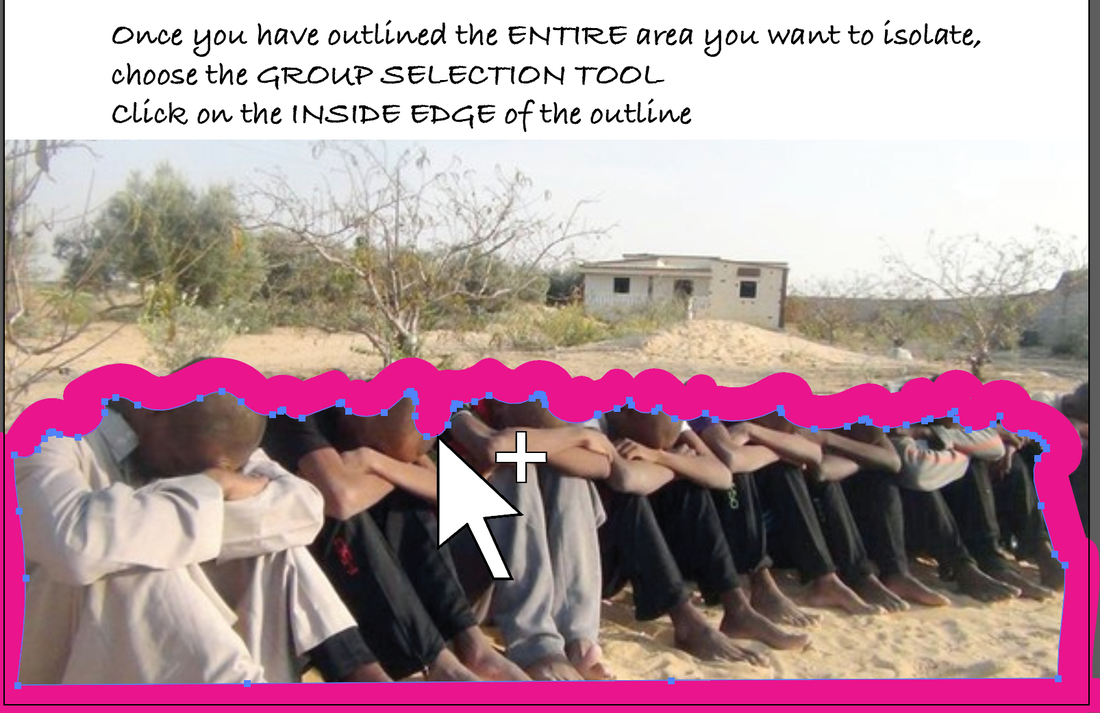
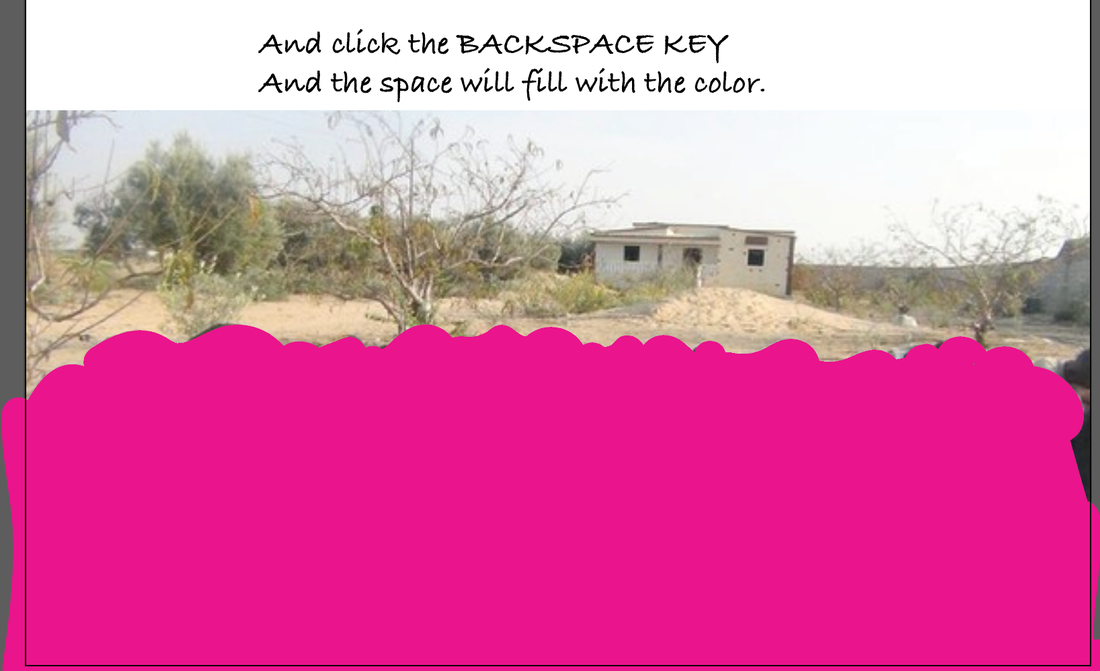
Follow this Step-by-Step Tutorial to set up your Final Art Page.
Click on the first Picture below to begin. Read the Directions at the bottom of the Picture.
Click on the "< or >" Keys to go forward or back through the Tutorial.
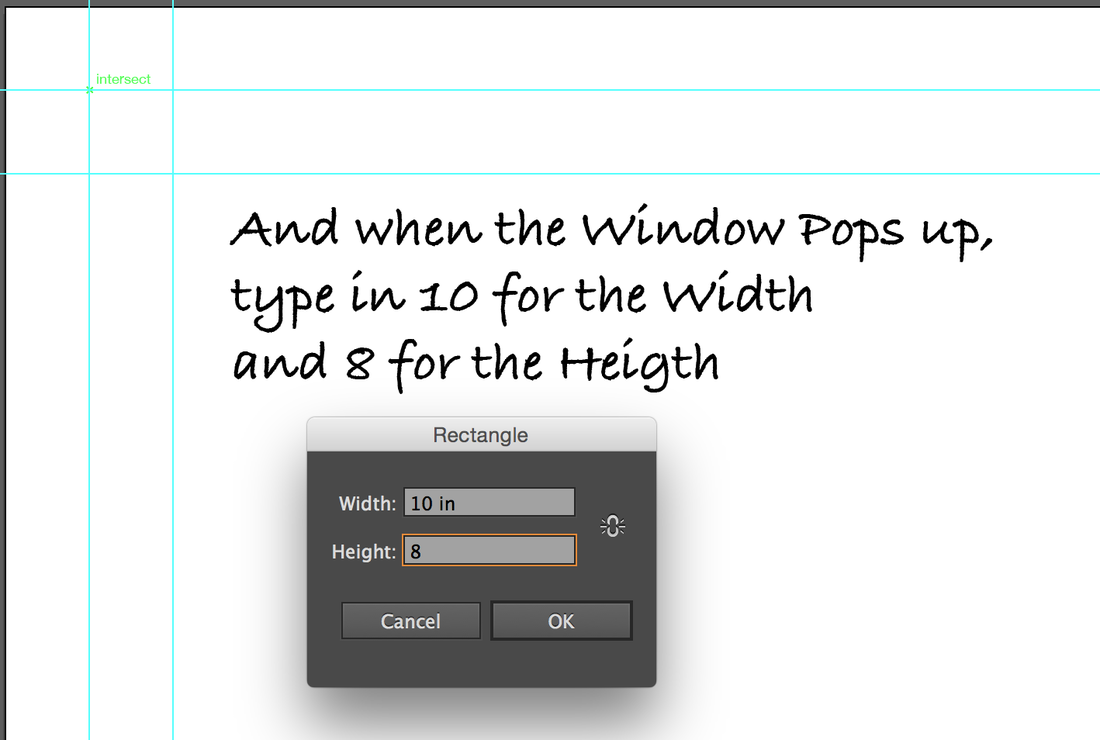
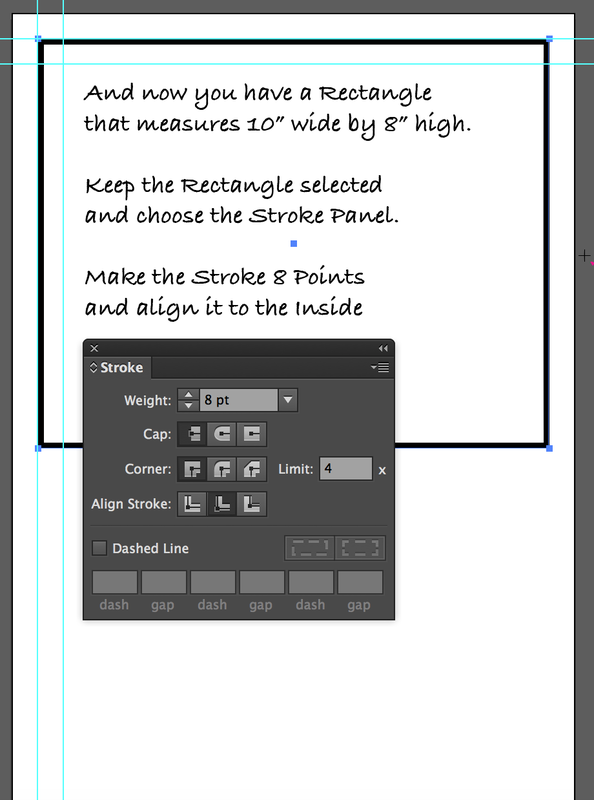
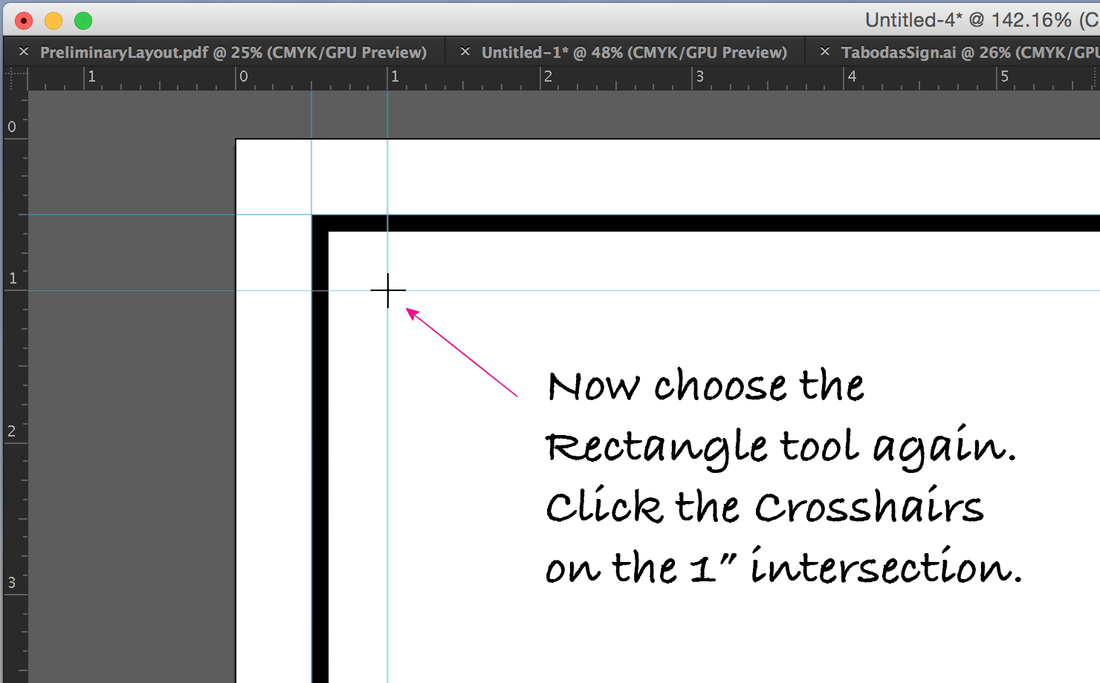
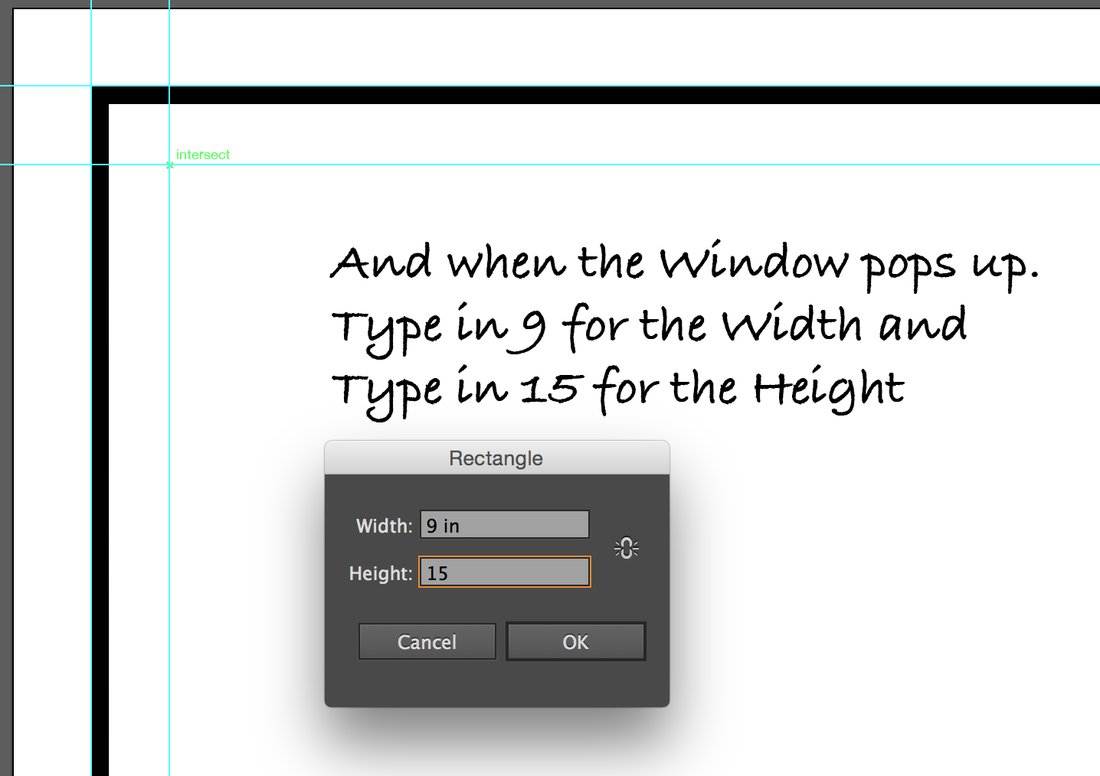
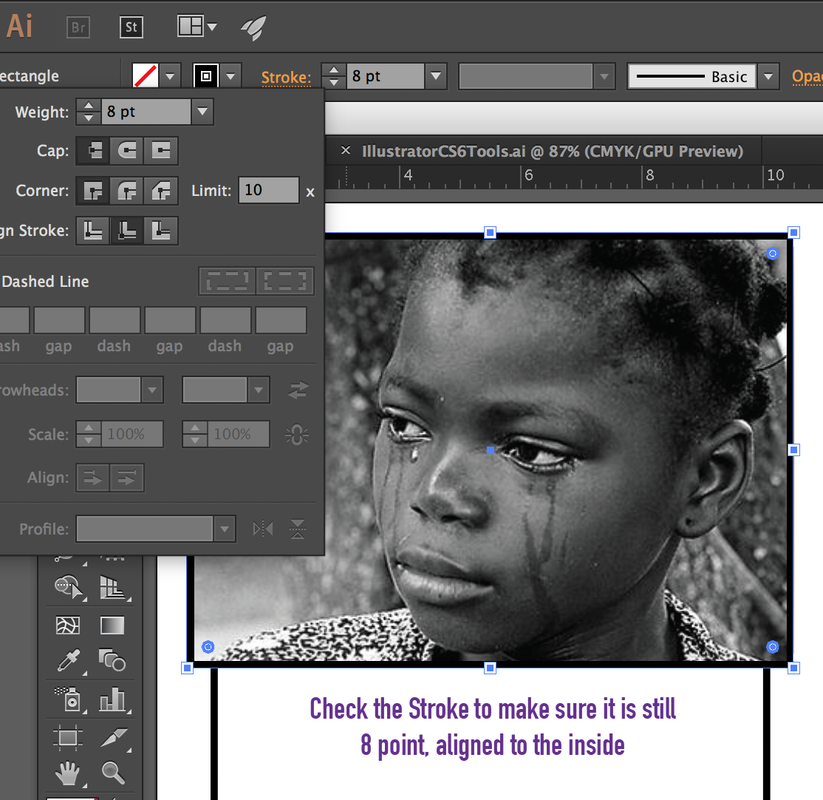
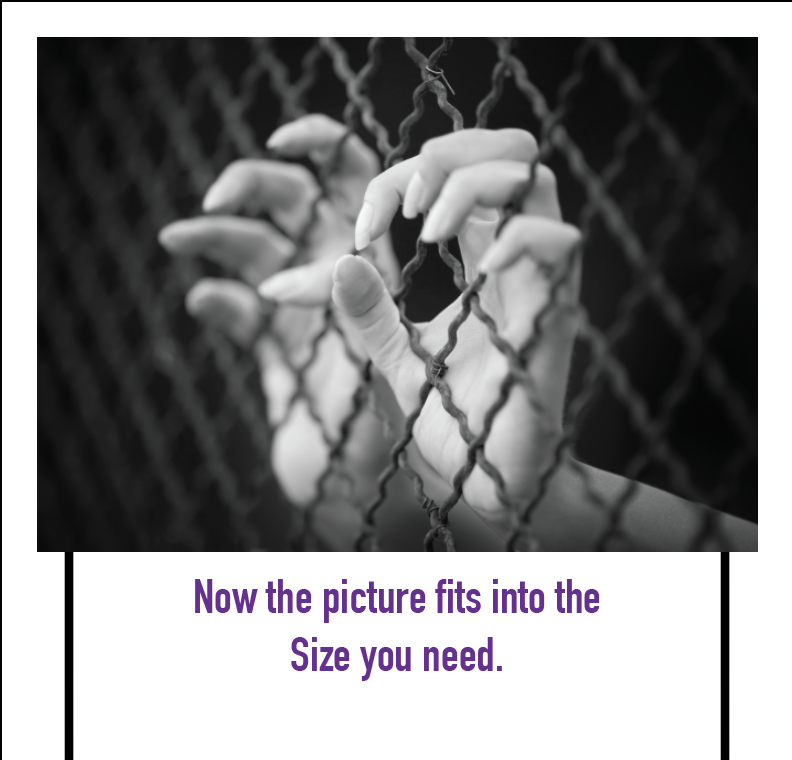
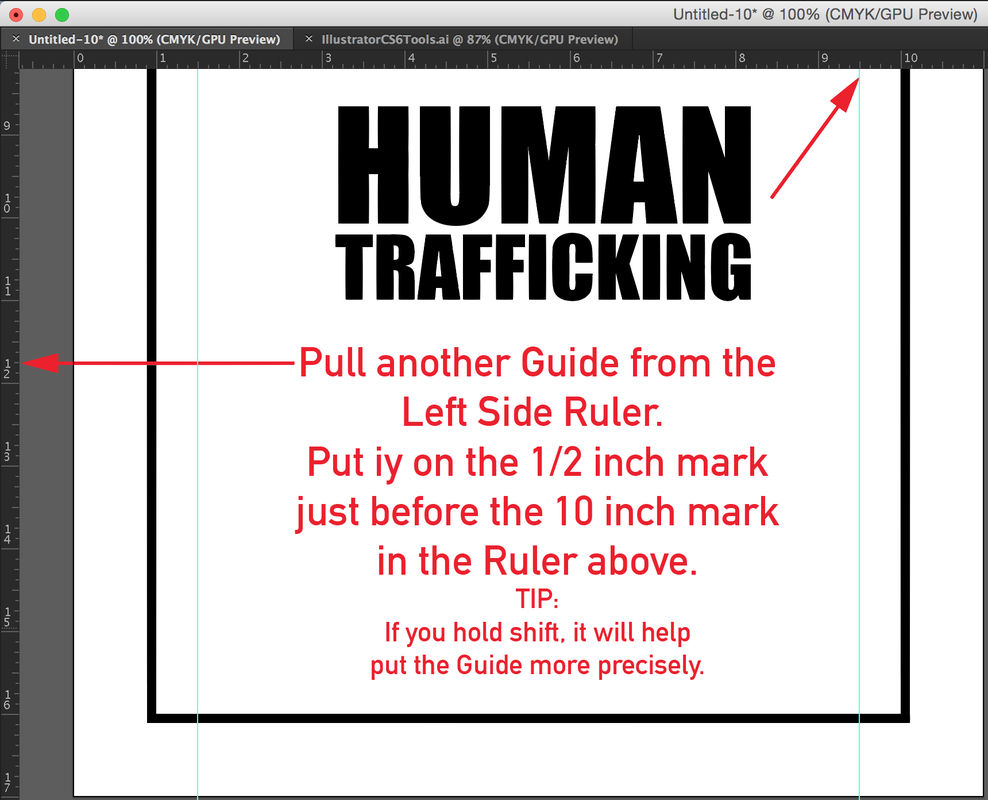
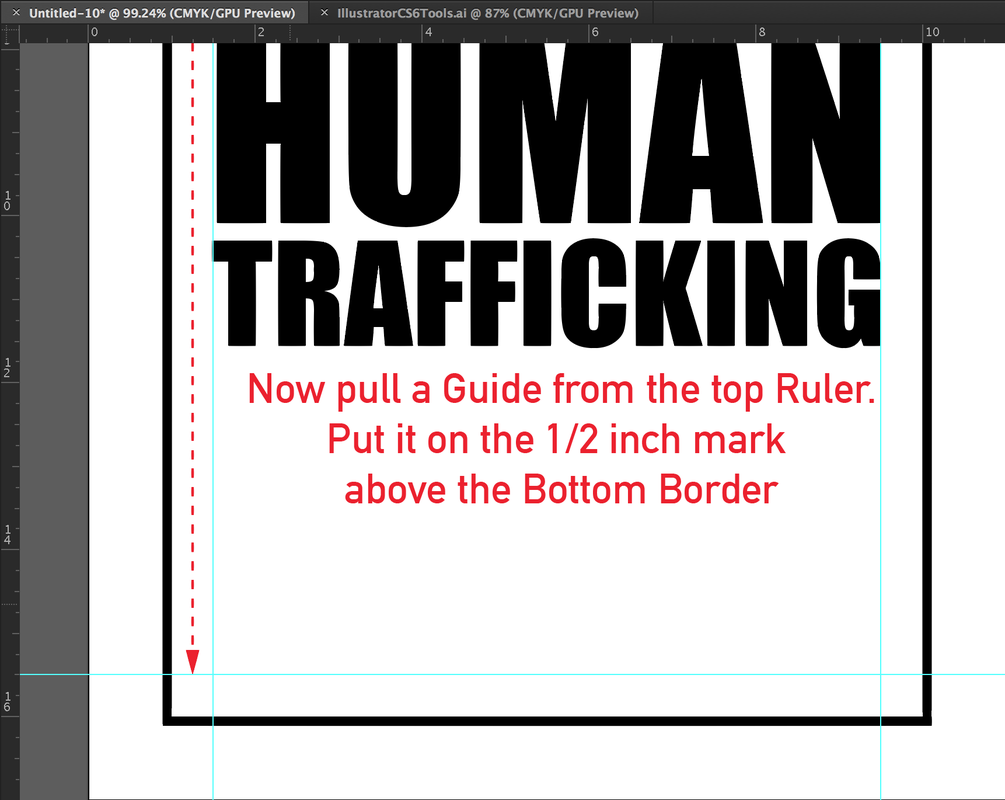
This is the Set-up for the Page Size and the Borders.
Click on the first Picture below to begin. Read the Directions at the bottom of the Picture.
Click on the "< or >" Keys to go forward or back through the Tutorial.
This is the Set-up for the Page Size and the Borders.