Dear Graphic Design 1 Students,
Please work on this tutorial as best you can. Work together, ask each other questions, help each other out.
This afternoon, I'll be working almost exclusively with the GD2 students. I will do my best to be as helpful as I can.
Thank you so much for your patience with this situation.
Sincerely, Ms. Babkie
GD1: PERIOD 7: FRIDAY: 8/16
1 SET UP YOUR PROJECT
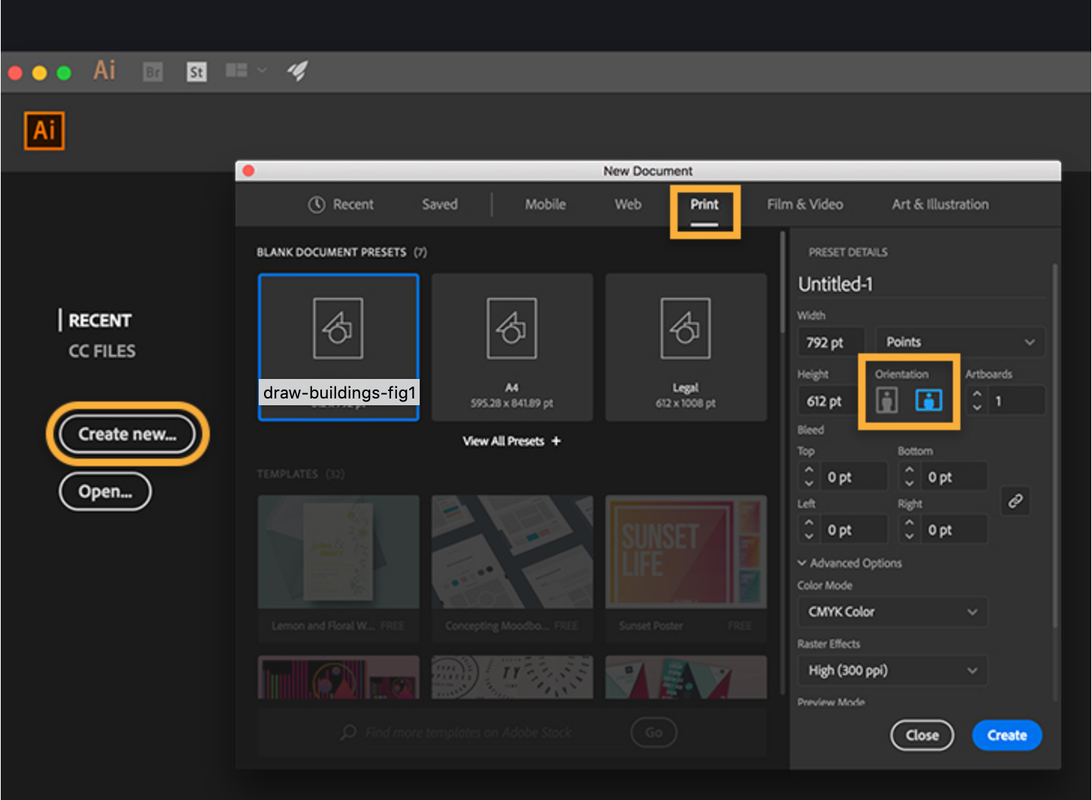
Launch Illustrator and click the Create new button, or press Control+N.
Select the Print tab at the top, or select Web if you want to use your illustration online.
Select a blank preset below and click the landscape orientation. Click Create.
See Step 1 picture below:
Launch Illustrator and click the Create new button, or press Control+N.
Select the Print tab at the top, or select Web if you want to use your illustration online.
Select a blank preset below and click the landscape orientation. Click Create.
See Step 1 picture below:
2 Draw simple shapes, starting with rectangles
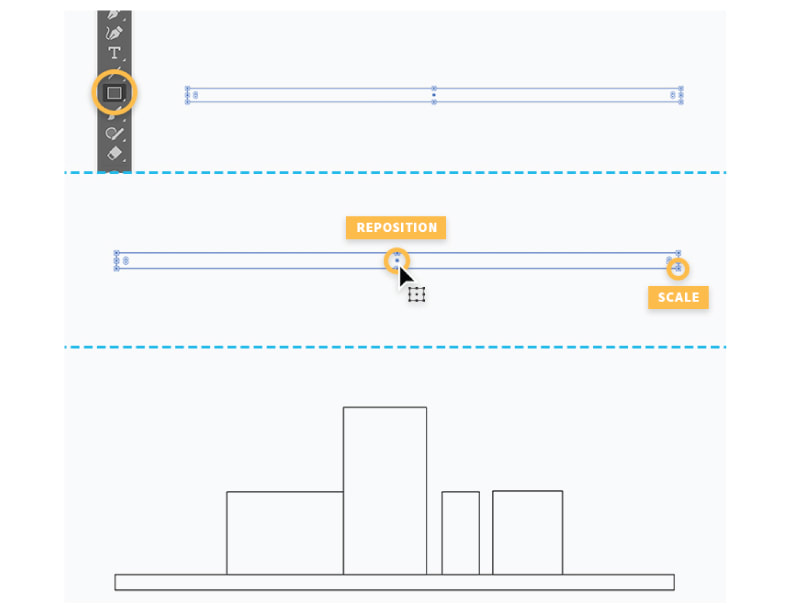
Start by drawing the larger structures, and then fill in smaller details.
First, draw a rectangular base to help you to align the rest of the artwork.
Type M, or select the Rectangle tool from the Tools panel.
Click and drag a long, skinny rectangle on the page as shown.
Drag a corner widget to scale it.
To reposition the rectangle, hover over the center point widget, and then drag to a different location.
Draw more rectangles of different sizes representing walls,
using the magenta guides to help you align them to each other and to the rectangle base.
See Step 2 picture below:
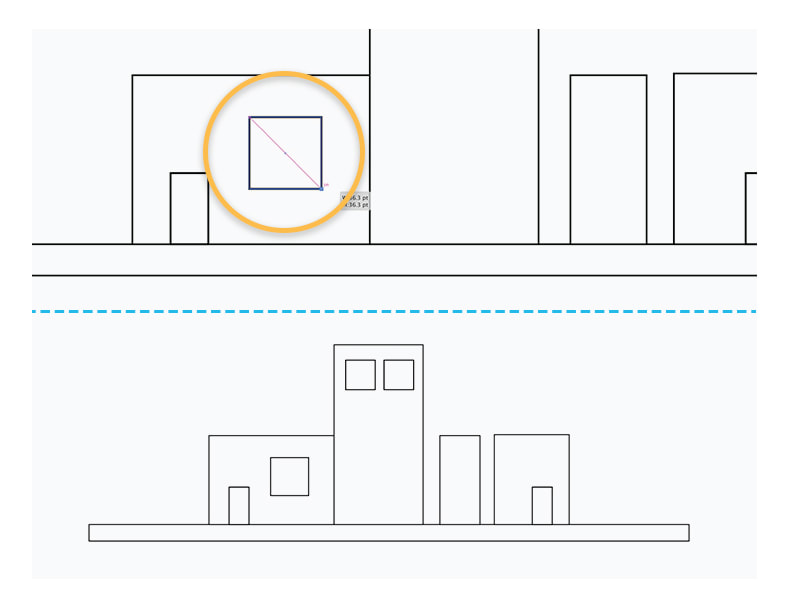
You can zoom to add smaller rectangles for the doors, windows, and panes.
Press Control and the + (plus) key once or twice.
The more times you press the plus key, the closer you zoom.
To zoom out, press Control/Command and the – (minus) key.
To draw a square shape, watch for the diagonal magenta guide as you drag,
which indicates a perfect square, or press Shift while dragging.
Tip: You can duplicate doors, windows, or other objects to speed up your drawing.
Click the center point widget of a shape, press Alt to make a copy, and then drag and drop it in another location.
3. Add circles
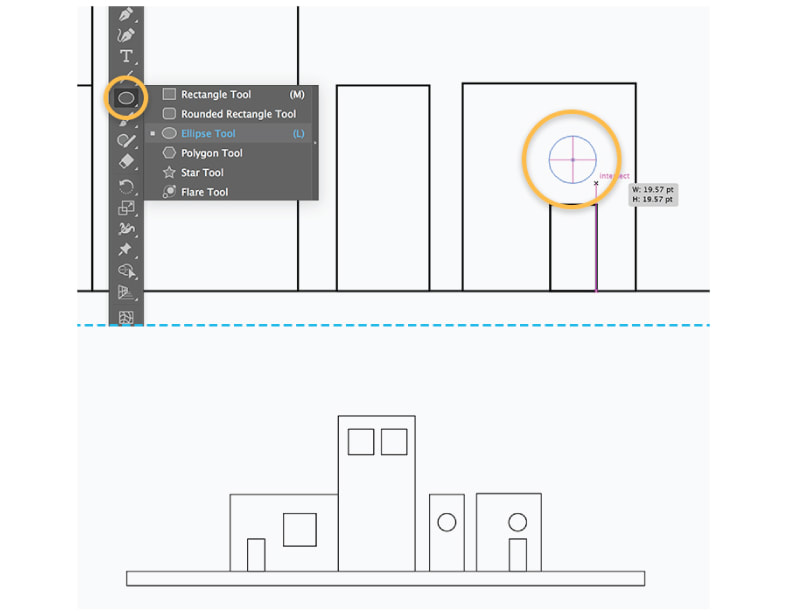
Next, you’ll add the round porthole windows.
Click and hold the Rectangle tool to access other shapes and select the Ellipse tool.
Drag a circle until you see cross hair guides appear indicating you are drawing a perfectly round circle.
Release your cursor when it’s the right size.
Use the center point widget to reposition the circle, and resize it with the corner widgets:
See Step 3 Pic below:
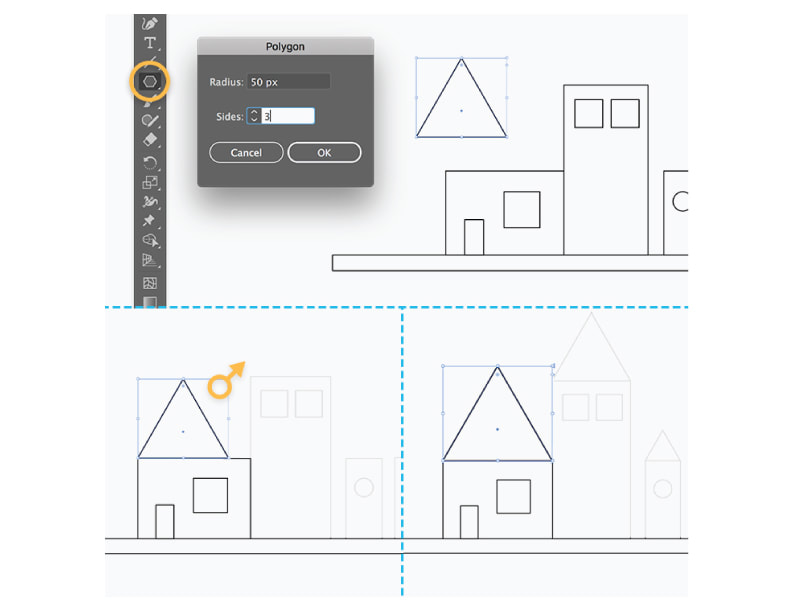
4. Add triangles
You’ll draw the roofs in this step.
Click and hold the Ellipse tool and select the Polygon tool.
Click anywhere on the art board and type Sides: 3 in the Polygon dialog box.
Use the center point widget to reposition the triangle as shown.
Scale it to fit the walls proportionally by pressing Shift and dragging a corner widget.
See Pic 4 below:
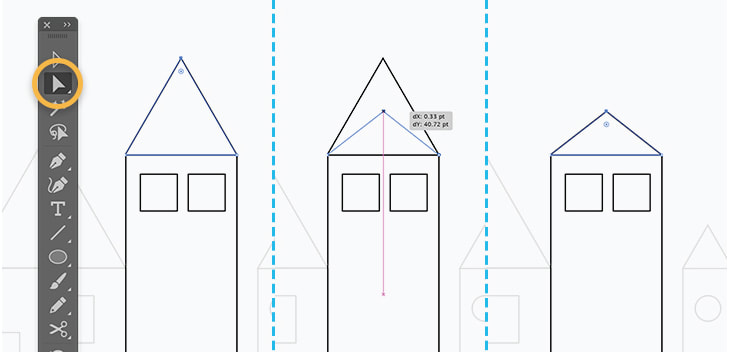
If you wish, you can change the proportions of the roofs after you’ve drawn them.
With the Direct Selection tool, click once on the topmost corner of a triangle to select just that point.
Press Shift as you drag up or down, or drag freely and watch for a magenta vertical guide
to help you keep the point aligned to the center.
With the Direct Selection tool, click once on the topmost corner of a triangle to select just that point.
Press Shift as you drag up or down, or drag freely and watch for a magenta vertical guide
to help you keep the point aligned to the center.
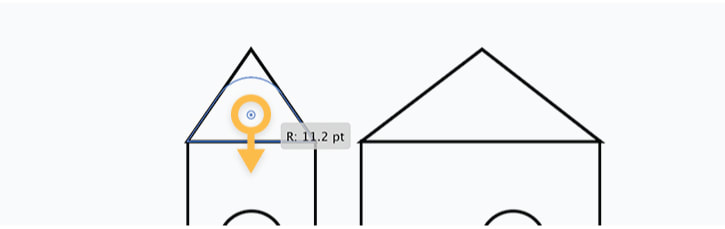
Tip: Drag the single rounded corner widget to create a roof with a rounded top.
5. Draw with lines
Use lines to add details to the windows.
With the Line Segment tool selected, place your cursor at the top center of a square
until you see the word intersect and a magenta guide, which indicate the center of the square shape.
Drag a line segment to the bottom. Release your cursor to finish drawing the line.
Repeat to create a horizontal line to complete the window pane.
Step 5 Pic below:

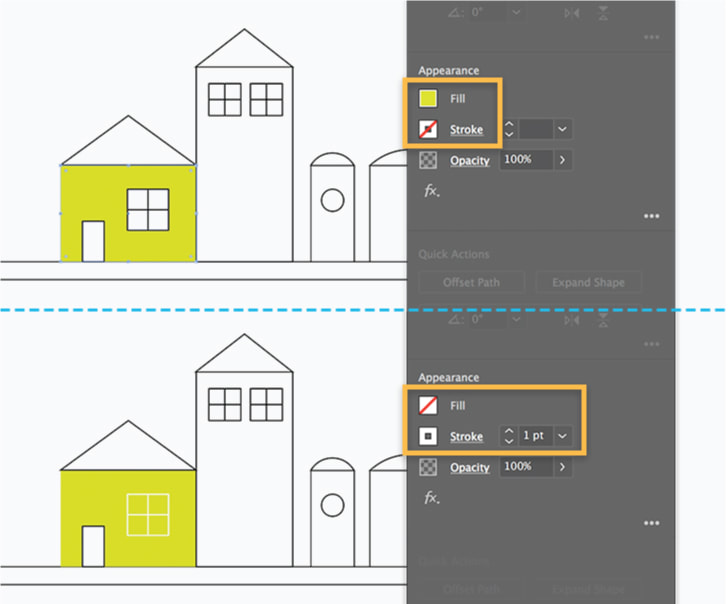
6. Add color
Type V to access the Selection tool and click the long rectangle base.
In the Properties panel, click the Fill Color swatch and select the Swatches option at the top.
Choose a color from the Swatches panel.
Then click the Stroke Color swatch and select None to remove the shape’s outline stroke.
Repeat to color all the walls and roofs.
Next, press Shift and click all parts of the window to select them.
Set Fill color to None, and Stroke color to white or another color. Change the Stroke weight if desired.
Tip: It’s easy to reuse color attributes already applied to an object.
Select an uncolored shape. Select the Eyedropper tool and click a colored object to sample its color,
and then apply it to the selected shape.
Step 6 Pic Below:
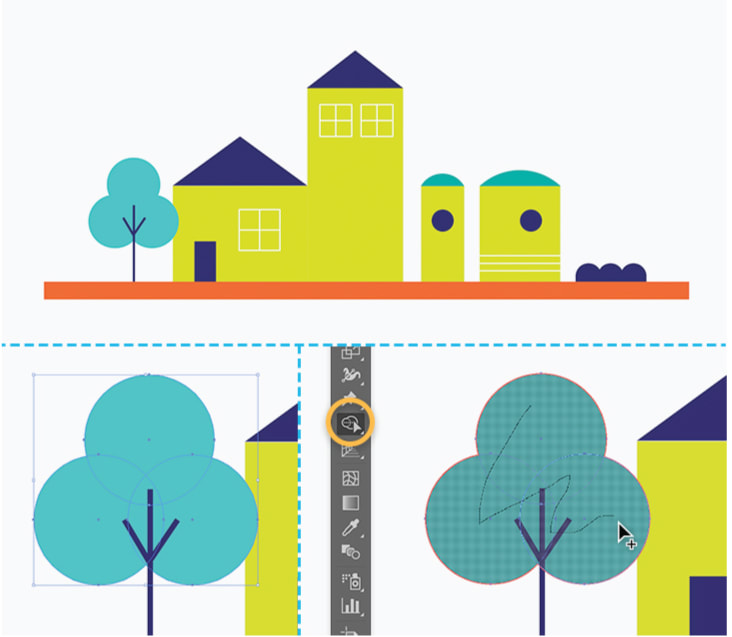
7. Combine shapes easily
Use the skills you’ve learned so far to draw all kinds of objects and add some flair to your illustration.
For example, use the Ellipse and Line tools to construct a tree.
Simply draw three overlapping circles to draw a treetop, and then draw three lines for the trunk and branches.
Tip: Use this technique to combine shapes easily:
Select the overlapping circles, and then select the Shape Builder tool and draw a line through them as shown.
Step 7 Pic below:
8. SAVE YOUR FILE:
Go to "File" at the top of the page > Scroll down to "Save As"
Go to "This PC" > choose your 562 number > Choose the "GD1 - 1ST QTR" Folder
Name this File as follows:
Type your First Name with a Capital Letter first letter, with No Spaces between the words, type the name of the tutorial:
ShapesBuildingsTute and then No Space, type Pd7, and then hit "Enter" or "Save". Your file name should look like this:
(Your First) NameShapesBuildingsPd7
Email me this File as an Attachment.
Again, thank you so much for your patience with this situation.
Again, thank you so much for your patience with this situation.
