This is a Tutorial from VectorTuts.com
In this tutorial you will learn how to create realistic vector fire, using the Gradient Mesh
Tool and Screen Blending mode. Believe me, there’s nothing overly complicated.
Please just follow the directions and take your time.
This exercise is for anyone who wants to learn more about Blends.
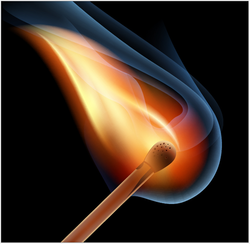
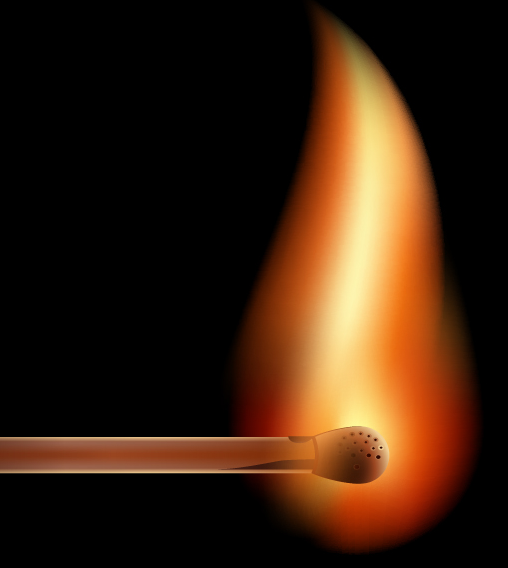
Look at that Match Fire - that's Vector Art - not a photograph.
The entire picture is vector art. And you'll be doing your own illustration soon, so take
your time, follow the directions and enjoy. This is exactly how I learned to use these
programs, through Tutorials given by the pros in the applications. I'll be doing this
exercise with you as I want to learn how to use the Gradient Mesh tool.
Tool and Screen Blending mode. Believe me, there’s nothing overly complicated.
Please just follow the directions and take your time.
This exercise is for anyone who wants to learn more about Blends.
Look at that Match Fire - that's Vector Art - not a photograph.
The entire picture is vector art. And you'll be doing your own illustration soon, so take
your time, follow the directions and enjoy. This is exactly how I learned to use these
programs, through Tutorials given by the pros in the applications. I'll be doing this
exercise with you as I want to learn how to use the Gradient Mesh tool.
STEP 1

We will be working in RGB color model, if you do not have it installed,
go to File > Document Color Mode > RGB Color.
Begin the tutorial by creating a background.
Use the Rectangle Tool (M) to create a rectangle filled with a black color.
Click the picture at left to see a larger version.
SAVE: Control S
go to File > Document Color Mode > RGB Color.
Begin the tutorial by creating a background.
Use the Rectangle Tool (M) to create a rectangle filled with a black color.
Click the picture at left to see a larger version.
SAVE: Control S
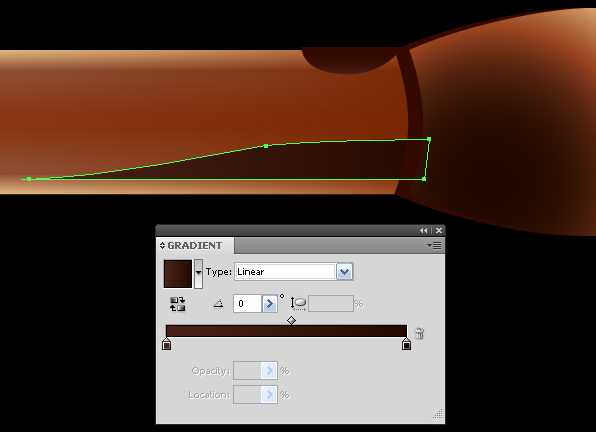
STEP 2 • Creation of a match
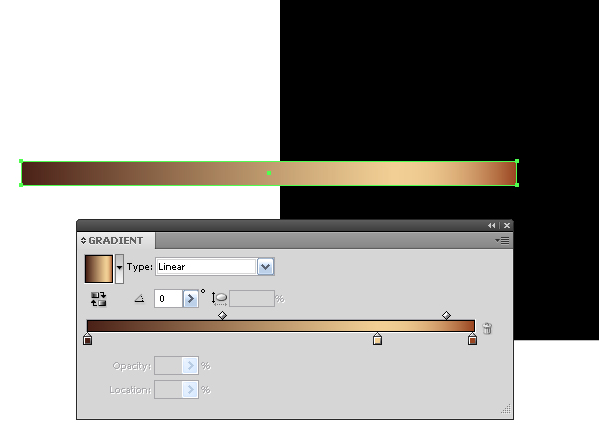
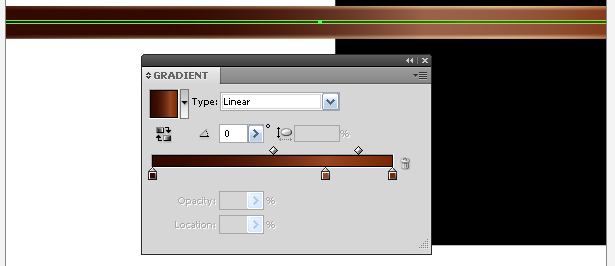
Take the Rectangle Tool (M) and create a rectangle in the shape of a matchstick.
Now fill it with a linear gradient of various shades of brown
to convey the light distribution at the edges of the match.
Next, copy this rectangle and paste it in front (Command + C; Command + F).
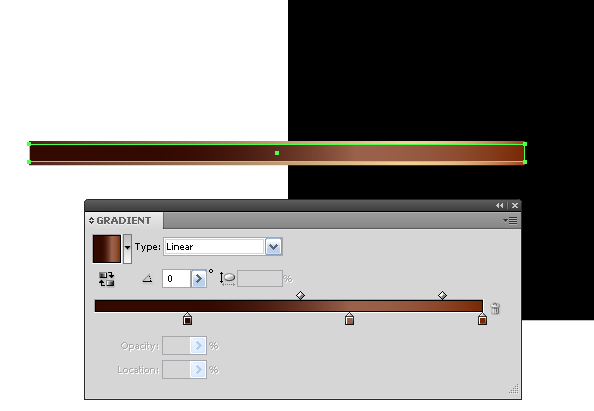
Now slightly reduce the height of the rectangle and fill it with a new linear gradient.
The shades of brown on this rectangle are darker than the ones on the bottom rectangle.
Now slightly reduce the height of the rectangle and fill it with a new linear gradient.
The shades of brown on this rectangle are darker than the ones on the bottom rectangle.

Select both rectangles and go to Object > Blend > Make.
Look closely at the picture here.
Click the picture at left to see it larger.
Note there are 50 steps to this blend.
SAVE: Control S
Look closely at the picture here.
Click the picture at left to see it larger.
Note there are 50 steps to this blend.
SAVE: Control S
STEP 3
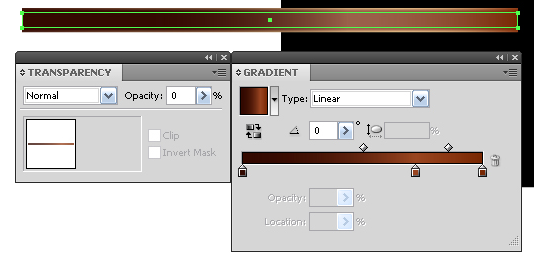
Create another rectangle of the same width as all the previous ones,
as shown in the figure at left, click the picture to enlarge it.
Set the Gradient fill and Opacity to 0% in the Transparency palette.
Create ANOTHER rectangle:
Same width as the previous one but the Height is only 2 PIXELS!
with the fill of the same gradient as a transparent rectangle.
Hmmmm . . . sounds confusing . . . Move On if you don't get it!
Select the last two rectangles and go to Object > Blend > Make:
Same width as the previous one but the Height is only 2 PIXELS!
with the fill of the same gradient as a transparent rectangle.
Hmmmm . . . sounds confusing . . . Move On if you don't get it!
Select the last two rectangles and go to Object > Blend > Make:

SAVE: Control S
STEP 4 • Creation of the Match Head
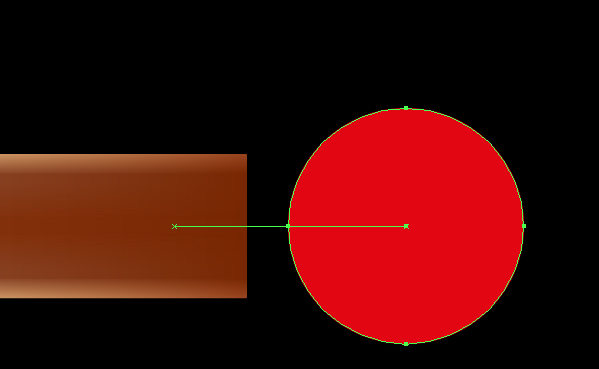
Take the Ellipse Tool (L) and
create a circle centered on the same axial line with the match.
For convenience turn on the Smart Guides mode (Command + U).
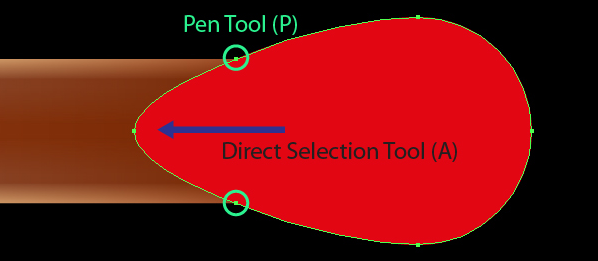
Use the Direct Selection Tool (A) and pull the left most point out to the left,
while holding down Shift.
Now take the Pen Tool (P) and put new anchor point at the intersections
of the head and the matchstick (Top & Bottom).
Use the Direct Selection Tool (A) and pull the left most point out to the left,
while holding down Shift.
Now take the Pen Tool (P) and put new anchor point at the intersections
of the head and the matchstick (Top & Bottom).
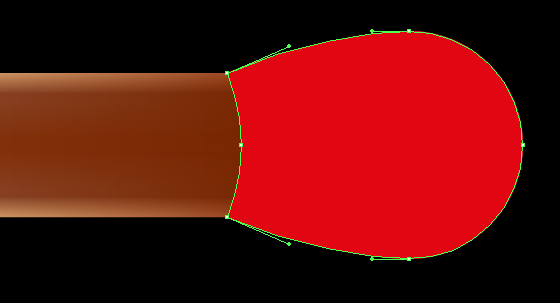
Using the Direct Selection Tool (A), transform the shape of the head to the view shown in the figure below.
SAVE: Control S
SAVE: Control S
STEP 5 • Fine Tune the Match Head

Fill the match head with a radial gradient that
goes from dark brown to its light shades.

Copy and paste back the shape of the head (Command + C; Command + B).
Fill the copy with a solid dark-brown color and shift it slightly to the left.
STEP 6
Take the Pen Tool (P) and create a place where the wood is burnt.
These areas are filled with a linear gradient composed of dark shades of brown color.
Click the picture at left to enlarge it.
I see a few spots of dark brown color, not just on the bottom, but also on the top.
Both of these objects must be located in the under layers below the match head.
In other words, this is all one layer so far, but we are "Sending to Back" in a few cases.
SAVE: Control S
In other words, this is all one layer so far, but we are "Sending to Back" in a few cases.
SAVE: Control S
STEP 7 • Create the Pores on the Match Head
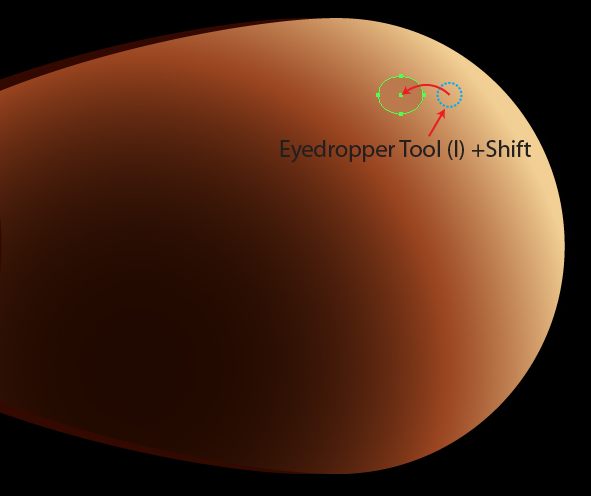
Take the Ellipse Tool (L) and create a small ellipse.
For the fill color, use solid color of the fill of a radial gradient of the match head.
To take the color, use the Eyedropper Tool (I) and hold down the Shift to select.
Often object selection interferes with choosing the right color, you can turn it on,
go to View > Hide Edges (Command + H).
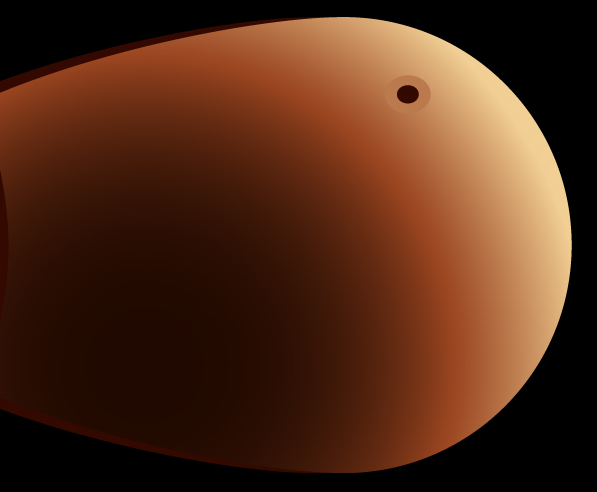
Use the same combination of keys to activate the selection.
Copy and paste the ellipse in front (Command + C; Command + F),
reduce the size and fill it with a solid dark brown.
go to View > Hide Edges (Command + H).
Use the same combination of keys to activate the selection.
Copy and paste the ellipse in front (Command + C; Command + F),
reduce the size and fill it with a solid dark brown.
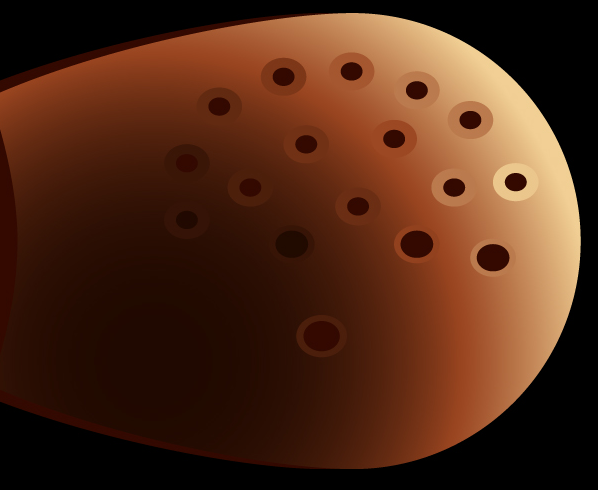
Use this technique to create more pores on the match head. SAVE: Control S
STEP 8 • Creating the Match Flame
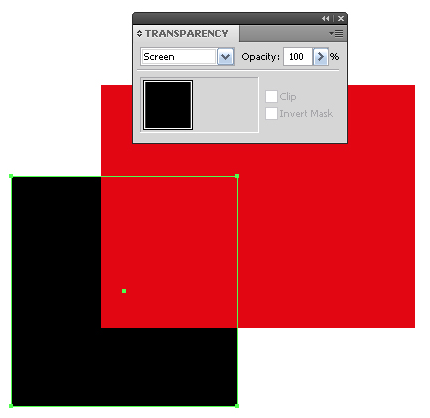
At this stage, you should learn one important property:
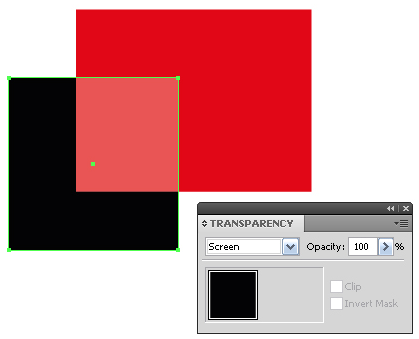
black objects - when overlapping over other objects - become transparent if you set the
Screen Blending mode for them in the Transparency palette in RGB color mode.
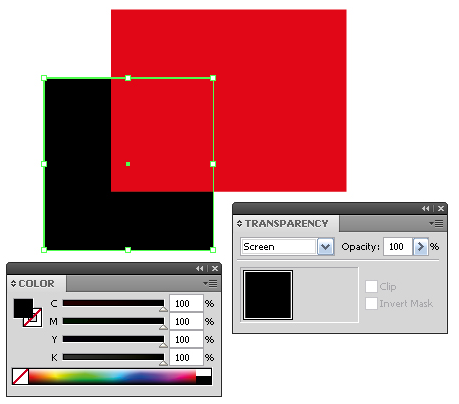
You can see below the same objects in the CMYK color mode.
If you are still working in the CMYK color mode,
then in order to achieve this effect, you should use absolute black.
then in order to achieve this effect, you should use absolute black.
STEP 9 • Creating the Shape of the Flame
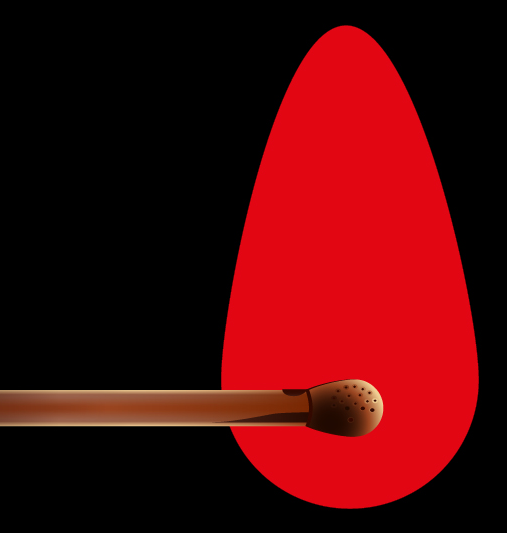
Use the Ellipse Tool (L) and create a circle.
Using the Direct Selection Tool (A), pull the top anchor point up.
The shape of the flame should be located in the under layer
below the elements of the match.
Don't make a new layer - simply "send to back".
SAVE: Control S
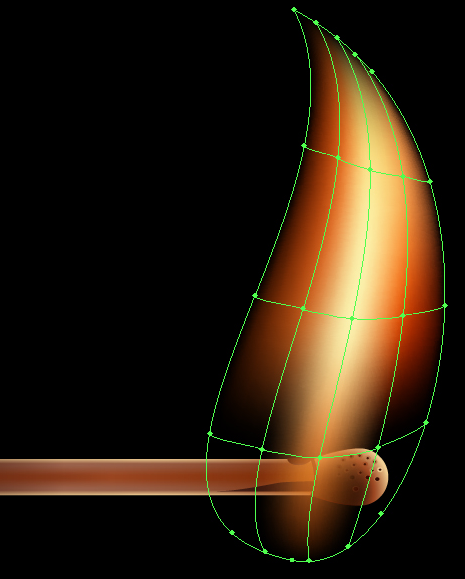
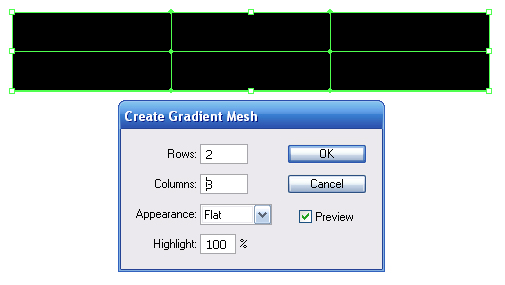
STEP 10 • Making the Gradient Mesh Flame - Oh Boy!
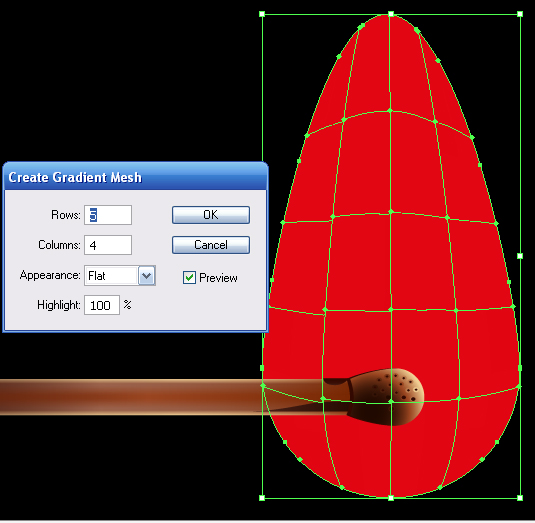
Select the shape of the flame, and go to Object > Create Gradient Mesh…
and set the number of rows and columns in the dialog box.
Click the picture at left to enlarge and see the configuration.
Remember that you can edit the grid lines that are obtained automatically.
Use the Gradient Mesh Tool (U) to create new lines.
Use the same tool to remove them but this time hold down the Alt (option for Mac).
Use the Direct Selection Tool (A) for grid line distortion and movement of the nodes.
SAVE: Control S
STEP 11
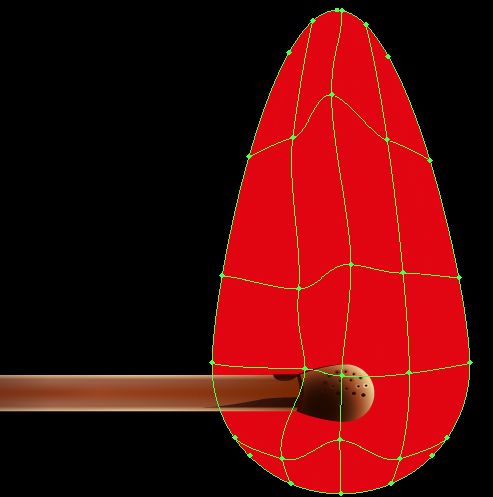
Thus, bring the lines and nodes of the gradient mesh to the view shown
in the picture at left.
Flame is a movable object, so your grid can have a completely different shape.
SAVE: Control S
STEP 12
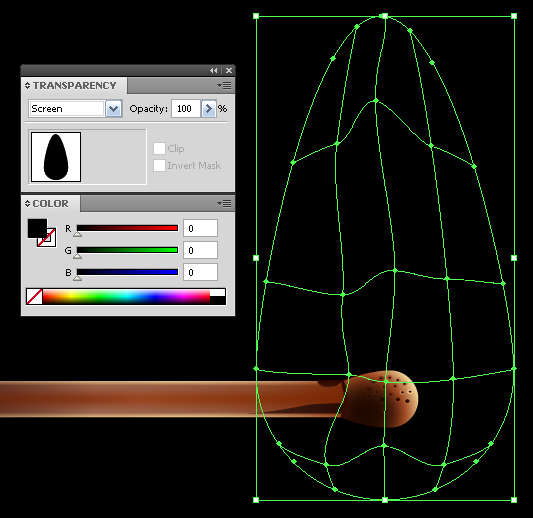
Select the gradient mesh with the Selection Tool (V)
or by clicking on the appropriate under layer in the
Layers palette and fill it with black.
Set the Screen Blending Mode in the Transparency palette.
Click the picture at left to see an enlarged view of the picture.
STEP 13 • Coloring the Flame
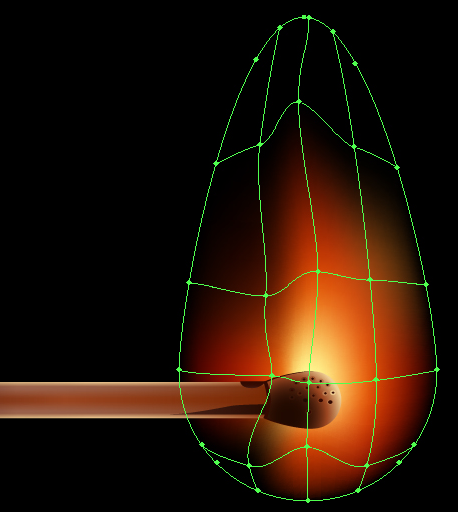
Select the grid nodes and apply yellow and red colors to them.
Nodes that lie beyond the borders of the gradient mesh should remain in black,
otherwise we get the sharp edges of the flame, which is unacceptable.
STEP 14
Create another object above the match.
Using the technique described above,
create a simple gradient mesh based on this object and color it.
SAVE: Control S
And this is how two gradient meshes look together.
STEP 15

Now create two more feathers of the flame.
And all the elements of fire together.

When coloring the gradient mesh you can use the colors of the already colored grids.
In this, you can rely on your artistic taste to create a very interesting result.
SAVE: Control S
In this, you can rely on your artistic taste to create a very interesting result.
SAVE: Control S
STEP 16 • Creating the Smoke . . . O Goodie

There is no fire without smoke.
Take the Rectangle Tool (M) and create a rectangle filled with black.
And set the Screen Blending Mode in the Transparency palette.
SAVE: Control S
STEP 17 • Only 3 more steps to go now
Keep the rectangle selected,
go to Object > Create Gradient Mesh…
and set the number of rows and columns in the dialog box.
Transfer the rectangle to the background in order to choose the right color,
and replace the color of the two bottom central points of the gradient mesh with blue.
SAVE: Control S
and replace the color of the two bottom central points of the gradient mesh with blue.
SAVE: Control S

STEP 18 • Only 2 more steps now
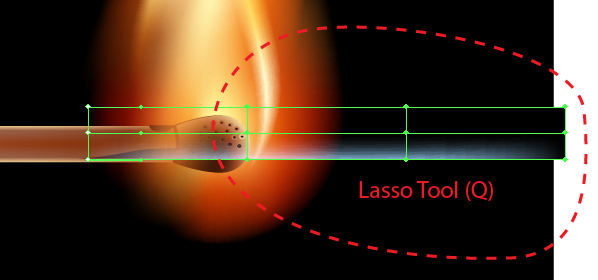
Now you need to bend the rectangle shape into the shape of a smoke stream.
I used the following tools to transform such objects:
the Direct Selection Tool (A), Lasso Tool (Q), and Rotate Tool (R).
Let’s take a look at the transformation technique.
First, lock (Control 2) all the objects except the rectangle.
Place the rectangle at the right place in your work, take the Lasso Tool (Q)
and select all the nodes of the grid, except those that are on the left side.
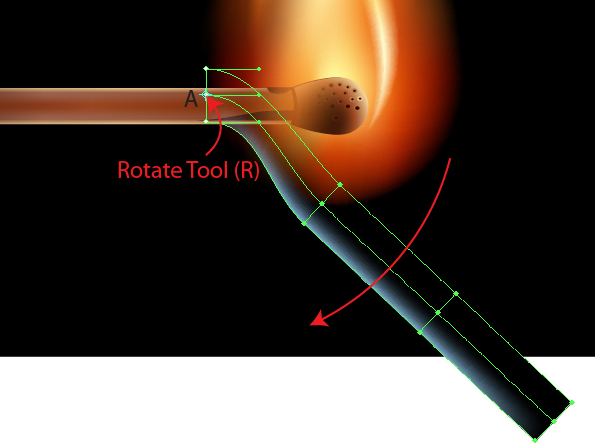
Take the Rotate Tool (R) and set the center rotation at point A and use the same tool to bend the object.
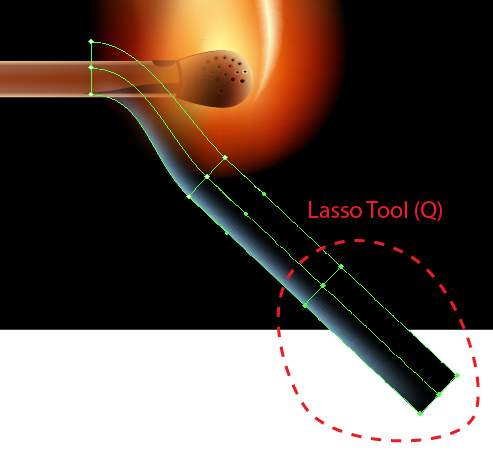
Now make another bend. Using the Lasso Tool (Q) select mesh nodes, as shown in the figure below.
Take the Rotate Tool (R) and set the center of rotation at point B and bend the object using the same tool.
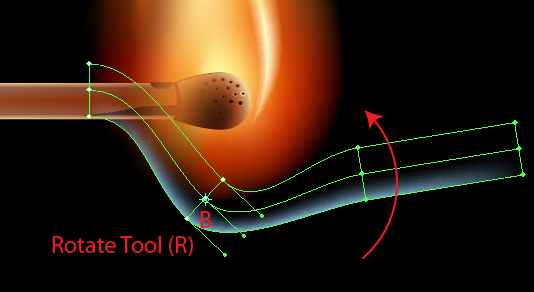
In addition, you can move individual nodes and (or) several nodes using the Direct Selection Tool (A).
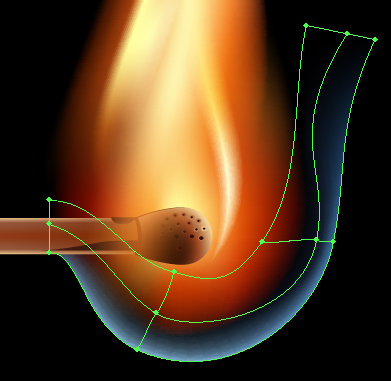
Grid line operation is the same as with operating any other vector objects.
I think you’ve got the working principle down. Bring the object to the view shown in the figure below.
Grid line operation is the same as with operating any other vector objects.
I think you’ve got the working principle down. Bring the object to the view shown in the figure below.
The smoke stream is located below the match - send to back. SAVE: Control S
