Setting Up and Applying Tabs for your Calendar Grids
Okay! Tabs! Let's do this!
Using your Text / Type Tool (T), Click on the left 1/2 " margin above the page.
NO TEXT BOX!!! The picture may look like a text box - but it's just type with no box
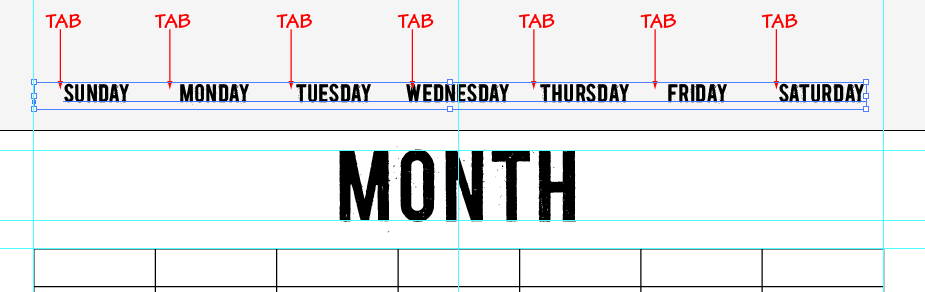
Click and hit the "Tab" key, then type the name SUNDAY, "Tab" MONDAY, "Tab" TUESDAY, "Tab" WEDNESDAY,
"Tab" THURSDAY, "Tab" FRIDAY and "Tab" SATURDAY.
Make this Type about 18 point, if the word WEDNESDAY doesn't fit reduce the text to 16 point, look at 14 point - you see what works best for you.
Position that type - even though it doesn't fit correctly, we'll be able to make it all look
just right in this exercise - position that type in the top section over the the other part
of the grid you made.
just right in this exercise - position that type in the top section over the the other part
of the grid you made.
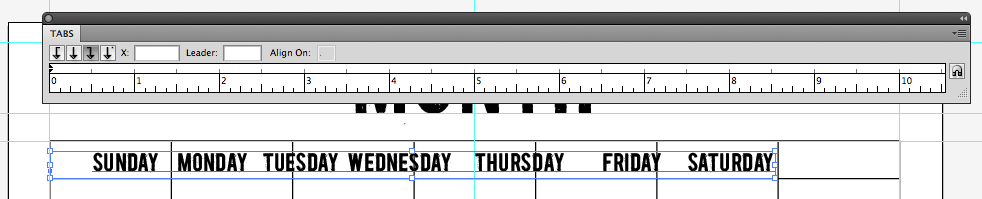
Select your type using the Selection Tool. And type Control/Shift "T" for "Tabs".
Position the TABS window so that the "0" end (Left end) lines up over
the left side 1/2" margin. Pull the little triangle on the bottom right end of the
TABS menu to the right - far enough over to the right so you can see the 10 inch measurement line"
Position the TABS window so that the "0" end (Left end) lines up over
the left side 1/2" margin. Pull the little triangle on the bottom right end of the
TABS menu to the right - far enough over to the right so you can see the 10 inch measurement line"
Click on one of the "Tab Arrows" above the first word (SUNDAY),
to make the type FL = Flush Left, Centered or FR = Flush Right. I have chosen to
CENTER the type in each of the sections so the Tab Arrow is straight line with an
"arrow" pointing down. Try moving the arrow side to side. You will see the type
"follow" where you slide. Try the other settings / arrows . . . the FL Tab,
try the FR Tab. You decide what works best for you and your design.

Put a Tab arrow over each word.
This is what directs the type to be Left, Centered or Right
The final result is shown in the picture below.

Setting up Tabs for the Days of the Month

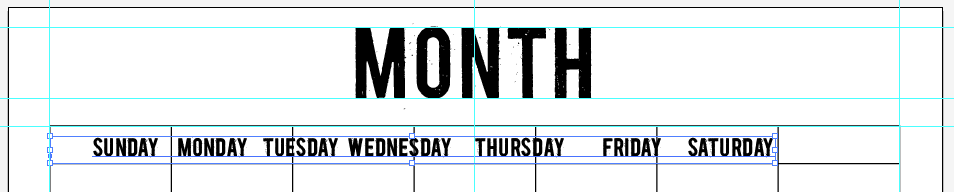
Make a Text Box (yes, make a text box) the size of the grid.
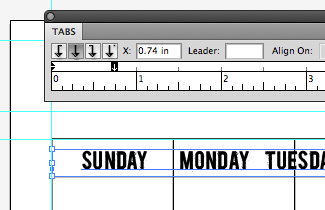
This part is important: When you put the text Tool near the grid lines,
you'll see it turn into a Type on a Path Tool, or it will turn into an Area Type
tool. You need to start the text box outside of the grid on the left.
Click on the picture here to see what I mean. Then use the Selection tool
to line up the left side of the text box with the grid.
The picture below shows how this should look:

Start typing your numbers, under SUNDAY*, start with "TAB" 1, tab 2, tab 3, tab 4 and so on.
And at the end of the row - after number 7, hit the ENTER or RETURN Key, then on the next line start again,
tab 8, tab 9, tab 10 and so on. You always start the row with Tab. See the picture below for clarification.
*Start under the SUNDAY even though that month doesn't start on SUNDAY. This is the "MASTER GRID" and you'll have your Tabs set for all the other grids here.
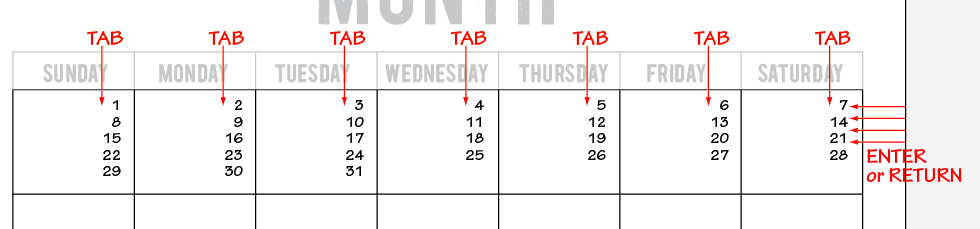
You'll notice the picture above shows I've made the numbers Flush Right (FR) and the type size is 12 point.
Now you'll change the "Leading" - the space from the bottom of the type above to the top of the type below.
This will happen in the Character Menu window - see below:
Now you'll change the "Leading" - the space from the bottom of the type above to the top of the type below.
This will happen in the Character Menu window - see below:

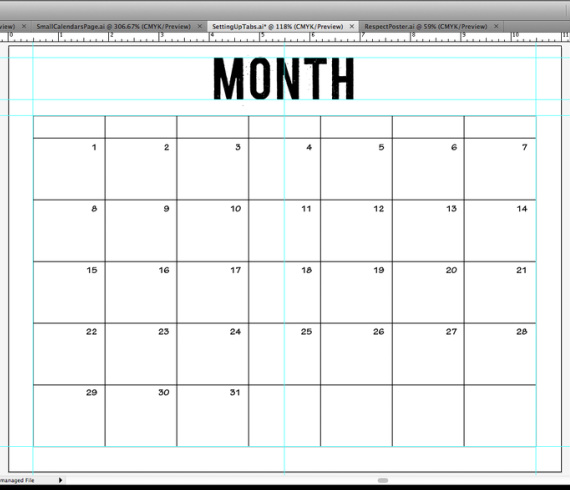
The numbers are all aligned on the right because of the Tabs that I set up and then I made the leading 88 points
from the line above to the next line and the numbers are pretty well placed in each row. I want the numbers
to be consistently spaced and placed in the upper right hand corner of each grid space.
The leading setting accomplishes that fairly well.
The final result looks like this (see below) and this is the "Master Grid" that I will use to create
all the other Months.
Please ask me any questions any time: during class or via e mail at [email protected].
Also, please tell me if there any mistakes or areas that are unclear or confusing.
Based on your input, we make these tutorials better for all who come along after you.
Thank you so much for your hard work and help.
Also, please tell me if there any mistakes or areas that are unclear or confusing.
Based on your input, we make these tutorials better for all who come along after you.
Thank you so much for your hard work and help.
