The Cause Poster: The Layout

1) SETTING UP NEW DOCUMENT:
Open Illustrator • Type Control "N" (New Document):
Choose Size: "Tabloid" (11 x 17) • Orientation = Portrait • Units = Inches • Click "Okay"
On the New Page: Type Control "R" = Rulers (Top and Left Side)
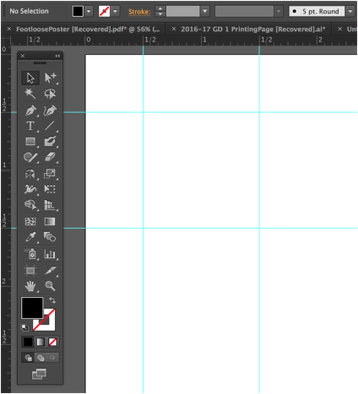
Get up Close to the Top Left Corner of the Page . . . (Use the "Z" Zoom Tool)
Now Click the Letter "V" to switch to the Selection Tool
Put 1 Set of Guides on the 1/2 Inch area of the Corner from the Top and Side.
Put another Set of Guides on the next 1/2 Inch further into the page - Top & Side
Choose Size: "Tabloid" (11 x 17) • Orientation = Portrait • Units = Inches • Click "Okay"
On the New Page: Type Control "R" = Rulers (Top and Left Side)
Get up Close to the Top Left Corner of the Page . . . (Use the "Z" Zoom Tool)
Now Click the Letter "V" to switch to the Selection Tool
Put 1 Set of Guides on the 1/2 Inch area of the Corner from the Top and Side.
Put another Set of Guides on the next 1/2 Inch further into the page - Top & Side
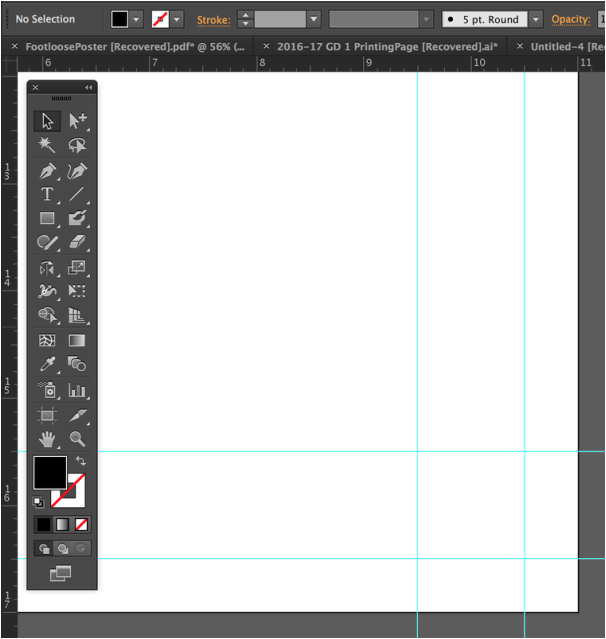
Now (Z) Zoom into the Bottom Right Corner
Switch to the Selection Tool (V) and Look along the Top Ruler:
Put a Set of Guides at the 9 1/2" Mark
Put another Set of Guides at the 10 1/2" Mark
Now use the Left Side Ruler:
Put a Set of Guides at the 15 1/2: Mark
Put another Set of Guides at the 16 1/2" Mark
Look at the Sample below:
Switch to the Selection Tool (V) and Look along the Top Ruler:
Put a Set of Guides at the 9 1/2" Mark
Put another Set of Guides at the 10 1/2" Mark
Now use the Left Side Ruler:
Put a Set of Guides at the 15 1/2: Mark
Put another Set of Guides at the 16 1/2" Mark
Look at the Sample below:
Now (Z) Zoom in to the Top Left Corner again
Choose the Rectangle Tool from the Tool Box and
Position the Cross-Hairs on the 1" (One Inch) Mark Top & Side.
And Click! Type 9 in the Width and 15 in the Height (See below)
Choose the Rectangle Tool from the Tool Box and
Position the Cross-Hairs on the 1" (One Inch) Mark Top & Side.
And Click! Type 9 in the Width and 15 in the Height (See below)

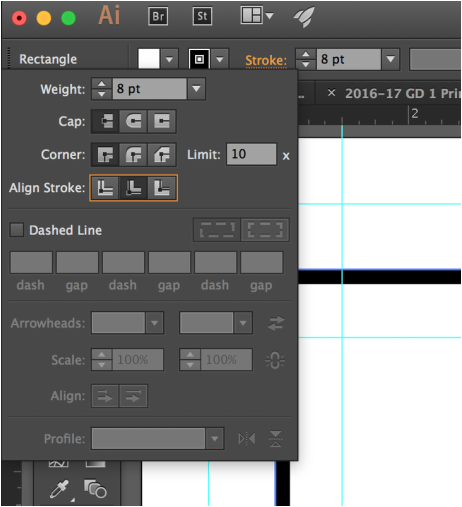
And you are setting up the Border:
Keep the Stroke / Border Selected and choose the
"Stroke Menu" at the Top, Left of your Page:
Change the 1 Point Stroke to 8 Point - use the Drop Down Menu to the Right of the 1pt.
And "Align the Stroke" to the "Inside" . . .
Keep the Stroke / Border Selected and choose the
"Stroke Menu" at the Top, Left of your Page:
Change the 1 Point Stroke to 8 Point - use the Drop Down Menu to the Right of the 1pt.
And "Align the Stroke" to the "Inside" . . .
And now, your Page should look like this:
