THE PEN TOOL - 12/2 - 12/6
PART 1: Pen Tool Basics "Worksheet"
We'll do this simple Basic Pen Tool "Worksheet" together. Follow me for set-up . . ..
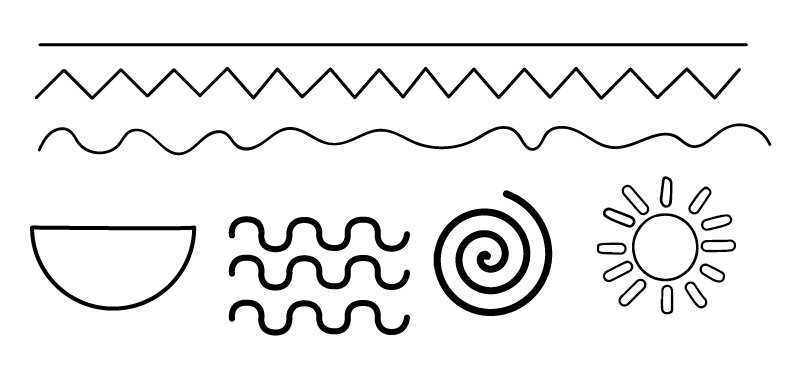
For now, Right Click on the image below - with all the lines on it - and Copy (Cntrl "C") Image.
Open a New Document (Cntrl "N") in Illustrator and Paste (Cntrl "V") the "Worksheet" Image into that page.
Set up the Layer with this image Locked and Dimmed to 25%.
Make a New Layer to do the Exercises on.
PART 2: Pen Tool Basic: CURVES
CURVES WORKSHEET: Do the same set up as you did for the above Basic Pen Tool Worksheet
PART 3: More Pen Tool Basic Practice
| pen_tool_the_exercise.ai |
Open the tutorial in Illustrator
• Lock the layer with the schematic you are tracing
• Make a new layer and call it "Vector Tracing"
• Work on this layer and e mail me your work: [email protected]
The following is how it might end up looking:
NOTE! Make the HOLE of the "O" and the "R" :
Select the Big "O" and the Center "O" > Object > Compound Path > Make
Repeat the same steps for the "R".

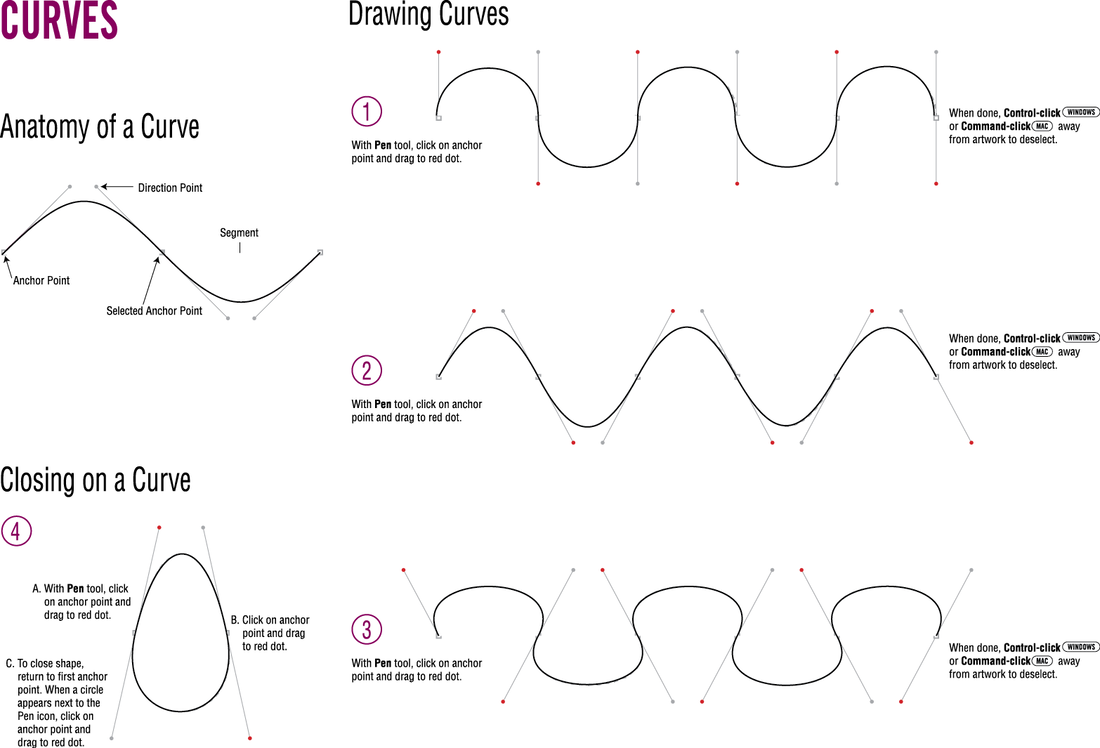
PEN TOOL PART 3
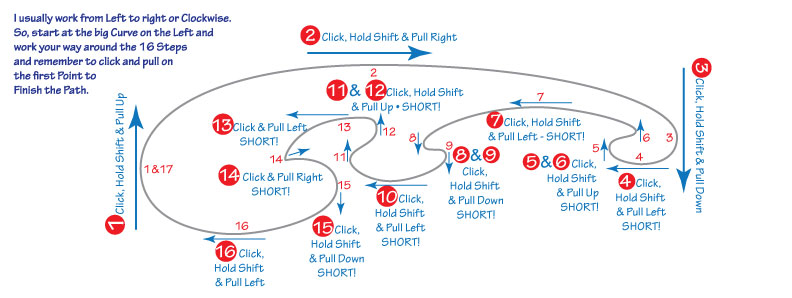
Okay - the hardest part of "getting" the Pen Tool is the Curves.
So, now, we'll Click and Drag our way through the following tutorial.
I have created a Step-by-Step Diagram that you can follow.
After you feel more confident, do the other 3 or 4 Curves.
Save the File I've provided below in a Pen Tool Folder.
Open Illustrator, and then Open this file from there - DO NOT PLACE IT.
Open Illustrator - Don't make a new page . . .
File > Open > FrenchCurve_Step-by-Step.pdf
Lock the Layer that this File opens in. Make a New Layer to do your work on.
| frenchcurve_step-by-step.pdf |
The following is what this Diagram looks like.
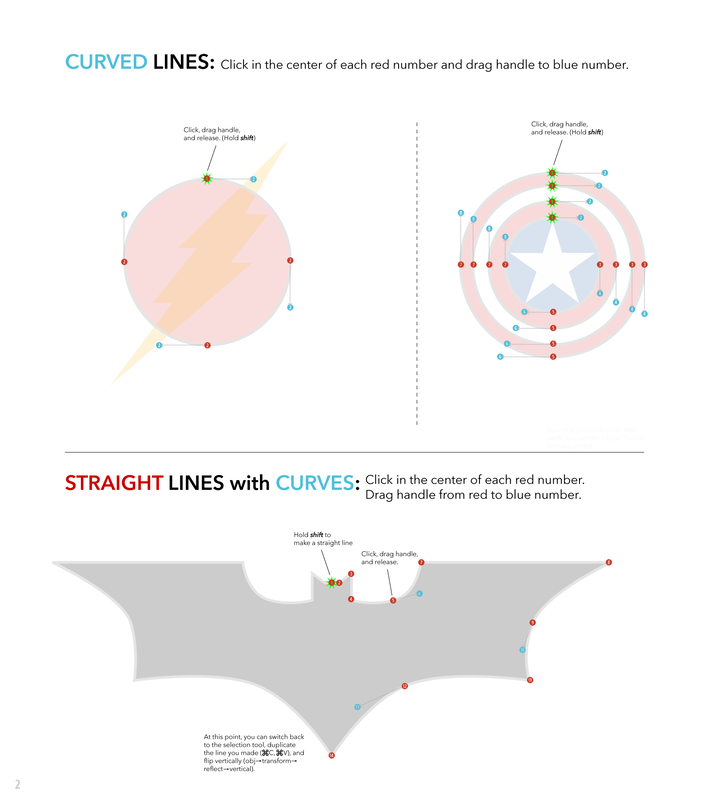
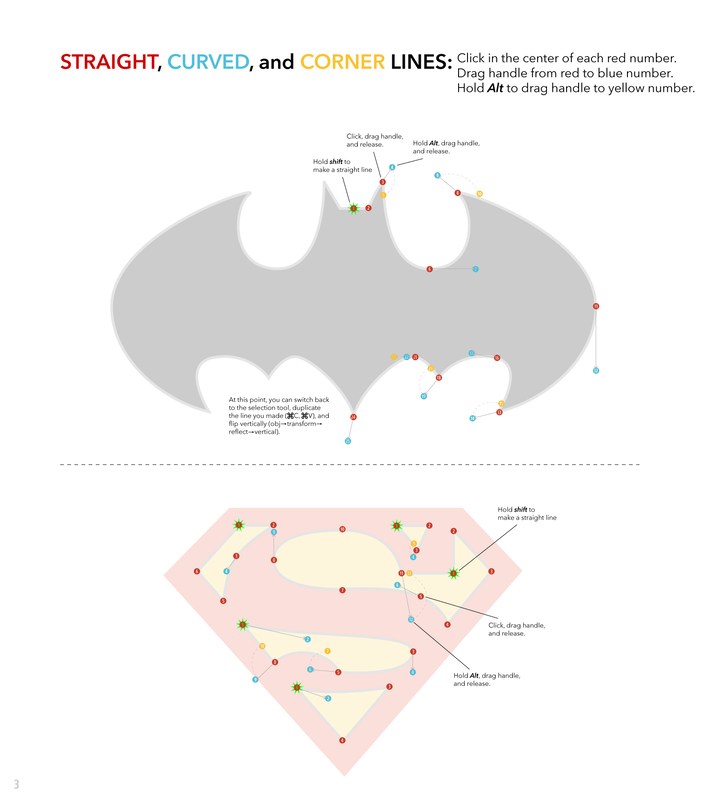
PEN TOOL PART 4: Your own French Curve Work
Here is a page of French Curves that I found on the Web.
Once you have mastered the Diagram I provided above, try your hand at these.
"Right Click" on the Picture of the Curves below and "Save Image As" to the Pen Tool Folder you have made by now.
Make a new page in Illustrator, Place (File > Place) this picture of the Curves on the Page. Lock it (Control 2).
Use the Pen Tool and work your way around the Shapes from Left to Right.
Remember to "Save" (Control "S") every 3rd or 4th Step.
Remember also - You are Amazing!