BANNERS ANNOUNCING THE GRAND RE-OPENING OF AN HISTORIC BUILDING
Here, I will be showing various Steps and Samples of what you should be putting into your Folders to
1) Present to me for Go-Ahead to the next Step
2) Include in the Final Art Presentation which will go to and be graded by AICE
Here, I will be showing various Steps and Samples of what you should be putting into your Folders to
1) Present to me for Go-Ahead to the next Step
2) Include in the Final Art Presentation which will go to and be graded by AICE
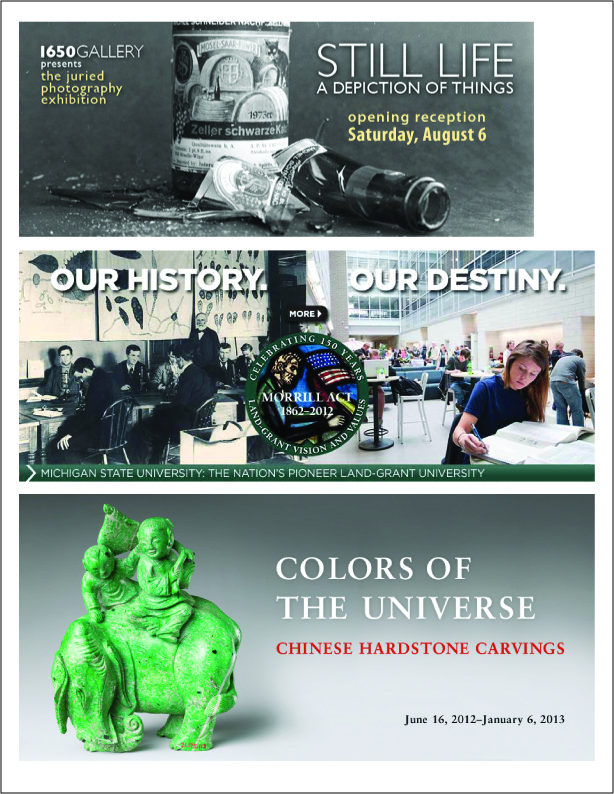
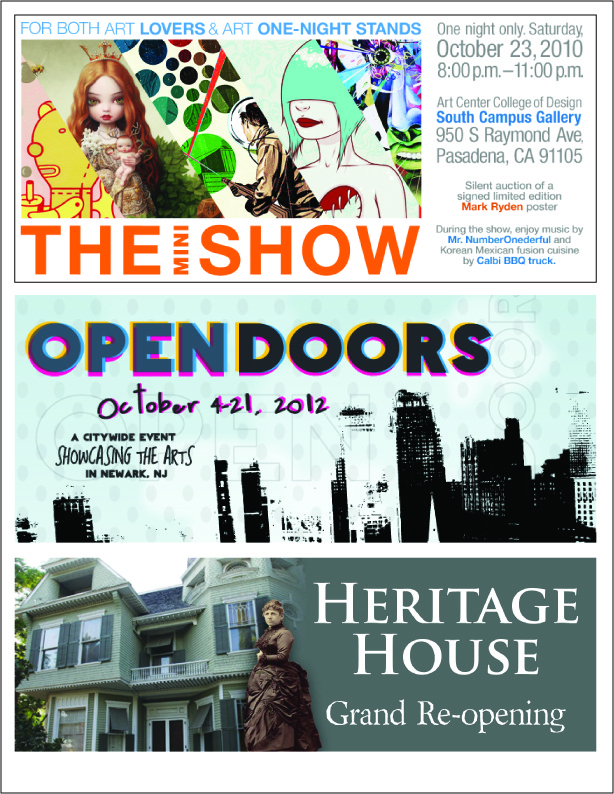
STEP 1. Research and Collect Images of Banner Designs
Collect as many Banner Designs that are of interest to you. Even if the Layout has NOTHING to do with your subject matter.
You may be able to use something from the design or the idea, the colors - anything that is interesting to you is important.
Here are 2 pages of examples that I collected from the internet.
You will collect at least 6 images of Banners for your VISUAL DIARY as EVIDENCE of your research of this project.
Then you will set up your pages like this:
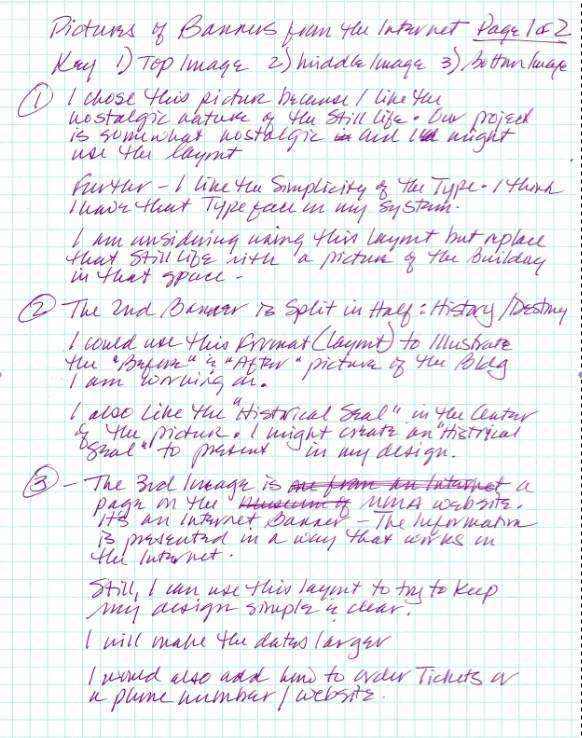
Once you have made a page of images, write out a little bit about why you chose that image.
This is EVIDENCE that you are making decisions based on Source Materials.
This EVIDENCE goes into your Written Journal.
Here are Scans of the Notes I wrote on the above Image Pages:
This is EVIDENCE that you are making decisions based on Source Materials.
This EVIDENCE goes into your Written Journal.
Here are Scans of the Notes I wrote on the above Image Pages:

SOMETHING TO CONSIDER . . .
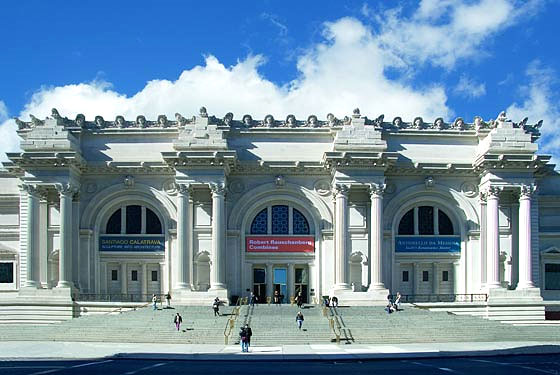
When presented with this Project, the first place I thought of was the Metropolitan Museum of Art in New York City. Not because they were re-opening, but because they are constantly Opening Wings and Exhibits and they hang banners on the front of the building - HUGE BANNERS! So, I collected a couple of different images of the MMA showing Banners hanging from the front of the building. We can learn something just be looking at what the MMA has done.
When presented with this Project, the first place I thought of was the Metropolitan Museum of Art in New York City. Not because they were re-opening, but because they are constantly Opening Wings and Exhibits and they hang banners on the front of the building - HUGE BANNERS! So, I collected a couple of different images of the MMA showing Banners hanging from the front of the building. We can learn something just be looking at what the MMA has done.


Just like I showed you in the above Sample - write out a small paragraph about each of the visuals here.
AICE wants to see what you are thinking, they want to see your thought process. See me for more information.
AICE wants to see what you are thinking, they want to see your thought process. See me for more information.
STEP 2 : Research and Collect Images from the Internet, Books, Articles and Elsewhere
that bear a resemblance to this project.
Collect as many images as you can find that might work with the Design you would like to create.
If you don't know what that design is yet, don't worry, it will come along out of all this Resource Material.
Here is a page of Images I collected from the Internet for my Banner Designs.

Here is a page of images of old buildings and doors that I collected from the Internet.
Again, I just collect a lot of images that I may or may NOT use for my layouts.
I plan on doing about 6 layouts for the client to consider.
These are only samples to give the Client an idea of the direction we might want to explore.
Nothing is in final form here, so the more resources you have on hand the better.
Make an 8.5 x 11" Page showing these examples.
This page (and more if you like) EVIDENCE that you have a direction and you are working towards this by Researching and Collecting items to go into your VISUAL DIARY.
Just like I showed you in the above Sample - write out a small paragraph about each of the visuals here.
AICE wants to see what you are thinking, they want to see your thought process. See me for more information.
AICE wants to see what you are thinking, they want to see your thought process. See me for more information.
STEP 3: CHOOSE SOME TYPEFACES FROM DaFont.com
In this Step, you will research some Typefaces on the Internet - specifically, DaFont.com. See my DaFont Tutorial.
You will choose 6 - 8 Typefaces that you think look "Historical" or "Dusty", "Building" maybe "Renovating".
See my Typeface Samples below to get an idea of how I was thinking about this project.
Set up an 8.5 x 11" Page of the Typefaces as I have done here

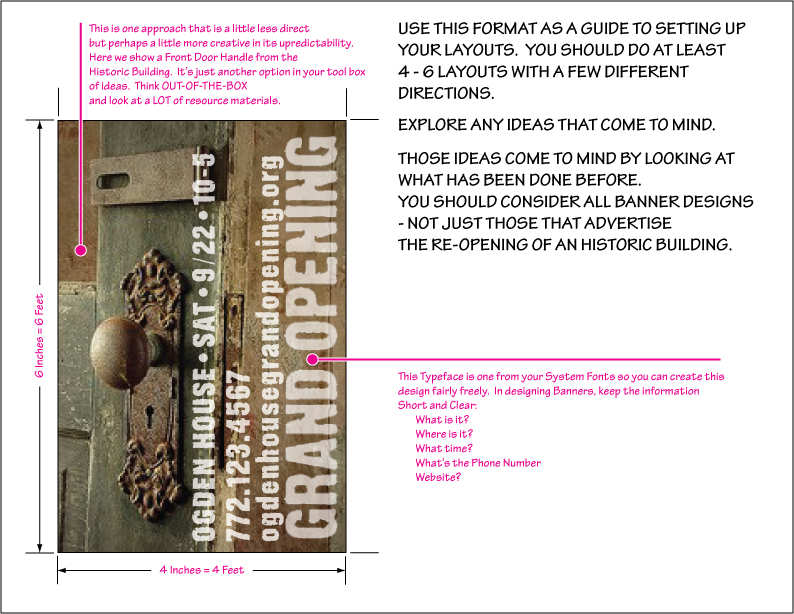
STEP 4: PUTTING YOUR LAYOUTS TOGETHER (SCALE MODELS)
Now you are ready to put together your layouts - Scale Models of Very Large Banners.
I have assigned you 2 Sizes: Wide: 10' Wide x 3' High. and 4' Wide x 6' High.
You will prepare these Banners in ADOBE ILLUSTRATORYou can NOT create these Large Scale Banners in Photoshop.
These MUST be created as Vector Art in order to enlarge the small scale art by 1200%!
I have assigned you 2 Sizes: Wide: 10' Wide x 3' High. and 4' Wide x 6' High.
You will prepare these Banners in ADOBE ILLUSTRATORYou can NOT create these Large Scale Banners in Photoshop.
These MUST be created as Vector Art in order to enlarge the small scale art by 1200%!